
Long time readers may remember this illustration I did a fair few years ago. At the time I was toying with the idea of BR Flatiron for Brettell Road. People who know anything about these locos will know that they only made it as far as 1938 before the lastof them went for scrap but my theory was what if they didn’t and made it another 2o years or so? After all we are all happy to bend the historical truth when it comes to places but why not locos too?
A brief history
Samuel Johnson of the Midland Railway had identified a need for a large passenger tank engine in 1903 and while a 0-6-4 seemed a logical progression of their 0-4-4 tanks several ideas and arrangements were put forward both before and after the design by Deeley was settled on. These ranged from a 4-4-4, a 2-6-2 with odd split side tanks, through several variations of outside cylindered 2-6-4’s and a 4-6-4. All of the class of 40 were built in 1907. As it turned out this was not a wheel arrangement that would become at all common in the UK. The front axle was mounted into a Carzatti slide giving extra play and resulting in a somewhat backwards arrangement of coupling rod with the knuckle joint ahead of the middle axle and not behind it as was the norm.
In early LMS days the class were fitted wit new superheated Belpair boilers resulting in a different firebox and being longer, the boiler now sticking out from the front of the tanks. The cab spectacle plates were also changed at the same time.
In 1928 loco No.2015 derailed at speed near Newark and a passenger on its train was killed. 2 more derailments occurred in early 1935. The first instance was when N0.2023 derailed at Ashton under Hill in February, killing its driver. 3 weeks later number 2011 was observed by railway inspectors operating between Leicester and Burton upon Trent only to itself derail 5 days later at Moira. Fortunately this time no serious injuries occurred. But the reputation had set in, the class were well known as rough riders on anything other than perfect track and were noted to run smoother going backwards.
An idea not completely without precedent.
The case for these locos lasting longer than they did is not without precedent. Class leader N0.2000 underwent some modifications to see if the riding could be improved. These were the replacement of the front axle arrangement with traditional springs (giving a different look) and an improved bogie with side bolsters. No 2000 was tested against an unmodified classmate No.2012 which itself had recent general repairs and not yet clocked up 1000 miles since. Both locos were considered to be in first class running order.
On the first test No.2000 ran between 35 and 50 mph before selling back to 35 and it was reported that the engine rode very steadily with no side movement reported of the trailing bogie. Test 2 saw No.2000 run between 45 and 50mph settling back to 45 with the same results. Test 3 was run at 55 and occasionally 60mph and this test was satisfactory enough to try test 4 where she was run over 60mph, reaching a speed of 67 before selling back to 65. It was reported that a slight amount of side oscillation developed and a slight roll but was still considered satisfactory riding.
No.2012 ran 3 tests. Test 1, 35mph occasionally touching 40 and the riding was reported as good with a slight oscillation and roll being perceptible on the footplate. Test 2 saw 45mph with occasional 47 and the riding was considered fairly good but with more oscillation and tendency to roll. The final test saw running at 55mph with occasional 60 and the riding was reported as rough with the oscillation and roll said to be pronounced and the front end having a tendency to develop an up and down surging motion.
Although the results of the modifications to No.2000 were good Stanier decided that the rest of the class were not worth altering and between 1935 and 1938 they were all scrapped with many of the (standard) parts going on to other locos. It was reported that many of the boilers were used on 4f’s.
But what if Sanier thought the modification were worth doing to the entire class? They were only 30 years old and many midland locos lasted much longer than that. As the boilers went to other locos they were obviously good so it it such a leap to think that a modified flatiron could indeed make it into BR days with only a slight tweak of history is it?
The Model
Luckily for us South Eastern Finecast do a kit for these loco’s and I’ve had one in the stash pretty much since I did the drawing above.
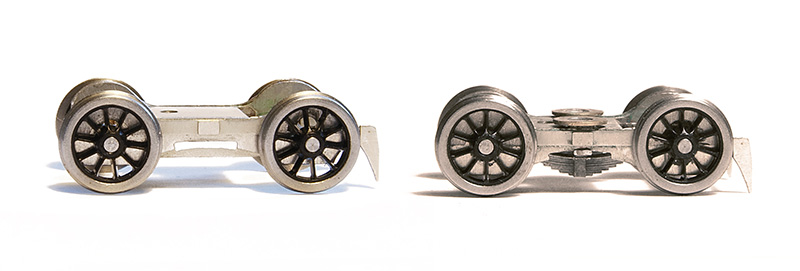
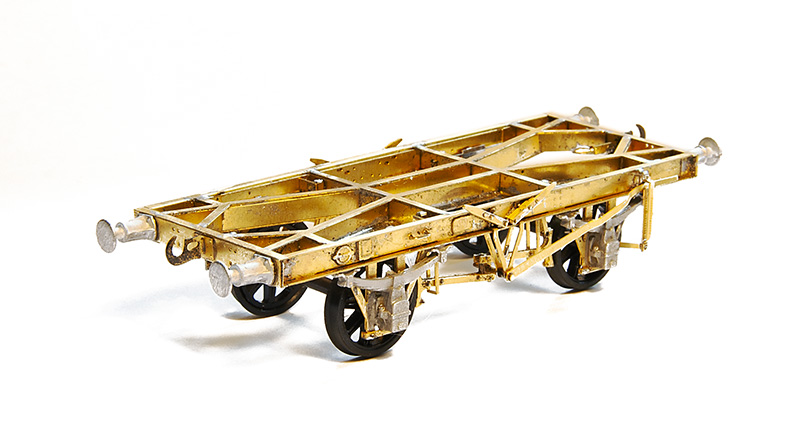
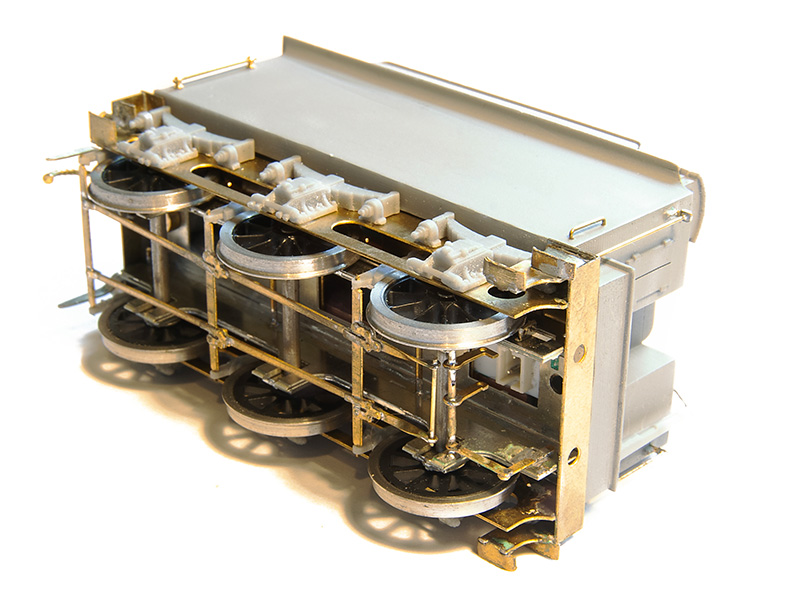
Starting with the bogie as supplied on the left and my modified version on the right. It’s been modified mechanically to provide basic springing on all 4 wheels and a basic form of sprung side control. As supplied the bogie is designed to be attached to a swinging arm much like the RTR guys tend to do. I didn’t really like that idea much if I’m honest.
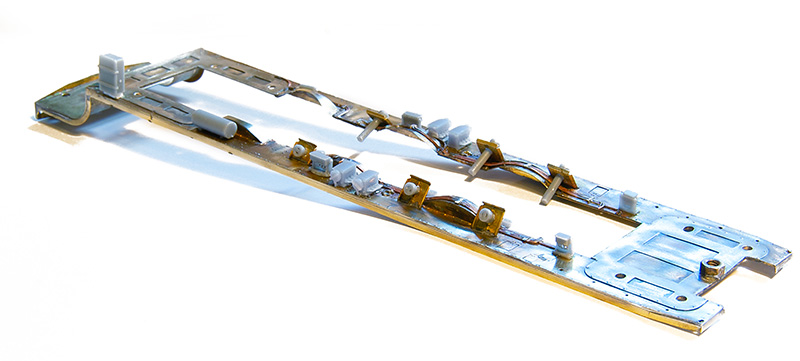
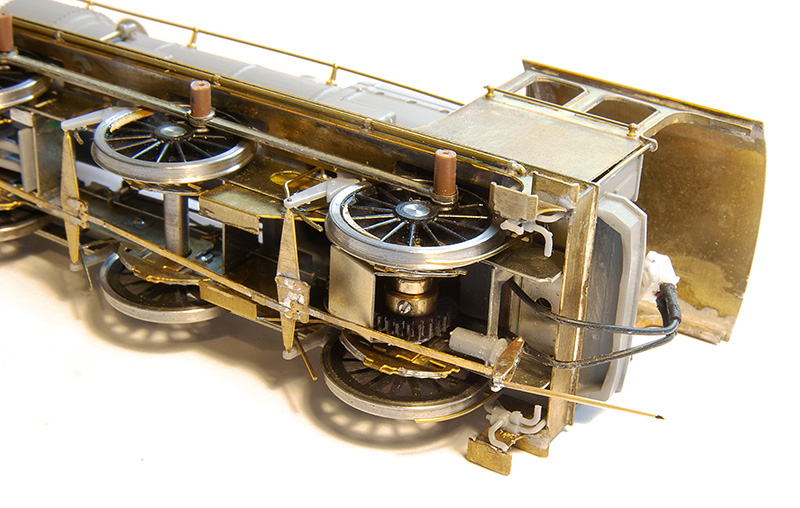
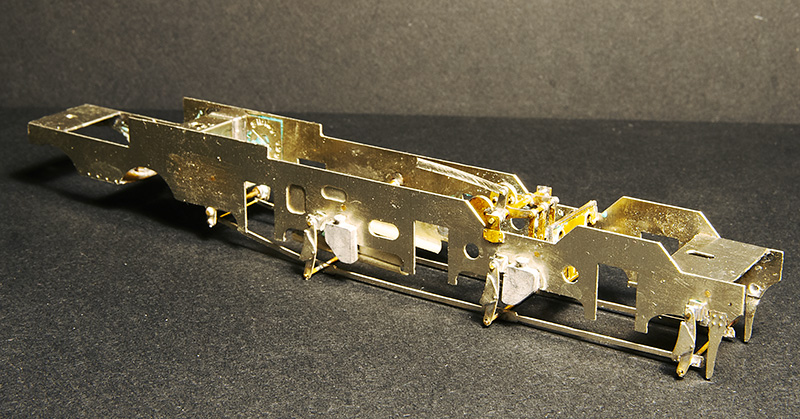 The main frames modified with some spare Brassmasters inside motion bits. I considered there was no way you would be able to see working inside motion so just modelled the bits I felt you might see if you looked hard enough!
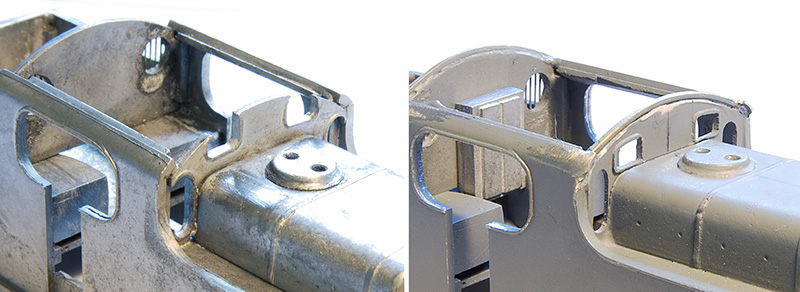
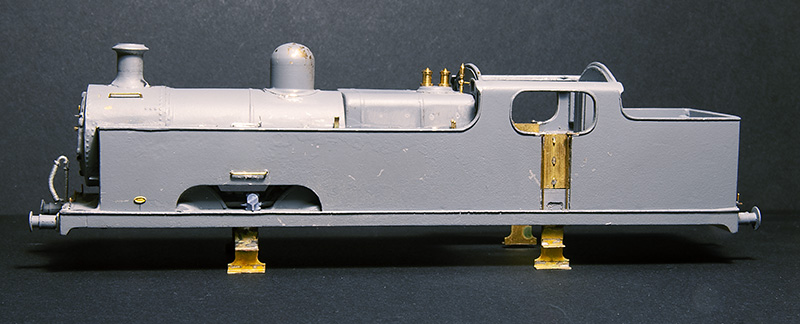
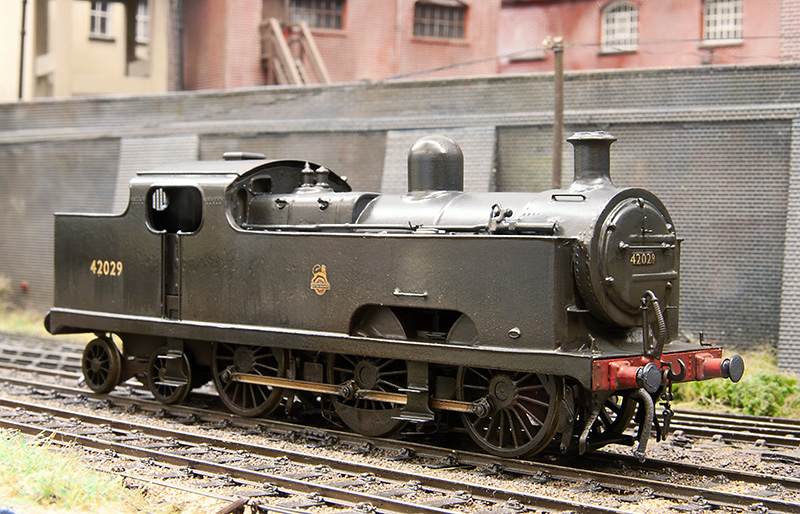
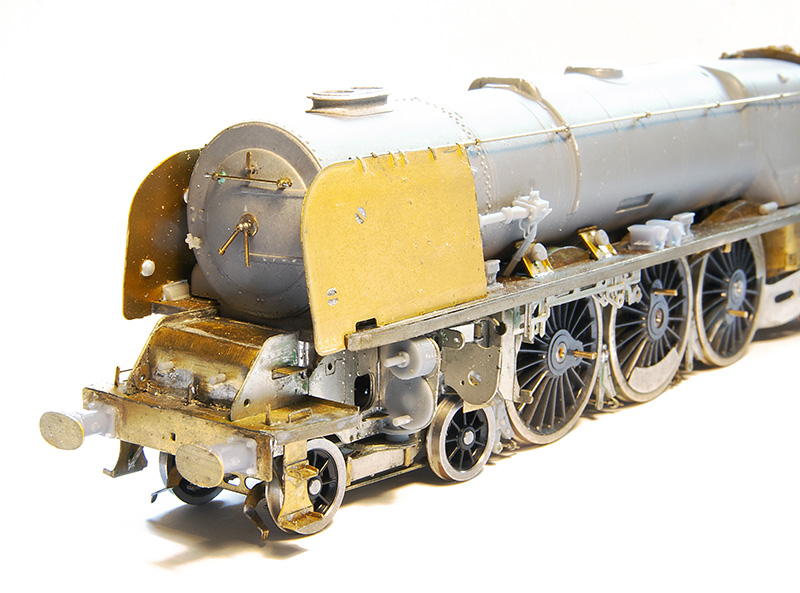
The cab Spectacle plate is a particularity weak point of the kit as it bears only a passing resemblance to the real thing, I made a new one from plasticard as can be seen on the right. If anyone wants the drawing for this (which I admit is a best guess on my part) it can be downloaded from here. The rebuilt cabs also seemed to have slightly longer roofs than the originals and little bits of Nickel strip were soldered to the corners to replicate this. 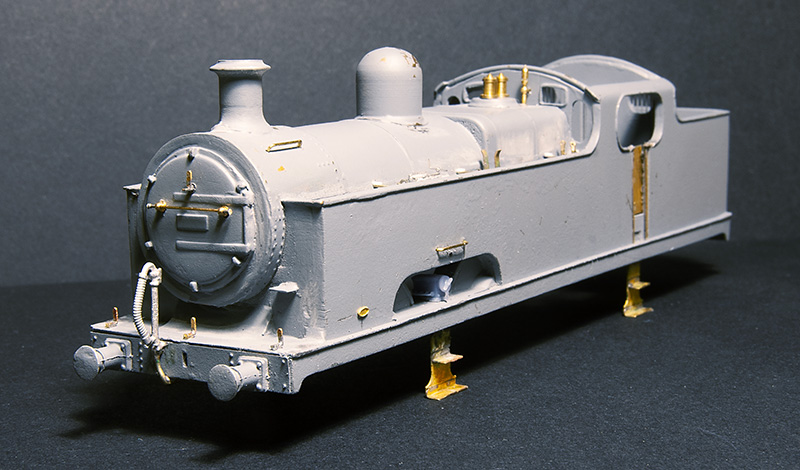 Front view. The kit relied on an upper half of the boiler/smokebox merging with the lower half which is cast as part of the tank front and this forming the front of the smokebox. The end result wasn’t all that round so I cut it back and used a 22mm copper ring in its place Buffers are from Lanarkshire Models and lamp irons from Stenson Models
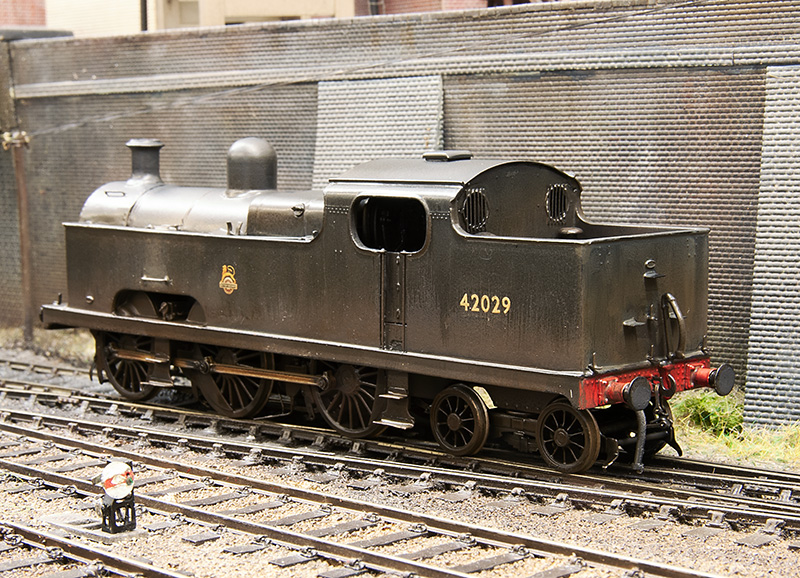
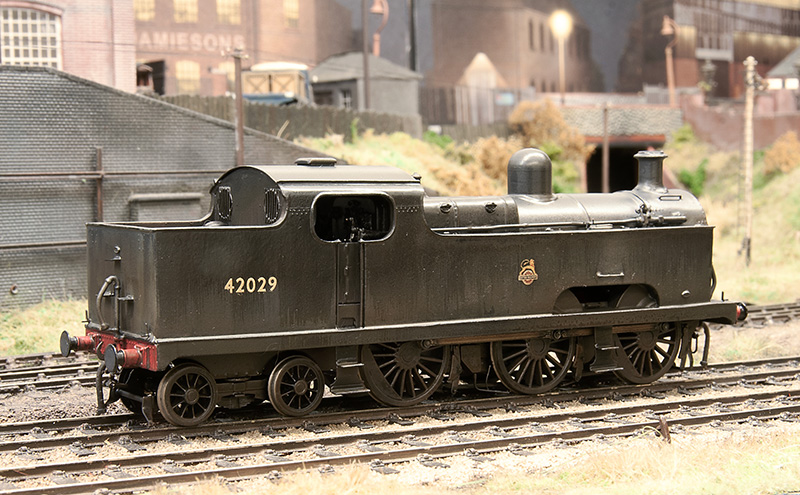
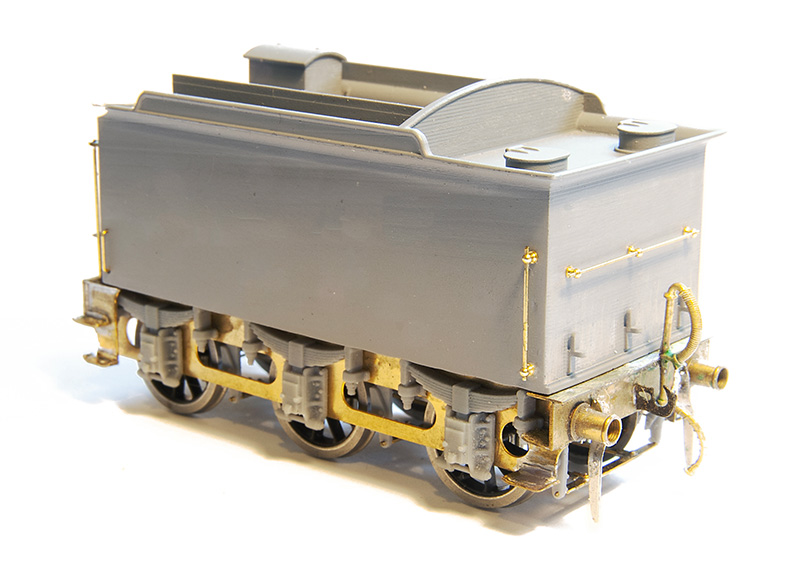
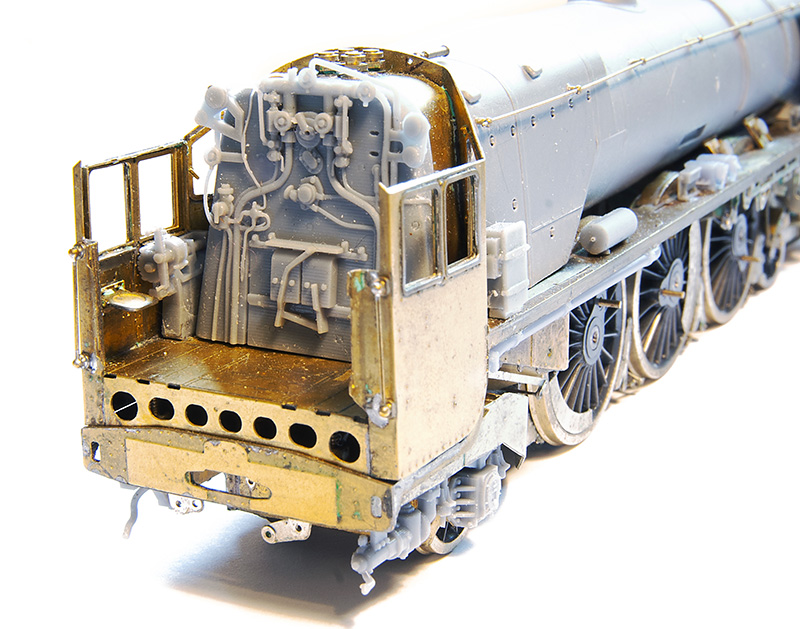
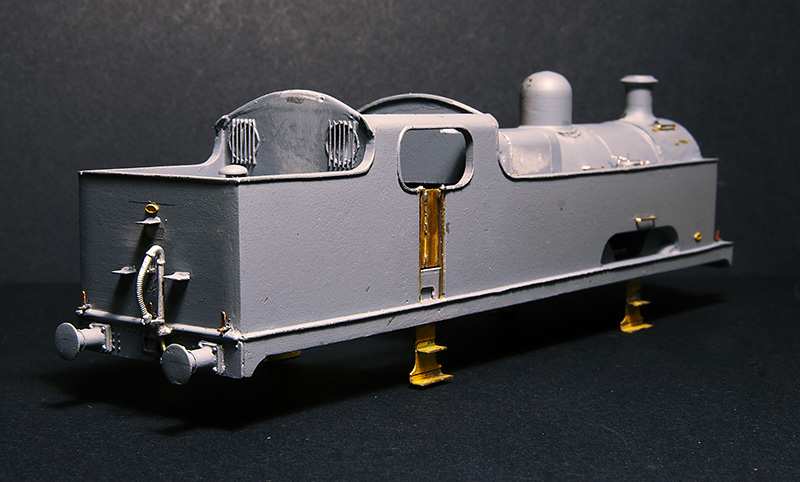 The rear view. The steps are cast into the rear of the bunker and where a little chunky. Also the top one was too low so these were replaced with some of my mk1 coach end steps. The window frames are from a Mainly Trains spectacle plate etch. Note the larger buffers on this end.
  The top of the tanks are vague as supplied with just casting for the water filer caps and 2 air vents that were related to the water pick up gear. In reality only 2015 had this fitted so they should be left off all other models of the class. This is my educated guess of what should be there but i do think there should be more clutter than this. Photos of this area are rare and so far I’ve only found 2
Progress will now need to wait until after Scaleforum where i need some more bits.
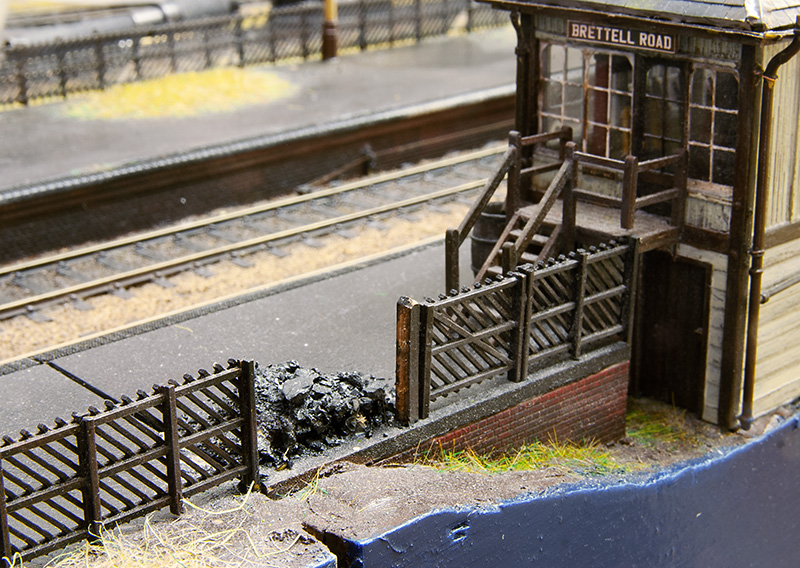
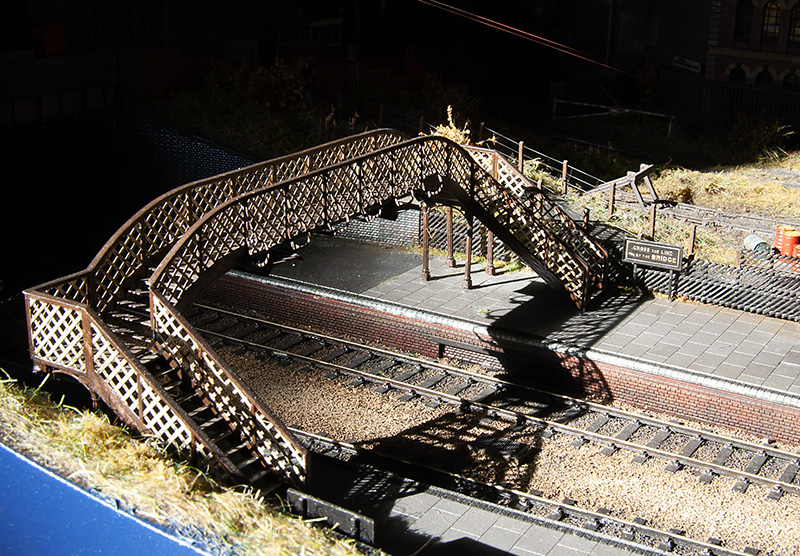
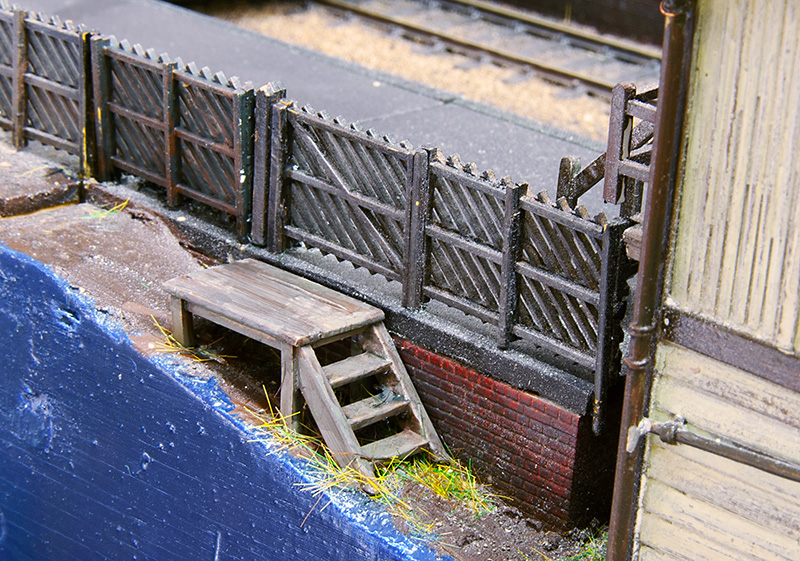 While working on this area I took the opportunity to add some rudimentary steps to the signal box. Something I meant to do at the start but didn’t. I had put the gate in but the poor signaller would break his leg falling off the edge of the platform! There was also a platform light that got bent and thats been repaired and replanted.
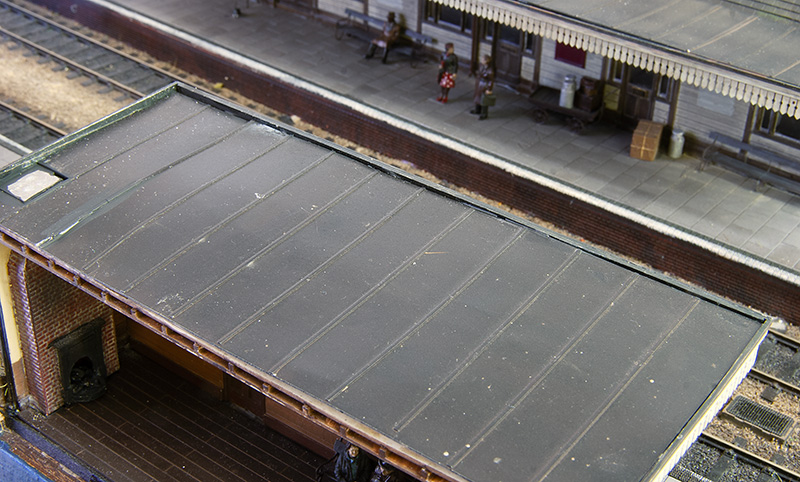 Something else that got bashed but didn’t actually break is the chimney on the platform shelter. This has very little clearance to the other board when packed up so rather than wait for it to get smushed I decided to make it removable. A few magnets popped into holes and a bit of steel on the roof and hopefully thats a problem averted. I also decided that the roof was a bit too vanilla for a building due to be closed in a week so I’ve had a look at this area too.
 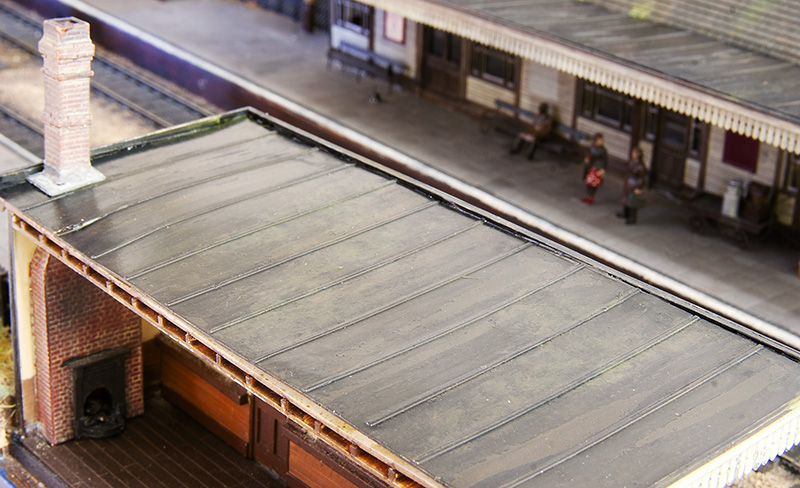 You may remember i talked about distress paint before when I was building the signal box and I’ve used it again here. For some reason it didn’t really crinkle up this time so a wash of Tamiya extra thin cement was painted on to add some more wear and tear. The mossy deposits are AK Interactive dark and light slime with some of their moss deposits.
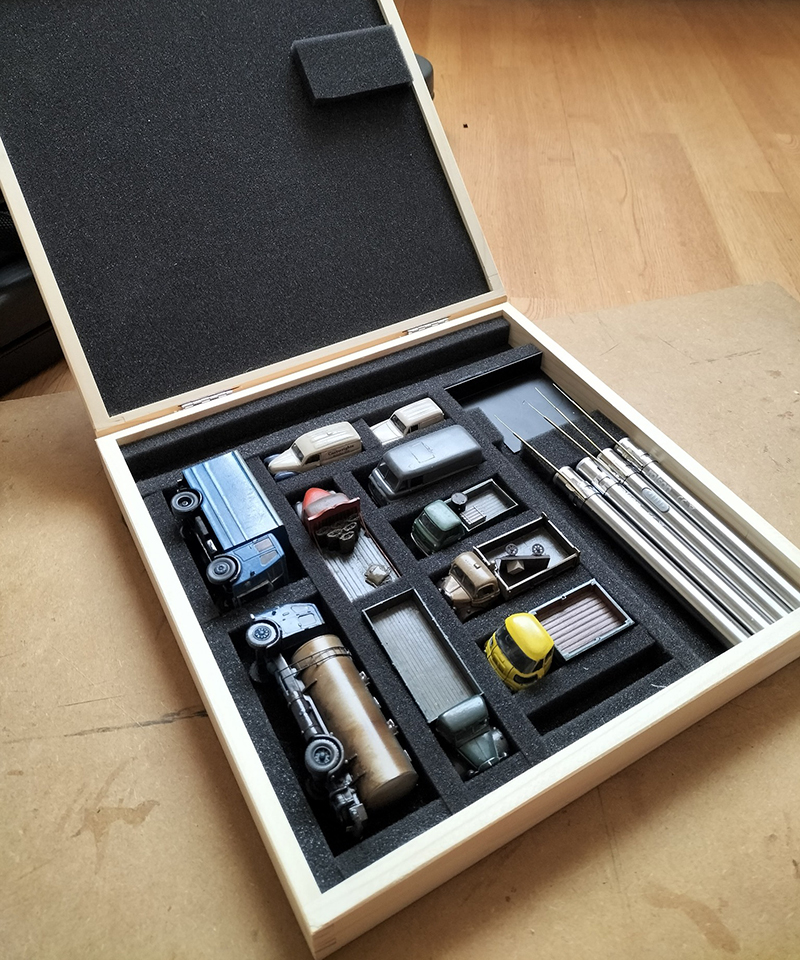 In an uncharacteristic fit of tidiness I’ve made a proper box for the road vehicles, removable chimneys and coupling poles. When I say ‘made’ I mean got a box off ebay for around a tenner and stuck some foam in it!
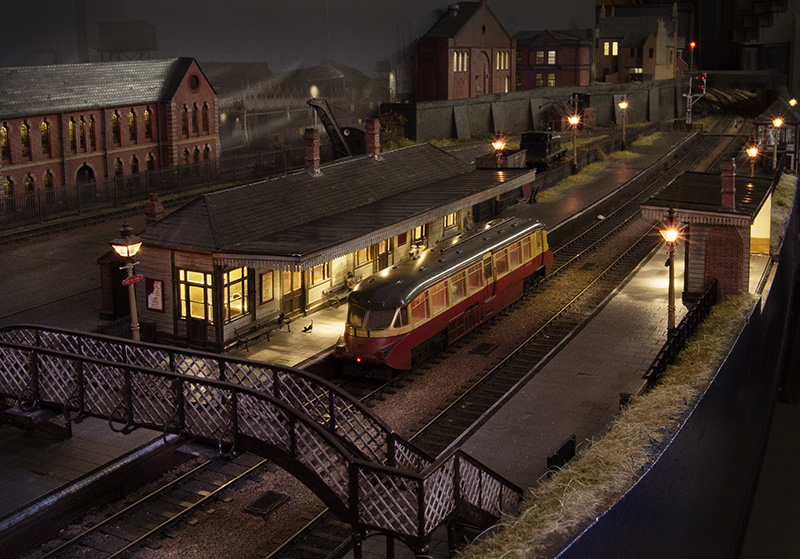 Finally Railcar W14 waits for the road. The cats are undisturbed by its presence.
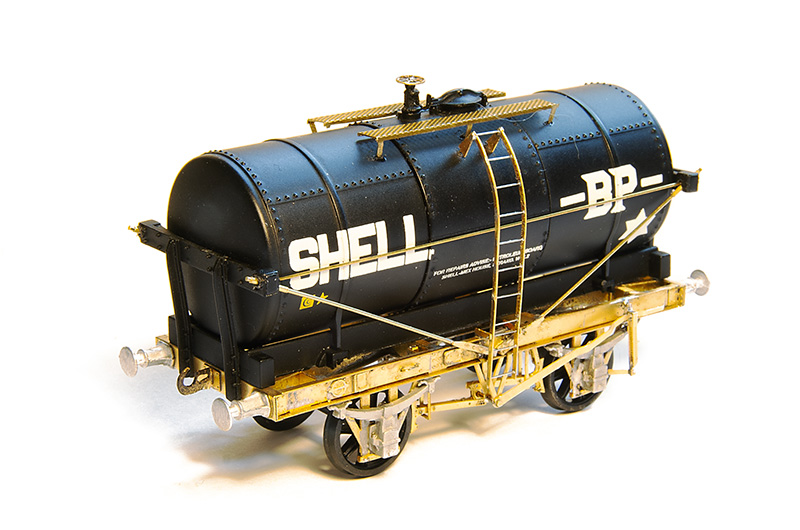
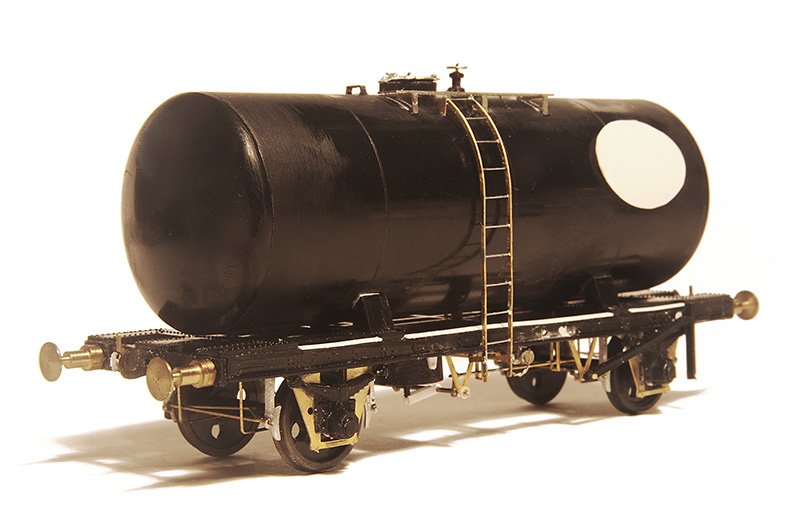
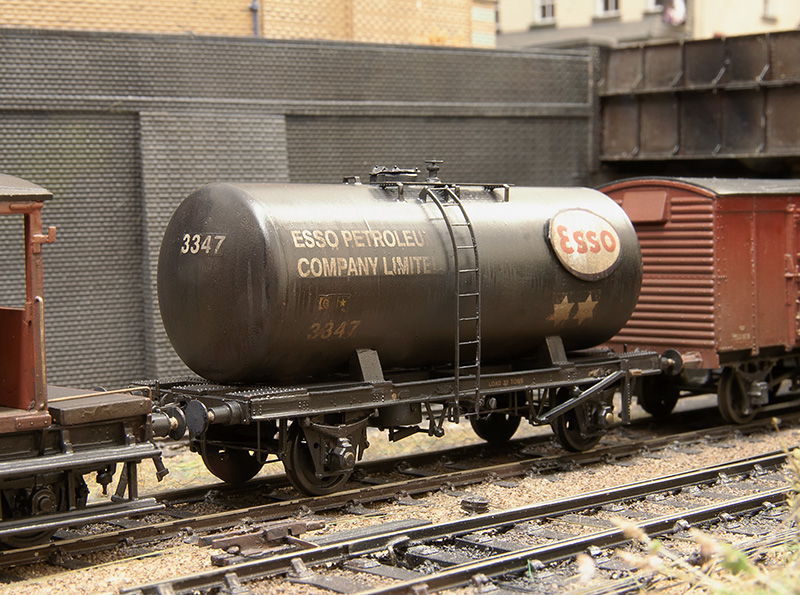
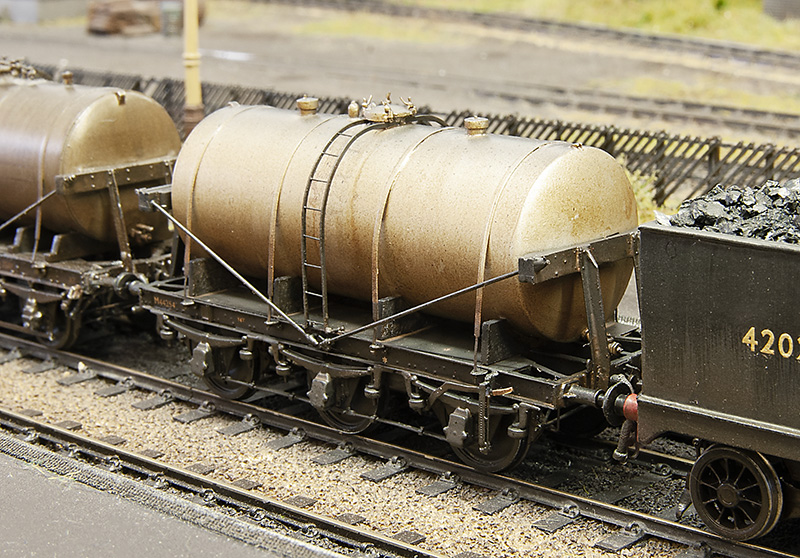 … the LMS milk tank I featured last time. Now ready for service.

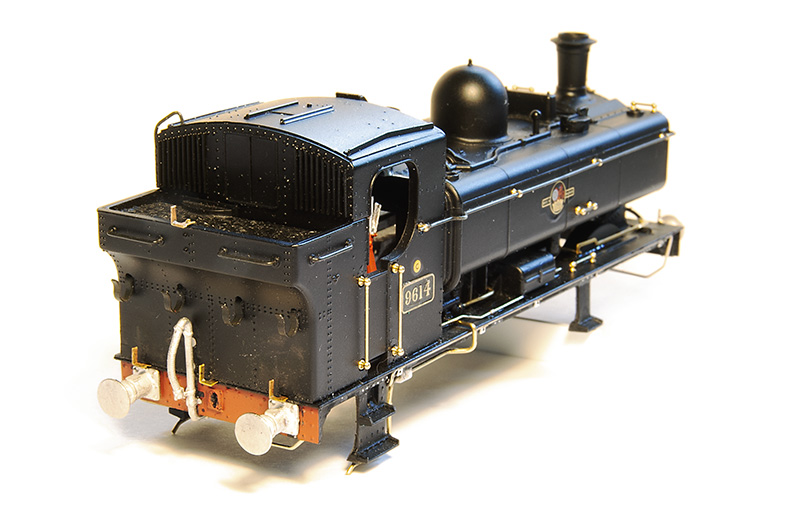 Rear view. The lamp irons were too high up on the bunker. This is correct for a 57xx but on the 96xx tanks they were lower. I was replacing them anyway. Buffers are Lanarkshire models. I prefer a better detailed solid buffer over a less detailed sprung one.
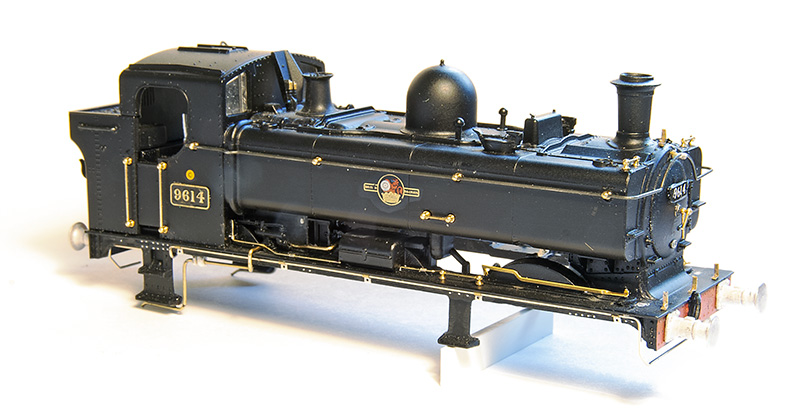
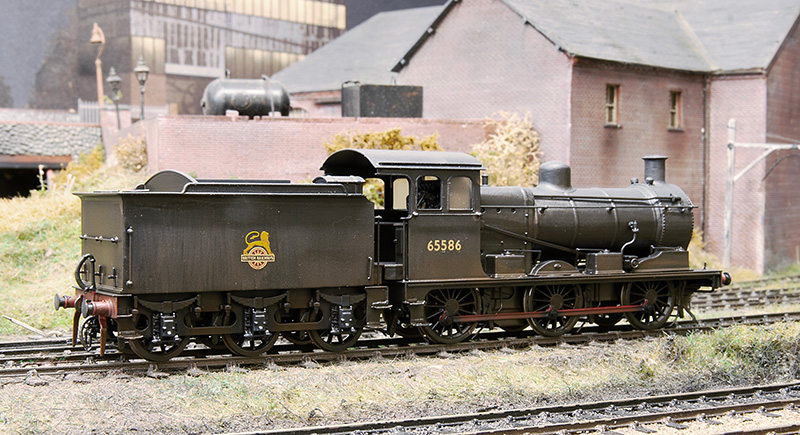
 Finally something that you will never see – Brettell road in the sun! It was coming in the shed door and caught my attention.
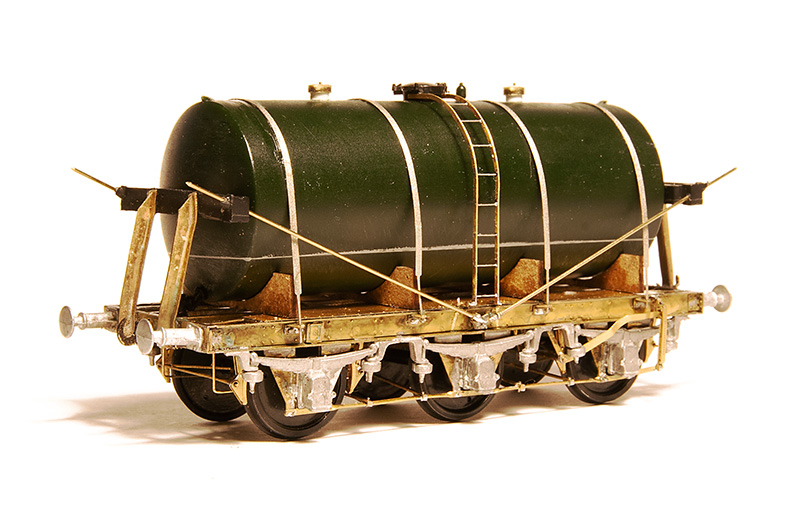
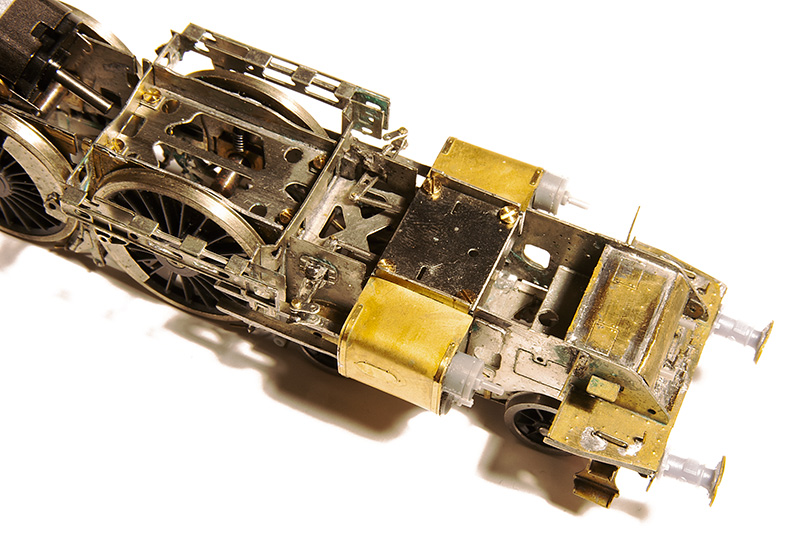 The cylinders viewed from above with the wrappers in place. Just behind the cylinders are the Valve rocking arms which as they need to be removable are held in place with a small screw.
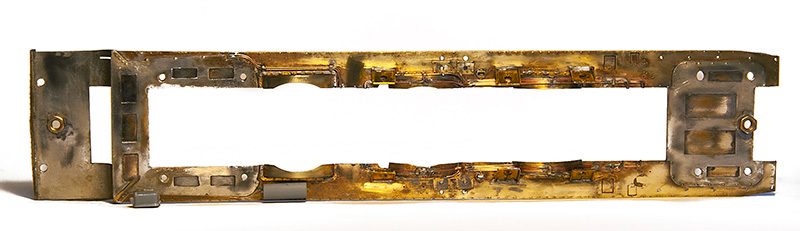
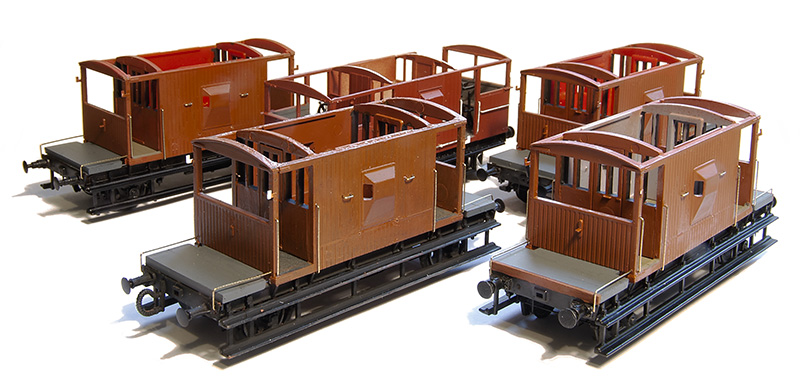 Note to self – if you’re going to batch build some wagons don’t pick ones that have loads of different sized handrails!
 The first 2. A piped one and a fitted one, both built with Bill Bedford W irons, Rumney models springs and axleboxes and additional details.
 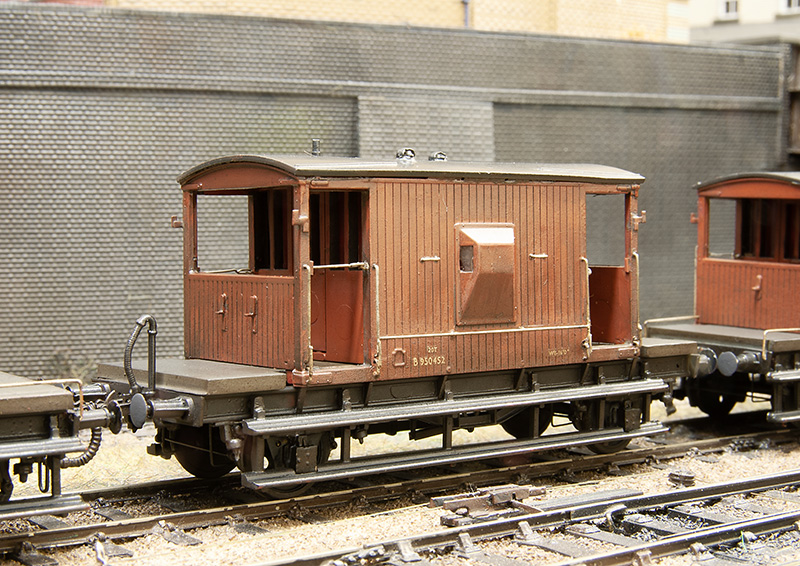 This one is a BR build of the LNER design note the shorter steps, no end handrails and different lamp irons. Build was the same as the first 2.
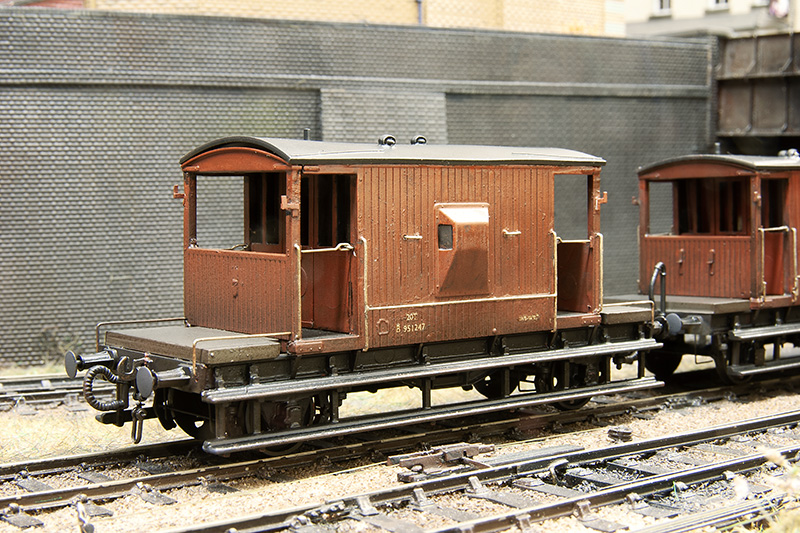
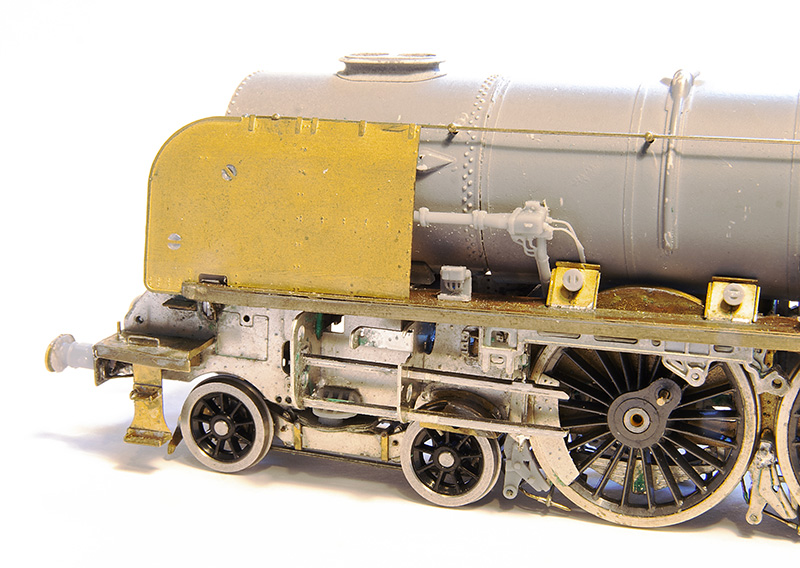
 I ended the first part of this project by mentioning I needed some bits from Scaleforum. One of these was the injector which I modified a little from an Alan Gibson one.
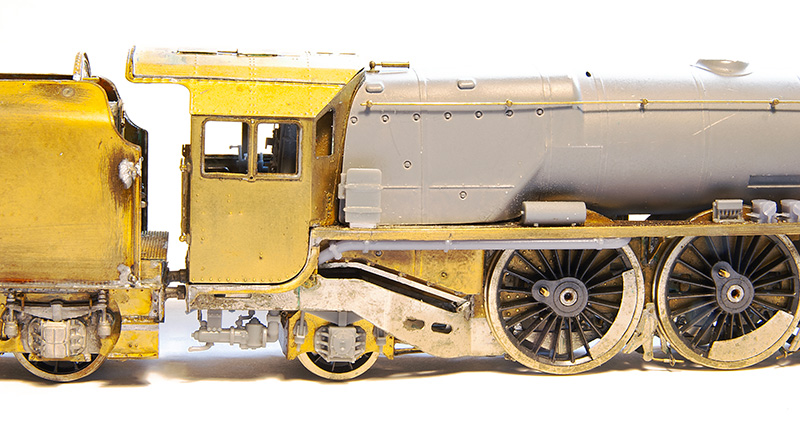
 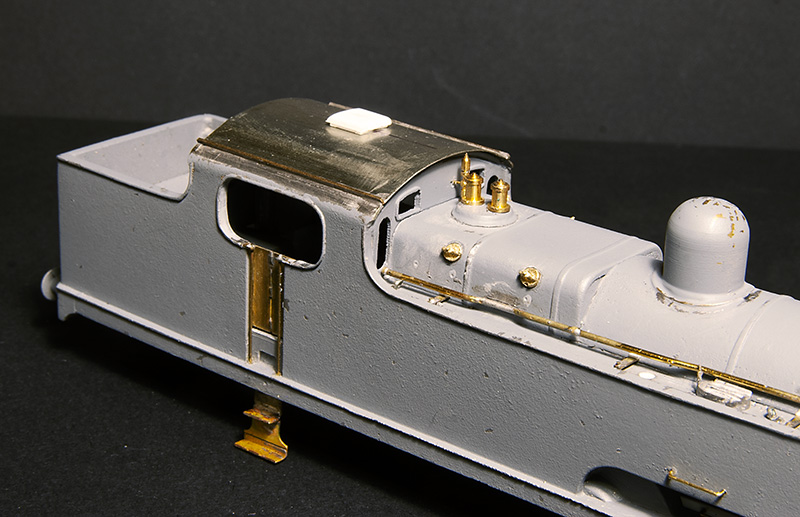 I also needed some firebox wash out plugs. Again Alan Gibson did the honours. It’s worth noting that they are not on the same places either side. The cab roof was just a bit of nickel silver rolled to the right radius and a few bits of strip for the rainstrips. The vent was filed up from Evergreen section. While on the subject of the cab the kit includes some bits and an etched floor. I found the handbrake column, if mounted to the cab floor as the kit was designed, gets in the way when trying to mate the body and chassis together so I cut it from the floor and mounted it to the body instead. The kit specifies that the reversing screw is mounted on the left side of the cab but, while hard to see in photos, it seems to be mounted to the right side so thats what I did.
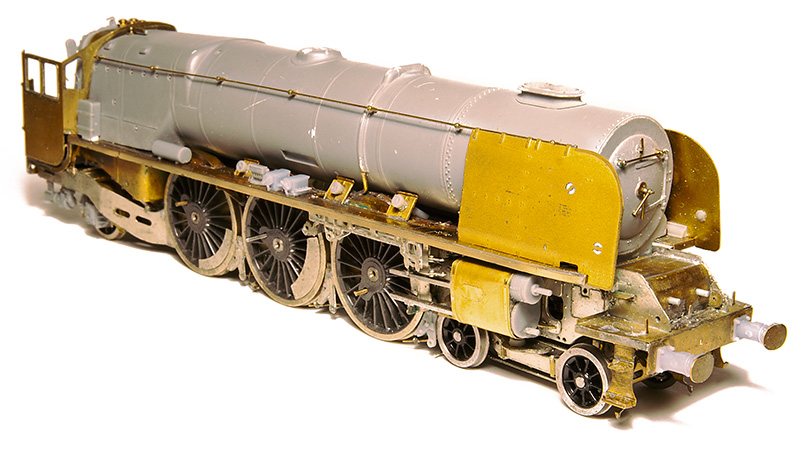
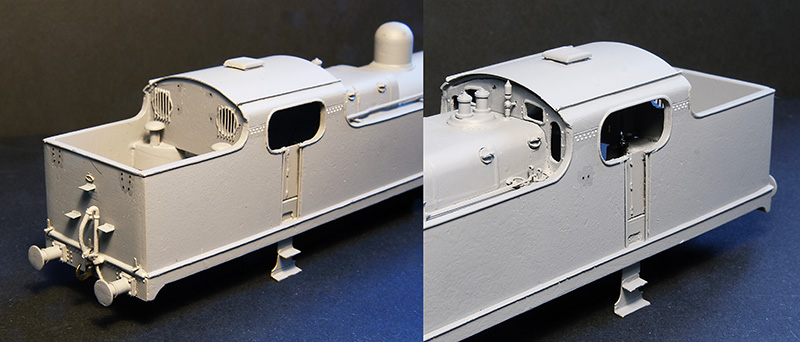 With everything in place and being happy wit the fit of things the body was given another light undercoat before the missing rivets were added from my dwindling supply of Archers along with some from Railtec. Thankfully the flatirons dot have a lot of visible rivets.
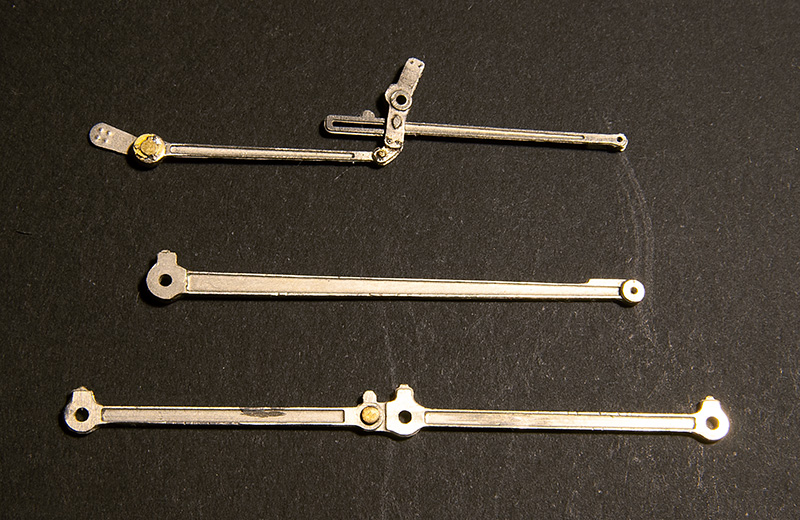
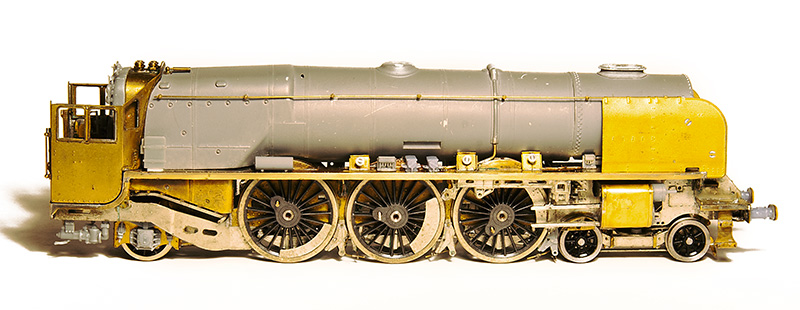
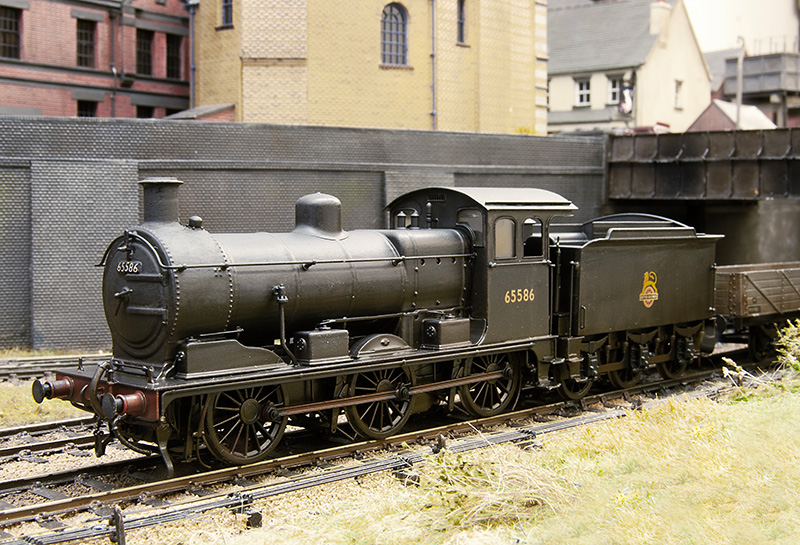
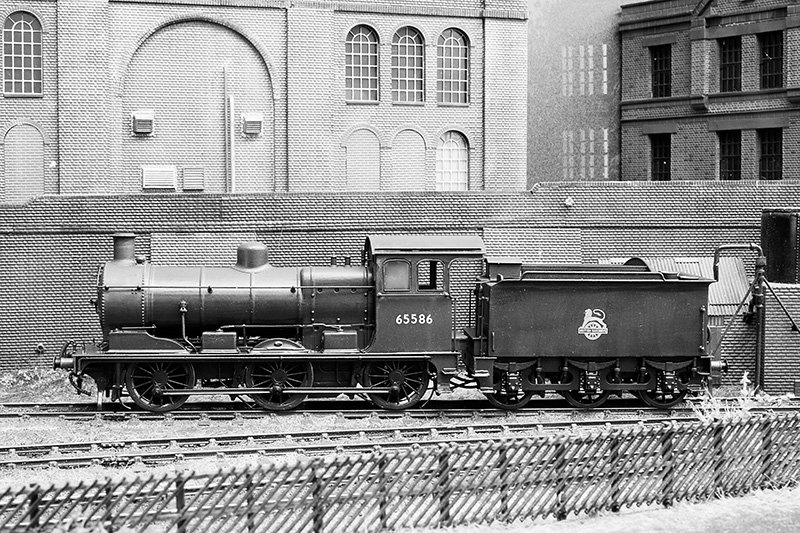
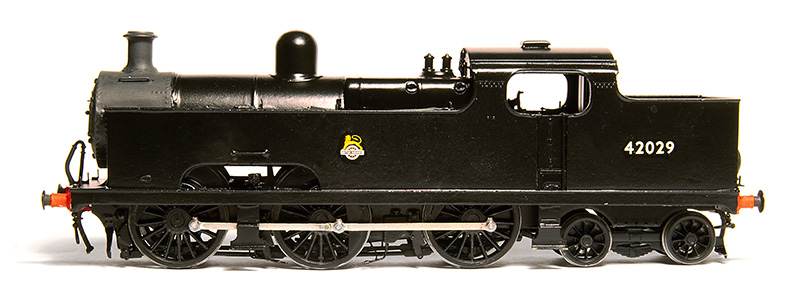 I don’t normally take a painted but pre-weathered picture but this time I made an exception. I mentioned in the last post that because of the carzatti front axle the coupling rods seemed backwards to the norm with the joint ahead of the middle axle not behind it. When No.2000 was modified this remained the case. The kit has the coupling rods the normal way round with the joint behind the middle axle and I’ve never seen a model flatiron (in either 4mm scale of 7mm scale) that addresses this. I found 52f models do a set that have the right wheelbase with the joint in the right place so I used those instead. One little tip that seems really obvious but I’ve never seen anyone mention (perhaps its because it is obvious to everyone else?) is that I line up the coupling rod on this side with the orientation of the grub screw on the final drive gear. It makes accessing the grub screw simple should you need to in the future as you know where to stop the wheels rotation.
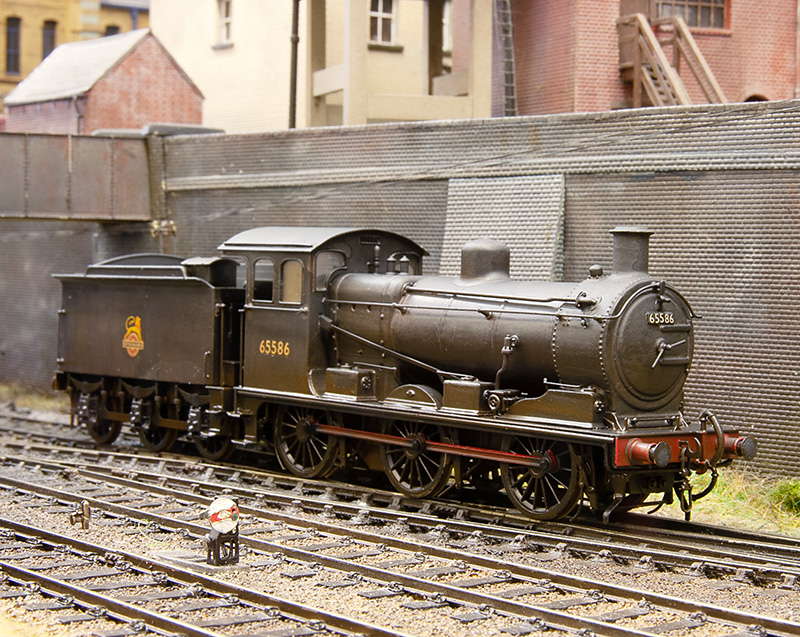
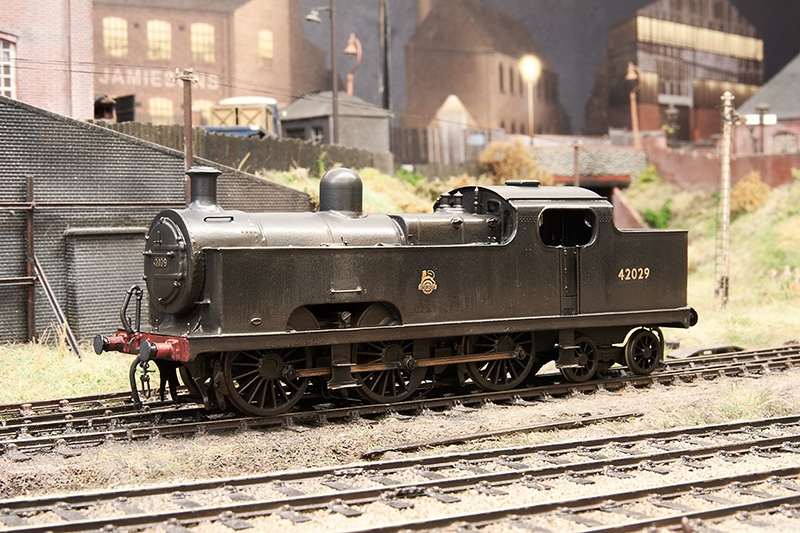
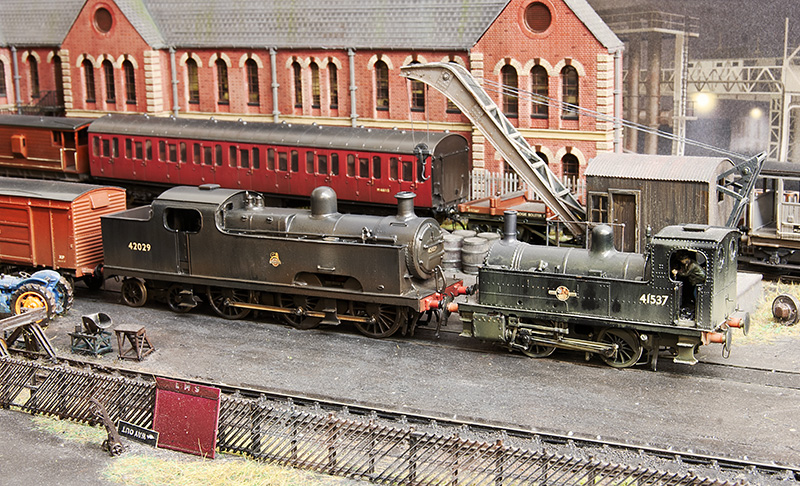 With her baby sister!
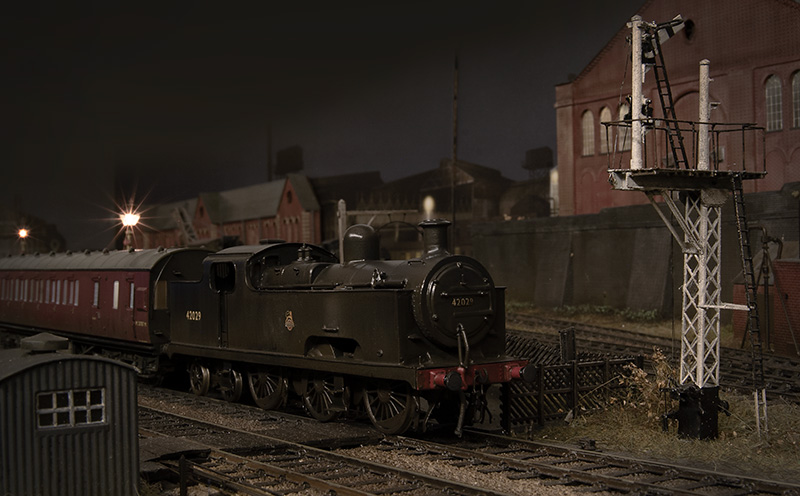
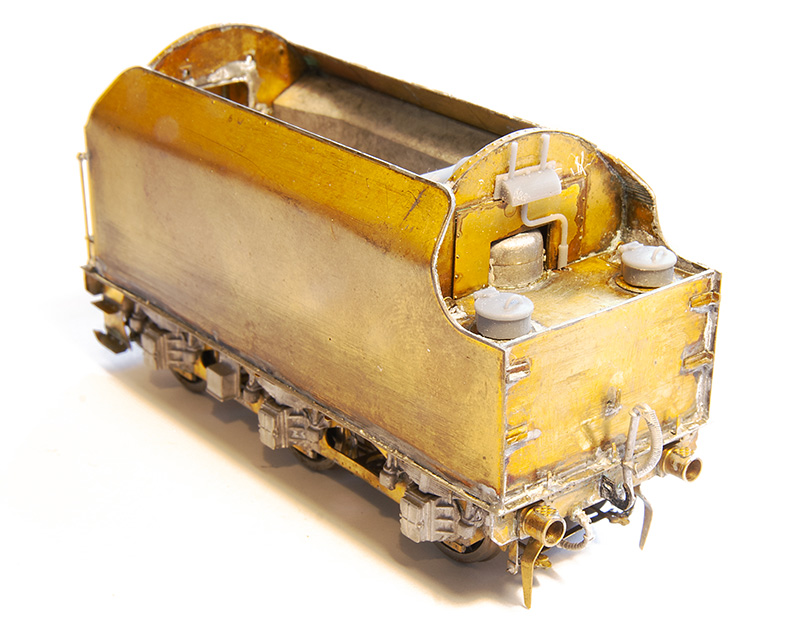
 The other little job on the tender was the guard irons which had been missed off the test etch. These were fashioned up from scrap using a scaled image of the production etch as a guide.
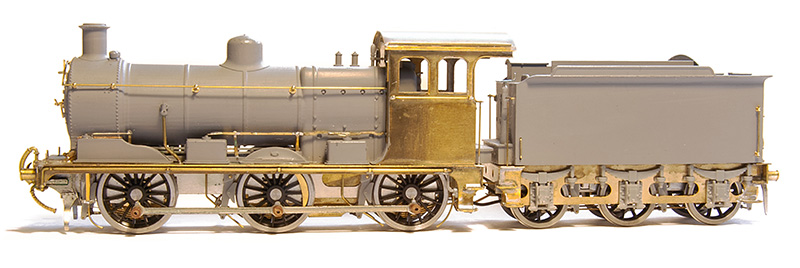

 While on the subject of the cab heres some of the inner detail.
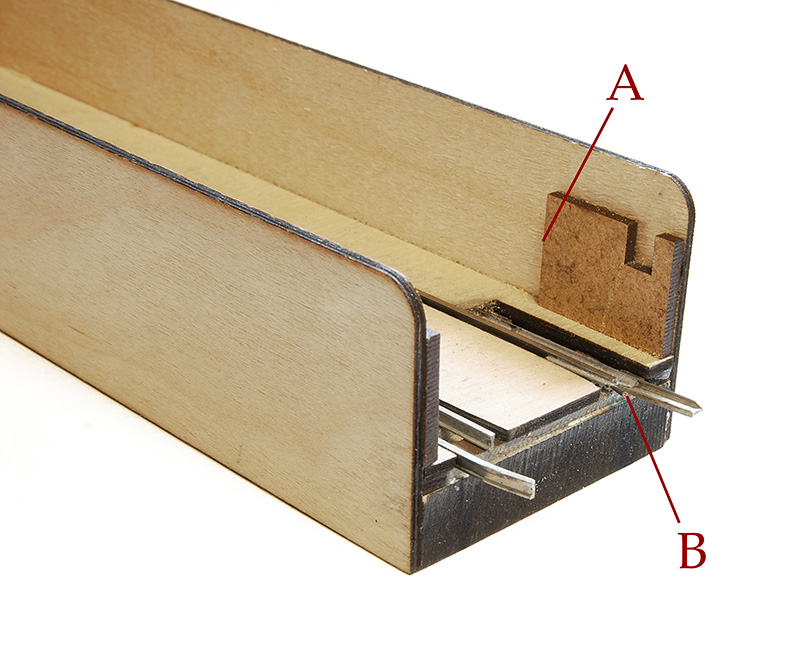 There were 2 areas with the cassettes that need addressing. Area A is that any stock that wasn’t on the rails would strike the edge of the end stop supports and bring the whole train to a halt. It’s unrealistic to think that everything on a cassette will always be on the track 100% of the time as the cassettes are moved around. Thats the point of them after all.
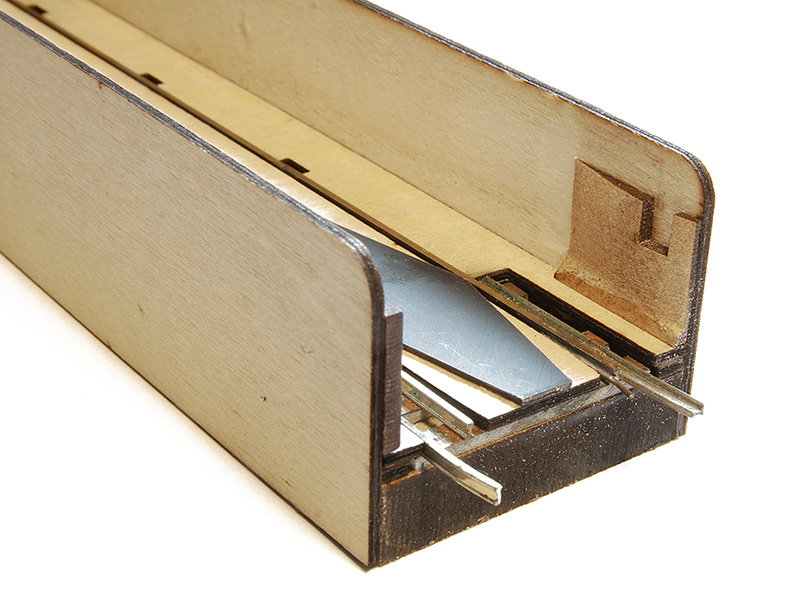 First approach to fix problem A was to shape the end supports so that stock doesn’t stop when it hits it. A few trials showed this to be effective but it merely gets the stock past the ends and it still stays off the track. Plan b was to make a re-railer from 30 thou plasticard so that any errant stock is pushed back on to the track. The advantage of this is that I don’t need to reshape the end supports at all as the stock is on the track as it runs off the cassette. This is just a rough proof of concept of course but if I fit one to the end of every cassette, as wagons will need to run of their own cassette and through the loco cassette that gives 3 opportunities to re-rail any rogue wagons and if they are still off after all that then they deserve to go back in the box for attention back home!