Another wagon diverson
Breaking away from the current building works for a moment a little wagon based diversion. As per normal mundane stuff with a few little bits of tweaking that most people will likely never notice.
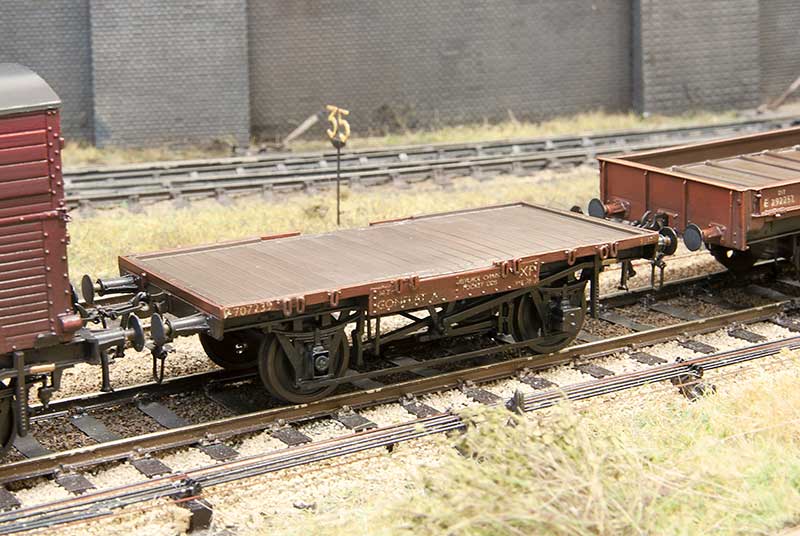 Conflat A from the Parkside kit. As per the last time I built some of these I beefed up the links a bit as I thought they were far too subtle. I fancied an empty one for a change and also added a missing (yeah sounds a bit weird that doesn’t it?) axlebox cover.
 Next up an LMS diagram 1838 container flat. Built from the parkside fitted LMS chassis kit with extra bits and bobs.
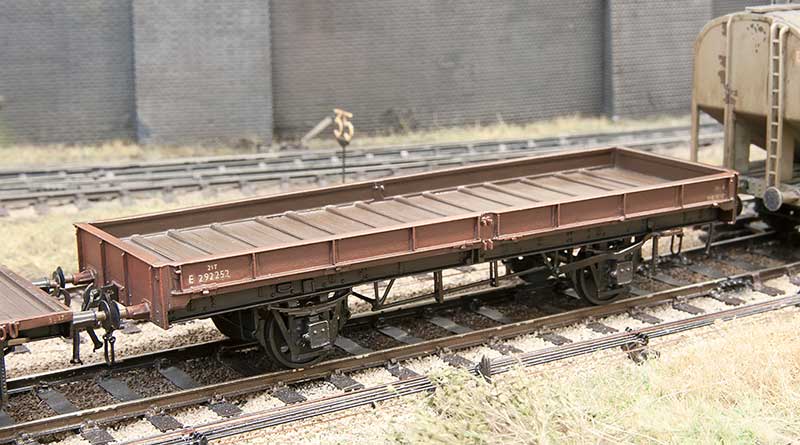
Finally an eastern region plate. When i did my fish van a few posts ago someone on the clearing house facebook group (highly recommended if you are on facebook and like wagon building) pondered if the chassis could be used to do an eastern region plate. Personally i thought it easier to go with the supplied chassis and replace the brake gear. Another Parkside kit.
Low cost modelling
 I was pleased to find that given the recent high temperatures and the layout living in a shed, that there appears to be no ill effects and all the rails are still straight and pointing in the right direction. I hope everyone reading this can say similar.
The above is a major blast from the past. Years ago when the West Midlands Area Group of the Scalefour Society was active, its organiser, Les, one week supplied us all with a parkside fish van kit. I think (memory is fuzzy if I’m honest) the idea was some sort of little competition to see what we would do with it. I don’t recall that anyone did but since then its sat in my kit stash contemplating its place in the world. As you can see it’s finally been built. I must admit the very long wheelbase produces a pretty ugly proportioned vehicle but its ready for service on Brettell Road. A note of thanks to Andy Hanson for kindly supplying the transfers.
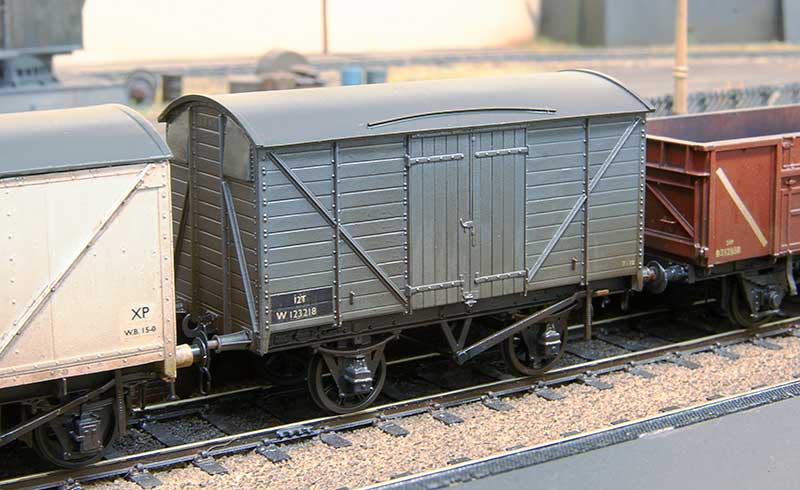 Above is a V33 van again from my spares box. It uses Ratio sides and a Cambrian 9ft wheelbase underframe. I don’t know how I ended up with the sides and while all the bits had, obviously, been paid for at some point I’m calling this one a freebie!
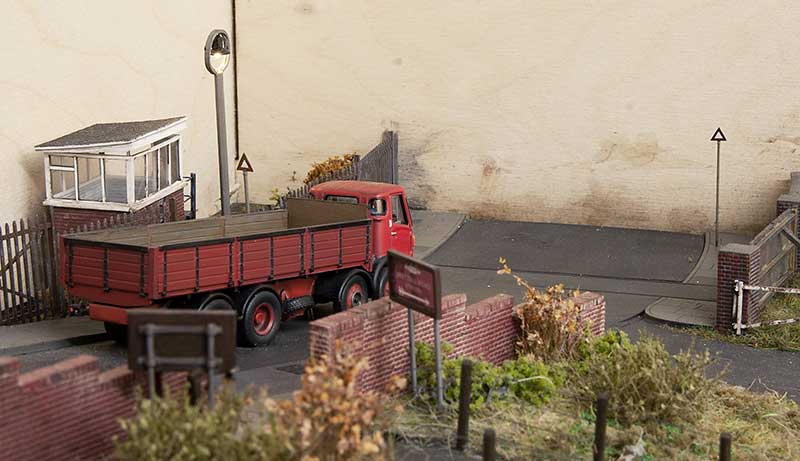 Added a couple of pre-Worboys road signs from Shirescenes. These are inspired by a picture of a Barclay tank crossing Level Street that I found. I made the furthest one about 80% the size of the nearer one to force the perspective a little.
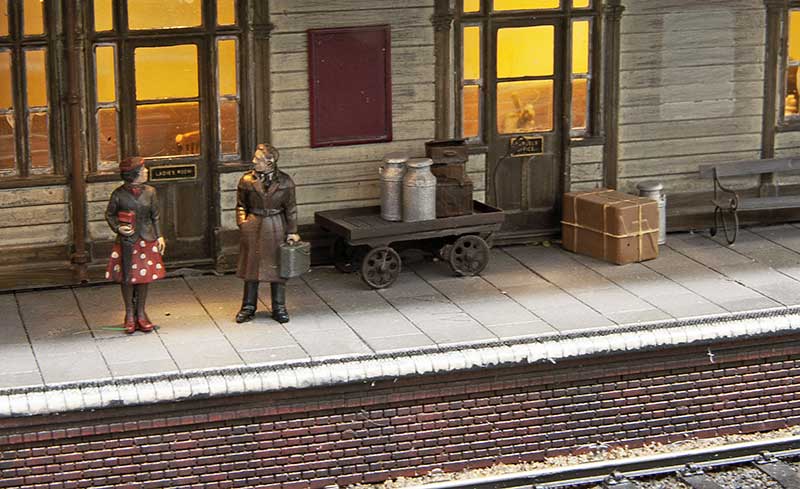 Finally a couple of milk churns from Modelu. To get the galvanised effect I painted them silver. Then a very light dusting of Halfords grey primer (holding the churn at arms length from the spray can) followed by matt varnish. I think it worked but if anyone will ever notice, who knows?
LMS long tube
Just missing out on my last post is this model
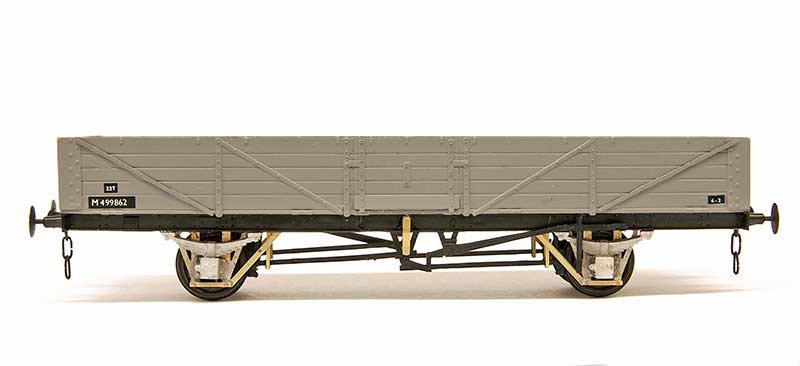
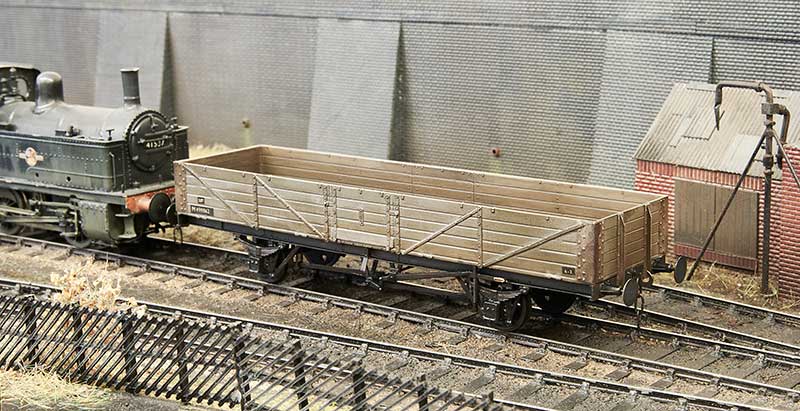
An LMS diagram 1945 Long tube. It uses a Parkside BR tube kit which has been shortened to 30ft 6in over the body (122mm) and 17ft 6in wheelbase (70mm). The corrugated metal ends have been replaced with planked ones from plasticard.
 A bit of a family tree starting at the top with an old Ian Kirk kit for the diagram 1675 wagon. The wheelbase for the top 2 are the same.
 Just a couple of pics for the hell of it!
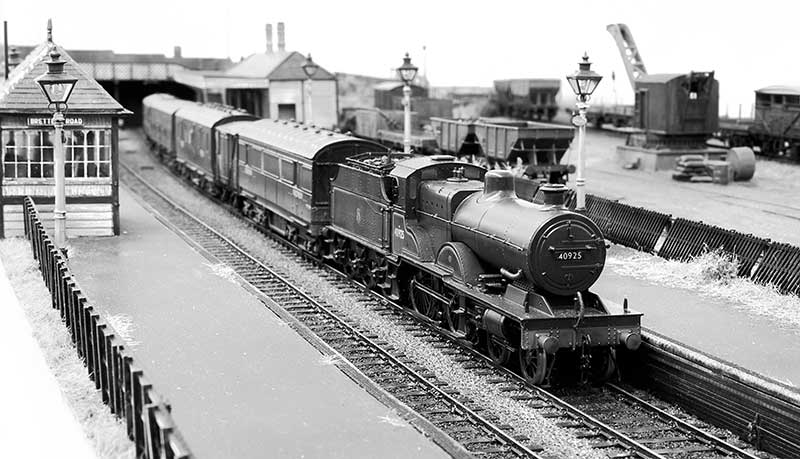
A Parkside quartet.
 The Airfix meat van I did a short while ago has peaked my interest just a smidge. There is a little bit of local interest for this (or a well sketchy excuse for me to go waffling on for a minute or two!).
Meat products moved by rail were probably most famous for the Palethorpes vans that operated out of the Dudley area but Brierley Hill was also famous for another processed meat producer, Marsh and Baxter. Founder, Alfred Marsh brought a pork butchers shop (with slaughter house) from E.J. Smart on Brierley Hill High Street in 1867 and initially started out curing ham and manufacturing sausages. By 1912 he brought the A.R Baxter factory in Dale End, Birmingham. Alfred Marsh died in 1918 and the business passed to his son Alfred Edward Marsh. After WW1 the company continued absorbing smaller firms and was eventually granted a Royal Warrant for its York Hams, which they supplied to Harrods.
In 1927 They began using their own siding at Brierley Hill Station and at their peak employed some 1500 workers and slaughtering approximately 2000 pigs per day. It was quite famous locally for an advert featuring a pig pulling a trailer loaded with sausages and the strap line ‘Drawing his on conclusion’. In 1954 a modern office building was built on Church Street, Brierley Hill which being slighter higher than the Round Oak steel works did tend to dominate the town somewhat. They also took a keen interest in investing in and promoting local sports and social interests and had both a cricket and football teams (both mens and womens).
In 1962 the company was brought out by Falstock Marketing Corporation although the Marsh and Baxter name was retained. It would survive another 16 years until December 1978 when the company was closed.
 This one is a Diagram 1/250 example using Airfix ends kindly supplied by my friend Ian. Knowing what I know now it would have been better to use a parkside standard 12t van as the meat van has different doors. Luckily I still had some suitable doors in my spares box. The ens needed chamfering to 45 degrees to match the ends and the floor needed shortening a little as the Airfix ends are thicker. I also used some spare underframe mouldings to get the BR welded plate fronted axle boxes.
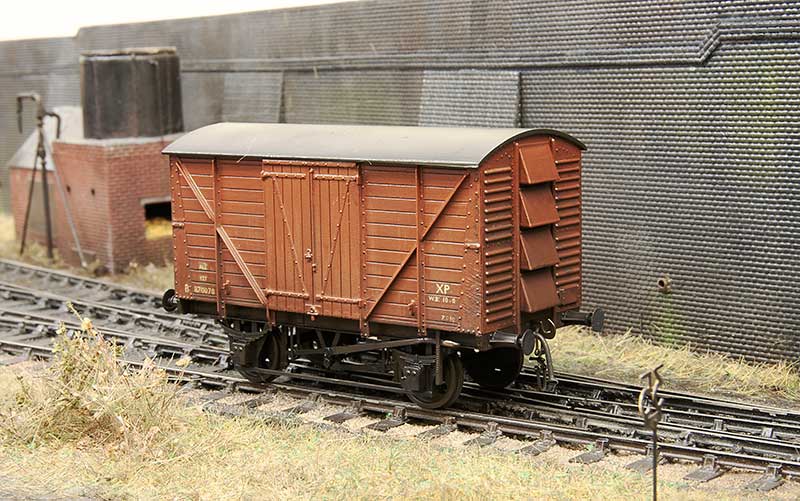
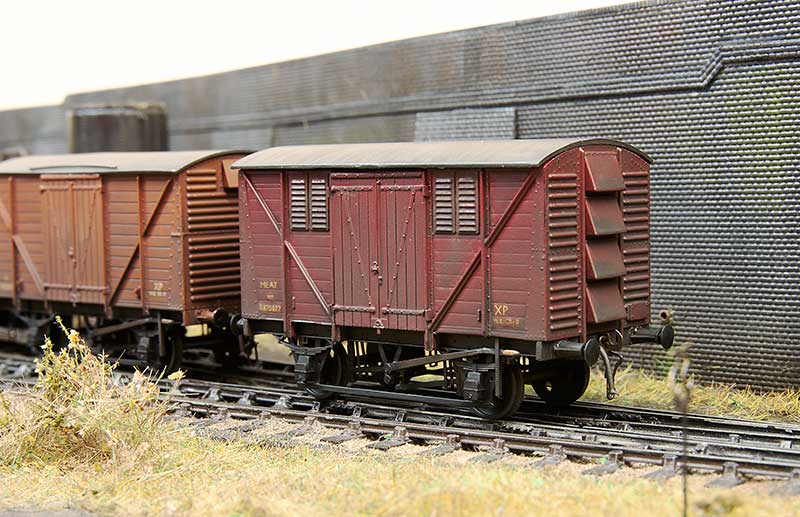
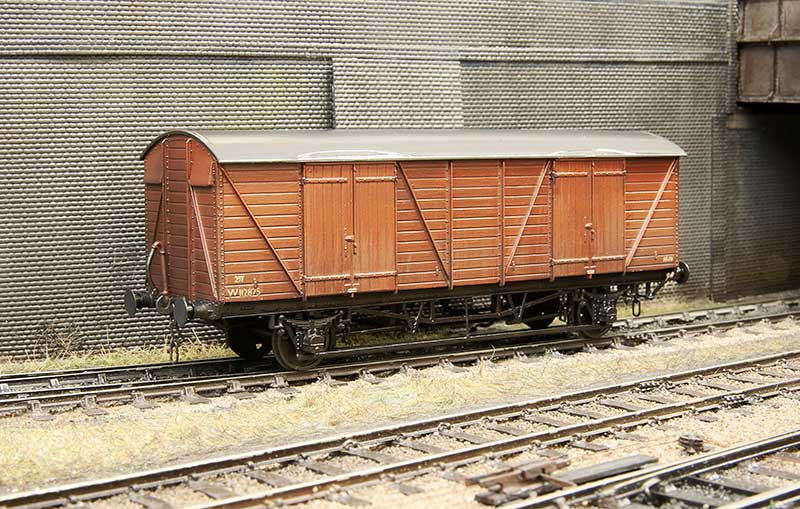 On the subject of vans I quite like these ex GWR mink Gs. Another Parkside kit with Bill Bedford springing and some other etched bits and bobs to refine the underframe a little.
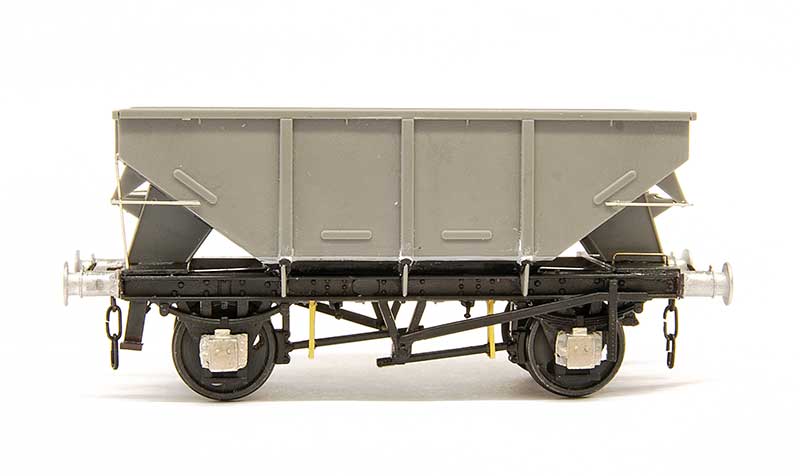 Moving on to Parkside’s latest effort. The BR 13t hopper. You can feel the Peco in this one! The underframe has similar feel (both in the way it’s done and the plastic its done in) to the old wonderful wagons tank kits. I needed to get the scalpel out to get it to fit together the way it was intended but once done it does result in a pretty solid chassis. I don’t know what happened with the supplied axleboxes but they seemed unfinished to me, almost as if there should have been an overlay as per the palvan kit. As there wasn’t I cut them off completely and replaced them with Wizard Models castings.
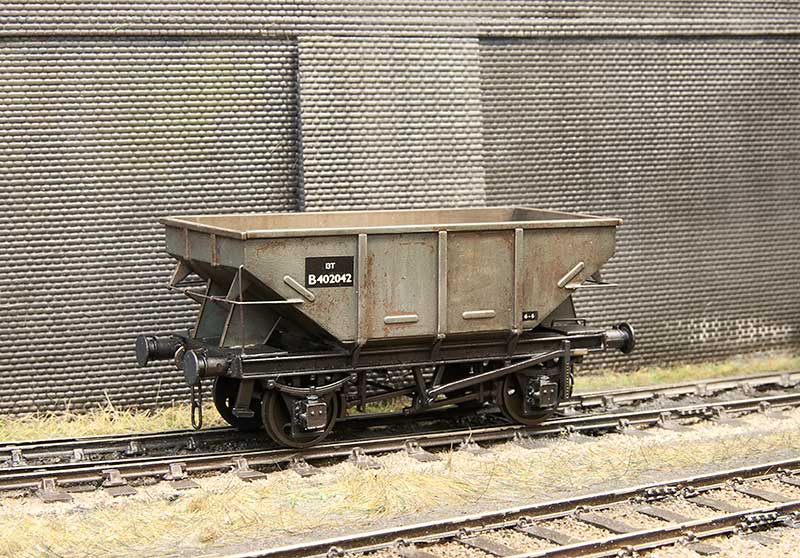 Knowing what to look out for it does build into a nice looking wagon and its pretty quick to bung one together. The model features some nice moulding on both sides of the hopper doors but with no where to really put any decent amount of weight I suspect many (like i will) will run them loaded.
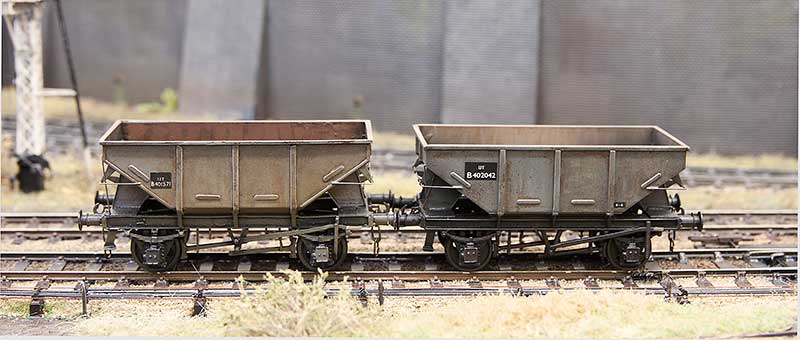 The inevitable comparison with my previous model from the Dave Bradwell kit. Draw your own conclusions.
Another classic
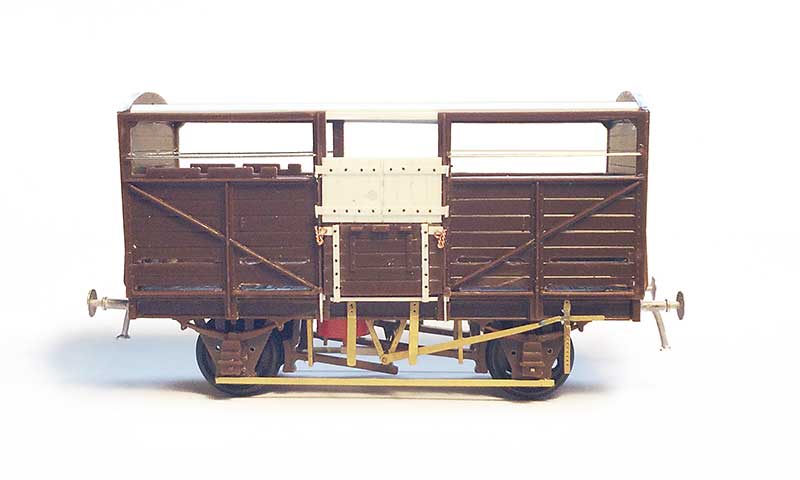 The good old Airfix cattle van. When I was a kid my dad built one of these so I decided Brettell lane should probably have one too. I deleted the opening doors (it was easier to replace the top ones completely than modify what was in the kit) and detailed the underframe with Mainly Trains, Bill Bedford and Rumney models parts.
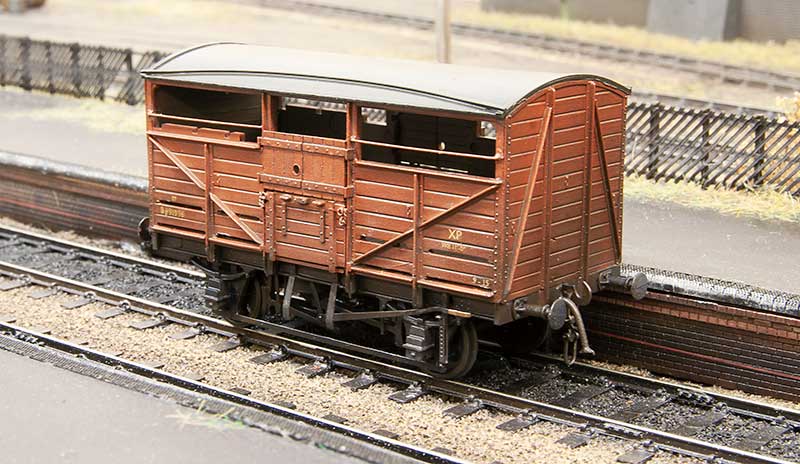 As with all Airfix kits of the time the roof was pretty clunky so that was replaced with a new one from 30thou plasticard and microstrip.
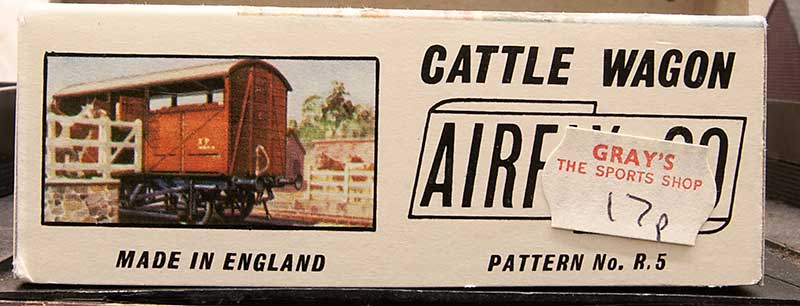 Ive no idea when this kit was first sold but even with modern eyes this looks like it was bit of a bargain!
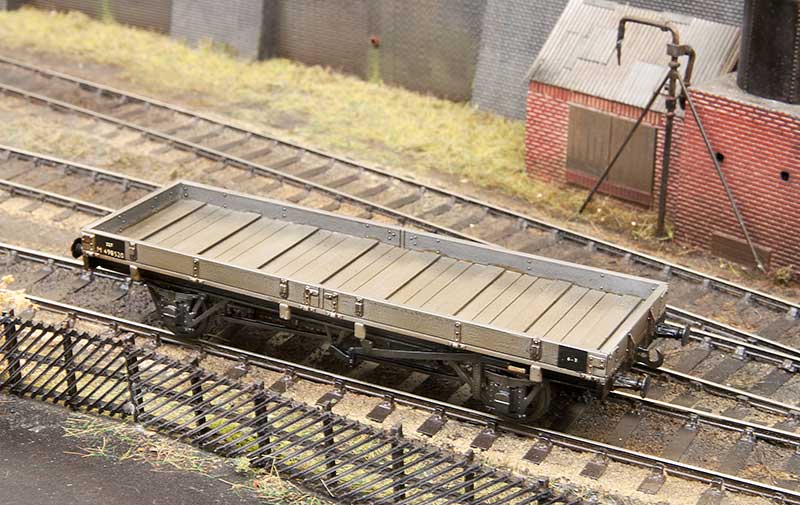 Moving on to a more recent kit. The Chivers model for an LMS long low thats been in my stash for a few years now.
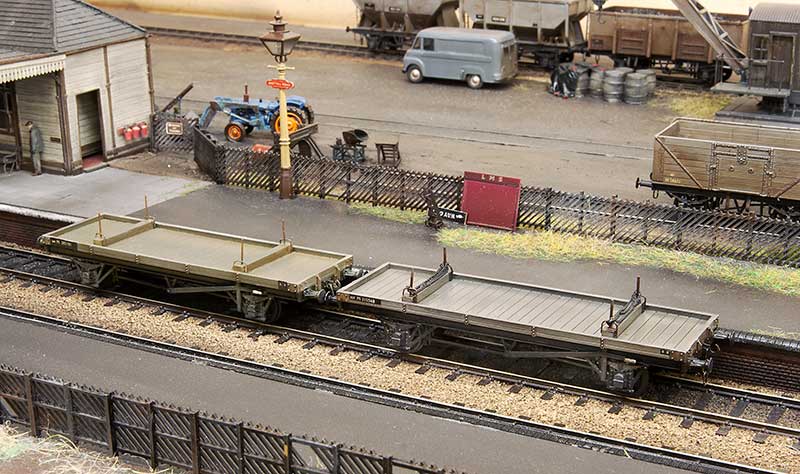 Also from Chivers, and also from my stash, I’ve finished off another LMS twin bolster. Chivers kits seem to have quite chunky underframe mouldings and while this isn’t noticeable on most of their kits I’ve built it was kind of more obvious on the first twin bolster I built (on the left). Potentially the use of sprung suspension adding to the problem I felt the underframe looked too wide and the w irons were too far from the wheels, giving a kind of 00 look to the wagon. On the new one (and the long low pictured above) I thinned the w irons to about half thickness and I’m happier now. It might very well that its only something I notice though!
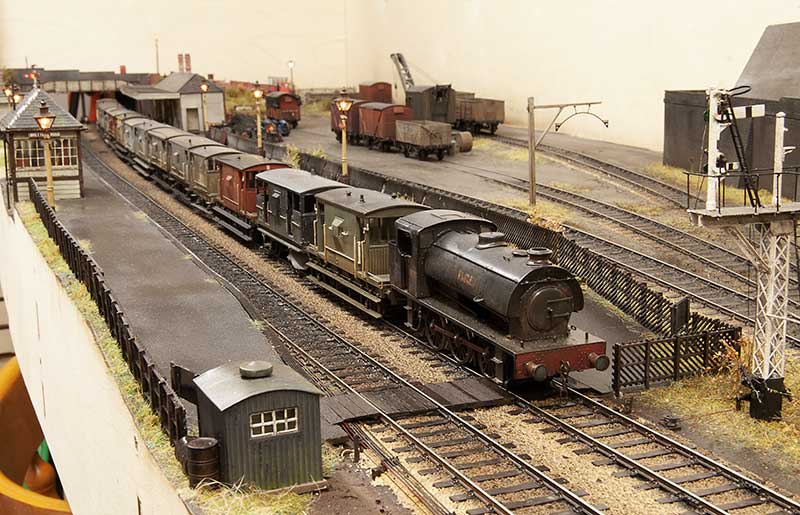
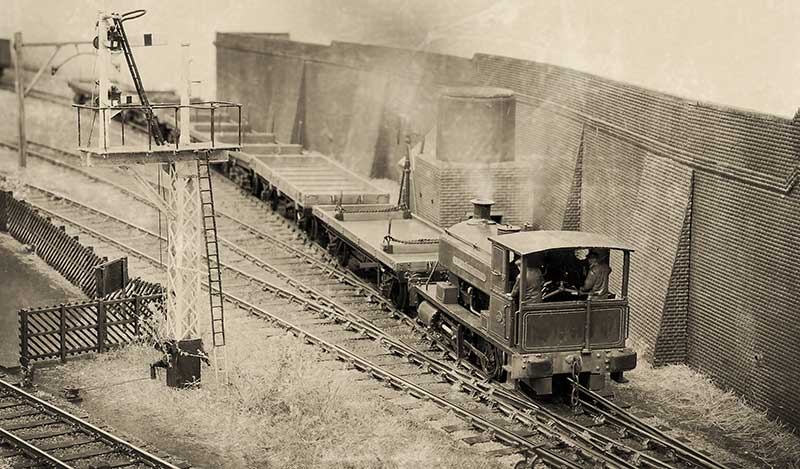 A ‘historic’ photo of the Barclay tank shuffling a steel train.
A couple of stragglers
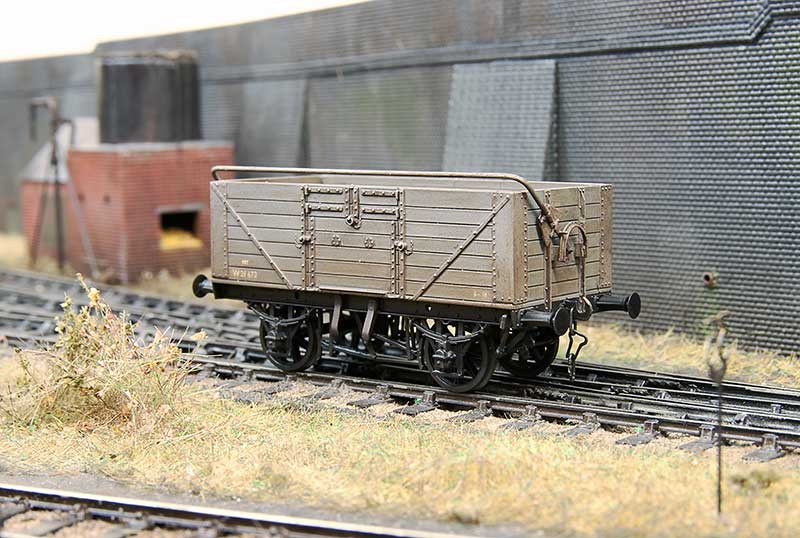
 Pictured above is a Cooper Craft kit for a GWR diagram 02 open wagon. I found that if you use the bearing holes supplied in the kit the wagon sits too high so the holes were enlarged vertically a bit at a time, checking the wagon on a bit of glass to ensure all 4 wheels stayed square. The rail is a modified Rumney models kit and the brake gear from MRD.
 The infamous Airfix meat van. Quite why Airfix picked this and not a standard 12 ton van is anyones guess. I replaced the gimmicky opening doors and the underframe with Parkside bits from my spares box. The transfers were cobbled together from what I had and those that were white were painted with revel clear yellow (730). Buffers on this and the GWR open were from Accurascale. Basically cheap and cheerful!
 A private railway favourite and an exhibition last hour staple, the good old brake van special! I think i might have overdone it a bit!
A couple of brake vans
I may have mentioned before a plan to have a mixed engineers train for New Street. This will be the closest I will get to what could be vaguely referred to as a traditional goods train. For this I’ve completed a couple of the good old Airfix brake van kits. 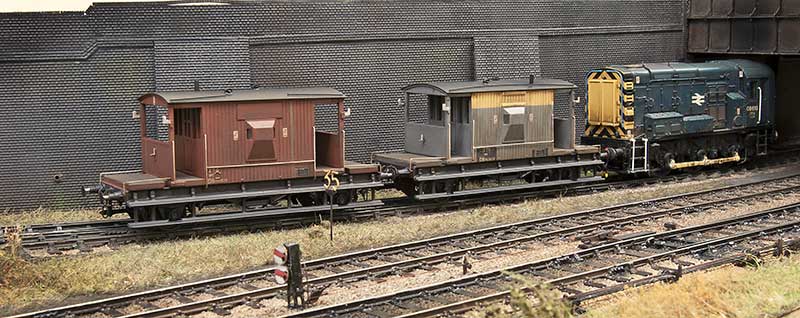
Pictured above on test on Brettel Road, the bauxite one features roller bearings left over from a Chivers kit and Oleo buffers from Accurascale. The dutch one also has Accurascale buffers (spindle this time) and plated ends. Both feature a new, thinner roof. Ive retained the original chassis with internal rocking compensation at one end and added the underframe trussing Airfix missed off. Theres an etched underframe option for those who are interested and I can direct you to this thread if thats something you fancy having a look at.
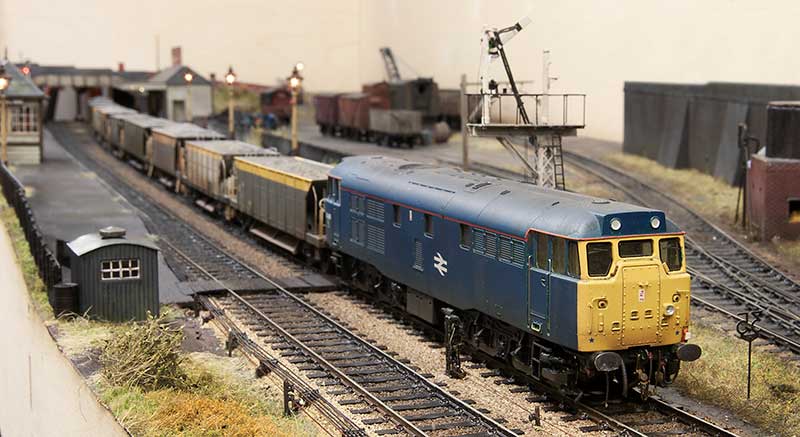 While time travelling engineers trains were ‘invading’ Brettell Road this 31 appeared!
Bit of pick ‘n’ mix
Bit of a pick ‘n’ mix post this one.
 Lady Margaret now has her identity thanks to some custom nameplates from Narrow Planet
Finding your own compromise
When it comes to plastic kit building it helps if you think of a line. At one end of the line you have the kit as supplied, built as per the instructions with no attention or research what so ever on the prototype itself. At the other end you have the kit, researched, wrong parts replaced or corrected and superior parts substituted, as much extra detail as you can manage. Rumney chassis kind of thing. Inevitably we all need to find our place somewhere along the line that we feel comfortable.
This place can be influenced by several factors.
Cost – adding a lot of extra parts can mount up to quite an expensive model.
Expediency – high end models take a lot longer to build. Do we have the time
Reliability – no point adding every little detail if in use you’re going to knock it all off again.
Usage – if you wagon is part of a train of 30 that are only ever going to trundle past at a scale 40mph are you going to have the opportunity to notice the extra work?
Consistency – no point mixing highly detailed and basic kit builds together really.
Volume – how many models are we going to need?
 Heres my pretty much standard position along that line. The base model is a parkside kit. As mentioned elsewhere I’m not particularly worried about compensation or springing on a 10ft wheelbase wagon but i do use it for vehicles longer than 12ft wb.
A – brass tie bars. I use 0.8mm L section. the real things aren’t L section but i use this for strength and you cant tell unless you turn the model upside down. In plastic kits the tie bars are a real weakness ad they are either bendy, get broken or to avoid those 2 things, massively thick.
B – break hangers from Bill Bedford – It doesnt take much to add a little finesse to the brake gear and trick the mind into thinking its all a bit more refined that it actually is.
C – metal buffers, or in this case metal buffer heads. Unless your kit comes with metal buffers already lets be honest here, the plastic ones are going to be awful. These are MJT buffer heads.
D – couplings. A whole discussion on compromises in itself. In my case I use Smiths which i know are overscale but they are (quite) easy to use in operation.
E – brake pipe from Lanarkshire models.
Glue
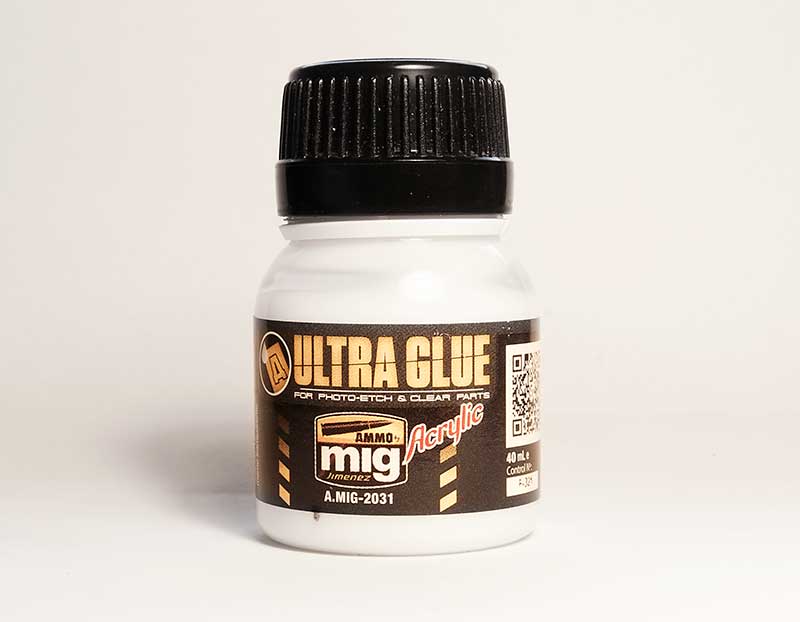 Ive recently been trying this stuff. Ultra Glue from MIG for etched and clear parts. Its water based so can be thinned if required and so far it seems to do the job at least as well as superglue. Its especially good for fitting name plates as while it has good grab it takes a few hours to fully harden and being water base any that creeps out can be lifted off with a wet paintbrush.
Reading
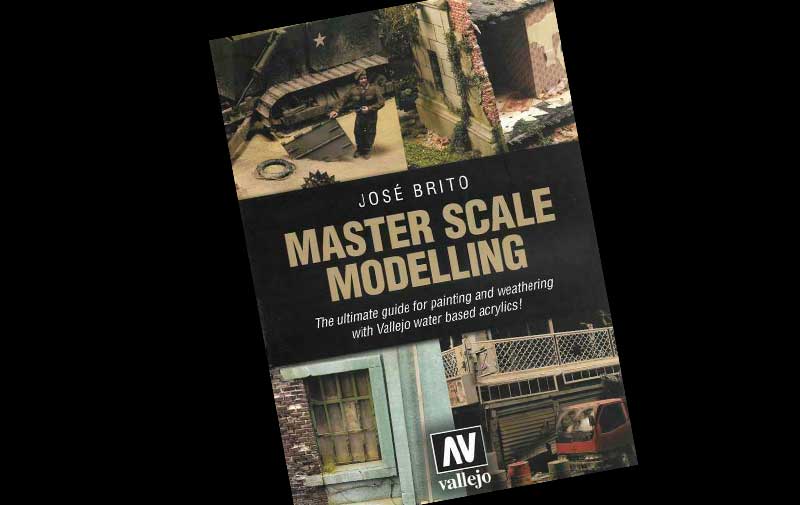
It’s been an awful long time since Martin Welch treated us to his ‘bible’ the art of weathering. And while still essential reading things have moved on a bit, especially so in the last few years or so. Some of the paints Martin used are no longer available (Humbrol tarmac for example) but theres a whole market now of weathering paints and materials. This (rather large at over 500 pages) book is an excellent window outside of our sometimes a little comfortable railway world.
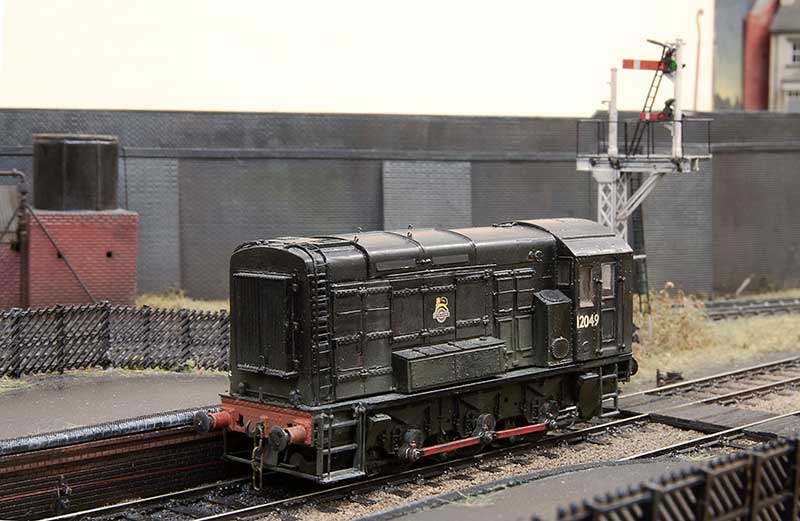
Having had a little trundle to Stourbridge shed and back for some Diesel, Class 11 shunter 12049 waits for the nod back into the yard at Brettell Road.
A short post in brass
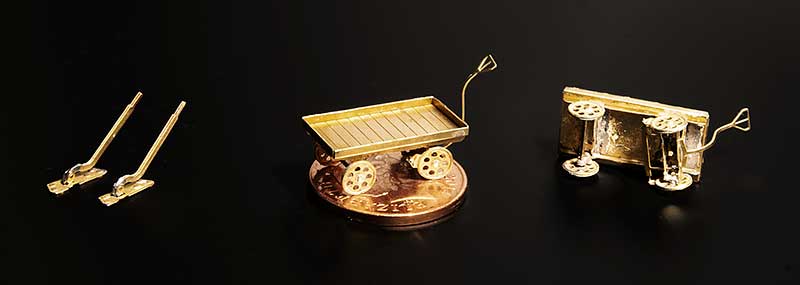 Been fiddling with bits of brass again. I wouldn’t normally bother taking a picture of something as simple as a point lever but I found that the ones I built before were a little vulnerable and easily bent. I haven’t changed the ones i use (Shirescenes) but what I have done is doubled up the levers themselves and they now seem a lot more robust.
I’ve built platform trollies before to but this time I have changed the supplier. I think my previous ones were Scalelink but this one is from London Road Models and is much more detailed. It even had a representation of the brake linkages. Regular readers will no doubt know by now I’m a sucker for this sort of thing! The trolly is shown perched on a two pence piece for scale.
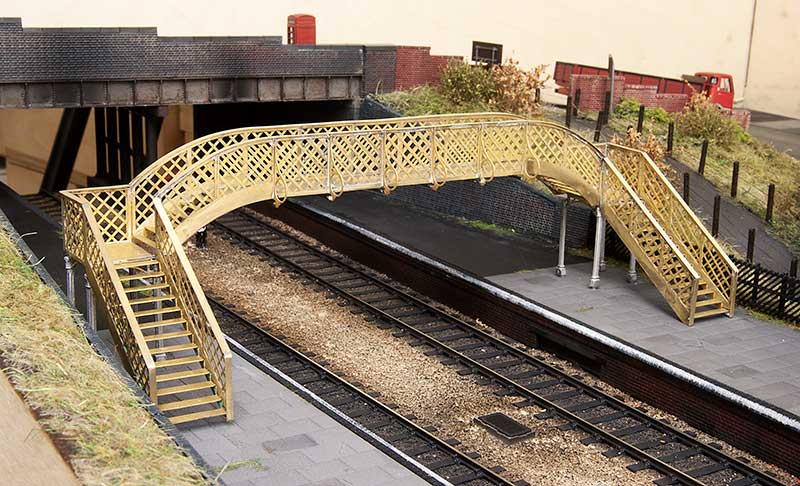 Moving on to something a little more obvious. This is the Churchward models (now sold by Phoenix models) footbridge kit shown in temporary position. As my track spacing is quite wide here I did need to extend the main arch by one panel and, luckily as the etches for the arch are the same, I could use the spare bits that weren’t needed on the facing side. The sides were cut and shut with the new panels grafted in meaning the only bit I needed to fabricate from scratch was the main span floor. An enjoyable kit to build this one.
A few in progress lorry kits
With my first demo in a few years (my first exhibition in any form in a few years actually) coming up in a few weeks*, I thought it an idea to do a couple of in progress lorries as a change to all the finished stuff I usually drag along to this sort of thing.
Both are Langley kits and were chosen for absolutely no other reason than they popped up cheaply on ebay! OK they were a little interesting anyway and i thought the dumpy little Dodge 5 ton tipper truck was kinda cute. The Milk tanker is a Leyland Beaver and both hail from the end of the 40s so they would likely be pretty tired by the time they reach Brettell Road. The make do and mend attitude of the Black Country would mean they might soldier on for that long but the impending Motor Vehicles (Tests) Regulations of 1960 must mean their days are likely numbered!
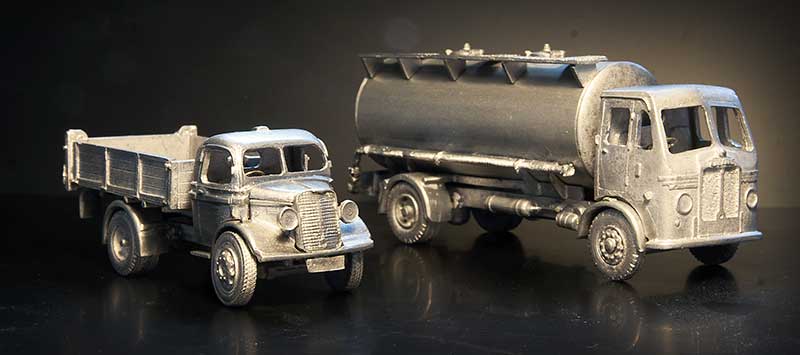
*See the news page
Duchess update June 2021
After a longer gap than would have liked attention had returned to my Duchess build.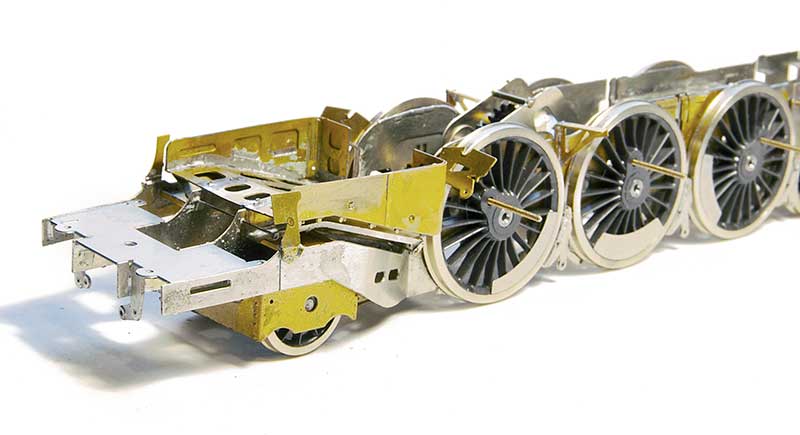 Starting with the lower firebox and damper operating rod.
 Next up the brakes. As can be seen clearance is kind of on the minimal side. Theres no springs fitted yet either so the chassis will sit a little higher than is seen here.
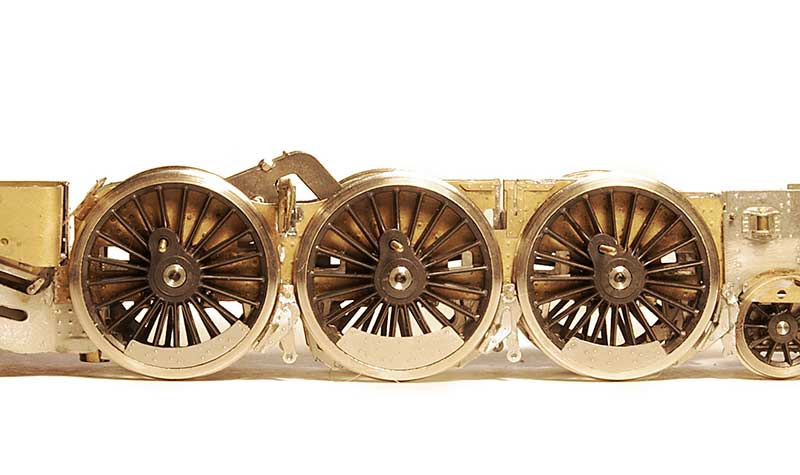
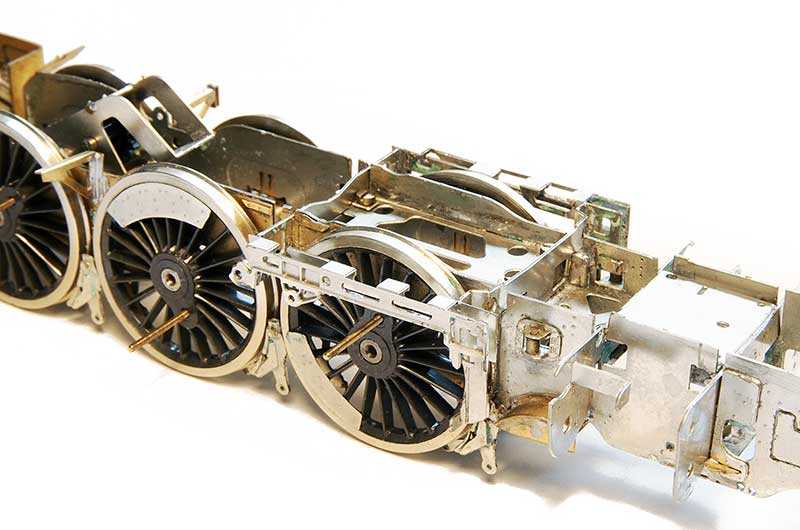 The motion brackets. Again theres not a lot of clearance between the bracket and the leading driving wheel.
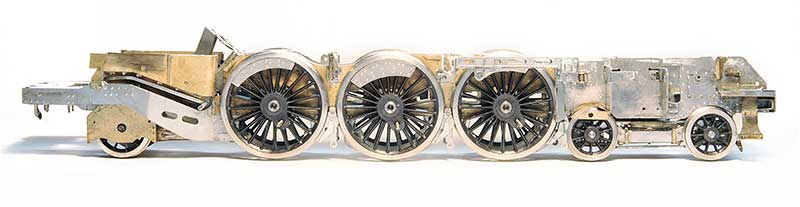
The chassis so far.
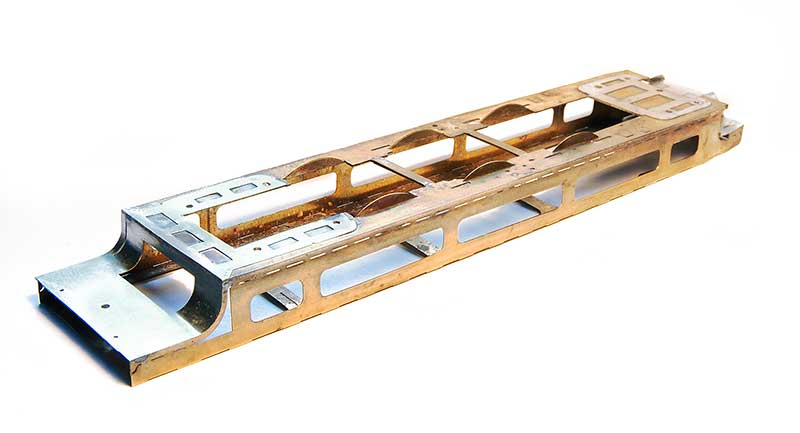 Moving on the next stage is the footplate Seen here in its assembly jig.
Good old fashioned kit bashing (with a spot of RTR bashing too)
 OK this one isn’t a particularly difficult exercise. The Oxford tank wagon re-liveried to Shell/BP livery. On my first Oxford tank I mentioned that the printing came off really easily with white spirit but not this one. This needed IPA and a fair bit of elbow grease! I added a discharge pipe and the logos came from Fox (they are a smidge to big for this little tank to be honest). I noticed, too late, that Oxford have modelled both of the vertical end ribs facing the same way on these tanks.
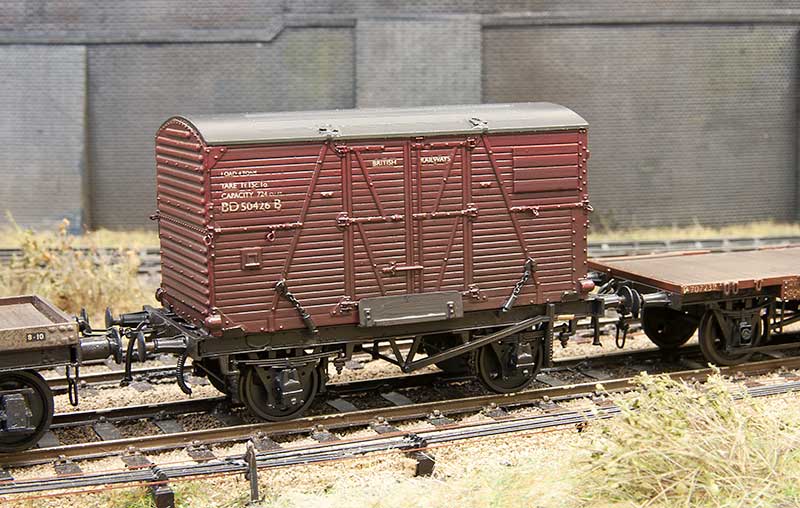
 Next up, a bit more fitting in with the post title. A diagram 2070 12 ton goods van. When I built my diagram 2108 van from parkside kit I used the ends from a ratio 12 ton van as the Parkside ones are the wrong shape. The rest of the ratio kit sat in it’s box until I recently decided to do something with it. These vans, although looking very LMS were actually built (for the LMS) by the Southern in 1942. I files off the metal framing a the ends and re-scribed the planks. The ends were just scratchbuilt from plasticard using the vent left over from the afore mentioned Parkside kit.
  The finished van. Bufffers are from Accurascale and the old label from Holler.

Next, an Airfix LMS brake van chopped up to be rearranged into a Diagram 1890 version or ‘reverse Stanier’ as they are sometime called.  As can be seen theres not much too this one and it makes quite a good project for those new to chopping stuff up. These models can be found really cheaply so theres not a lot to loose. The ends have been scribed as the upper ‘window’ section squared off with plasticard as filler. A bit of microstrip for the vertical frame and the upper beading on the sides was sanded back.
  The finished Van. Don’t forget to redo the steps on the solebars!
 This is a cheeky little one. Basically the Parkside kit for the diagram 1657 20 ton brake van but with the wheelbase extended from 12 to 14 feet to produce a diagram 1940 version. One of those ones that i’ll be surprised if anyone notices!

 The same cant be said for this though, I think people might notice! Same start point of the parkside kit but rebuilt to a diagram 1799 40 ton bogie brake van. The LMS built 3 of these specifically for the Copley Hill to Armley line and thats where they stayed. I just liked it for its wierdness really!

Building plastic kits – some thoughts
Thought I’d do a bit of a more detailed post about building and finishing plastic kits and the thoughts behind it as I go along. As always other methods are available and no one has to follow every step slavishly. Just take from this what you want if it helps at all. The intended victim in this case is a Parkside LMS (ex MR) 20 ton brake van, kit PC58. Im not sure how long this kit has been in the Parkside range but it has the look and feel of one of the later kits however the instructions do refer to the Woodhead transfer sheets as a source of lettering and they vanished a long time ago now. More importantly and the reason to devote a little more than my usual ‘heres a bunch of pictures, hope you like them’ approach is this is the last original Parkside kit in my stash so it’s also the last kit I will build that I brought from Richard Hollingworth himself.
So armed with the kit, the instructions, a selection of glues and other rudimentary tools plus the all important prototype references I set to work. Generally parkside kits are as close to model railway lego as you can get. They kind of fall together however don’t take this for granted and in this case I found that the floor was about 30thou too narrow. This was evened up with a couple of bits of microstrip either side. The importance of a dry run to check the fit of all of the parts parts cant be overstated.
Another thing not to assume is that the kit is right or accurate. Again generally speaking the vast majority or Parkside kits are but theres a couple that have a few clangers. The vac’ braked 16ton mineral wagon with a 10ft chassis not 9ft and the LMS fruit can with the wrong shaped ends are the better known examples. It’s strange how the right chassis is in the range for the mineral wagon and the common fix for the fruit van is to use the ratio LMS van ends and roof. As these are all under the Peco banner now you would think this would be an easy fix for them. Perhaps they don’t know? The glues I will be using. as theres no metal to metal joining required the soldering iron can stay turned off for this one. The main glue I will use is the Tamiya extra thin cement.
Building the body
 The body assembled, I drilled the holes for the handrails before putting it together, the instructions say to do this after but i find it easier this way. Although not really a decision as such with this kit as the handrails aren’t moulded on this is usually the first point where you will start to make your own decisions.
Handrails – do models look better with separately fitted ones? Yes provided you don’t mangle the body too much removing the moulded ones and the replacements are not all wobbly. I use 0.35mm nickel silver wire and flat nosed tweezers to shape them. You need to keep the bends crisp and the straight bits straight. If you mess up a bend don’t waste time trying to straighten the wire out as you wont. Just start again. Separately fitted handrails that are all out of shape against a gouged body will not look any better than the moulded ones you carved off. Whatever you do though if you do have messed up handrails and someone points it out don’t try to claim its because they were bashed about in real life as it’s obviously a bodge! I think this stems a lot from the late 90’s when people were fitting all manner of after market bits and dodgy etches to Lima diesels. The fact that a lot of these parts were worse than what people were carving off the original body seemed to pass people by as separate bits was what you did back then!
Decision 2 – the lamp irons. Will they look better separately fitted? Yep but theres another thing to consider, will I knock them off in layout use? When people are new to finescale models (I don’t like that term but it serves a purpose here) theres a tendency to fit every tiny bit of detail that you can. With experience of operating your stuff at exhibitions you will find that you tend to draw back from that to point where practicality takes over. Where that point ends up will naturally be different for each of us.
It helps a little to delve into how human beings work. When I was working as an illustrator we placed a lot of emphasis on learning to see. Although we have sight we are not really wired to properly look at things. We are designed to make quick judgements and move on, basically can I eat it or is it going to eat me? What we are good at though is spotting something wrong or out of place. So a moulded lamp iron in this case will go unnoticed by most people. But one thats been knocked off wont. This pre-determined fascination with the out of place can cloud our judgement of many things. We notice graffiti on a wall so we think it’s prevalent. We don’t notice the 100 other walls we walked past that didn’t have any. We notice the wagon in a train that looks like it should be in the scrap yard and ignore all those that don’t look like anything like that. This extends to our history too, especially our photographic history. Photographers like the rest of us will ignore the mundane as focus on the thing that catches their eye. If you look at pictures of New Street in 1987 you would believe pretty much every train had a class 50 on the front and there was one DMU a day, as for EMU’s you can forget those completely!
 This next stage will be dictated by how the kit in manufactured and can in the right circumstances save time later. If the kit is moulded in all the same colour (and its not black) you can skip this bit. However if the body is one colour and the underframe is black you can safe a lot of painting later if you paint and finish the body before you move on to the underframe which is what I have done here.
The Underframe
 A wagon of this size is border line for needing springing or compensation in my experience. On wagons that don’t need it one tip I’ve found that works is to slip a piece of thin paper between the axle and the bearing at one end only while putting it all together. The other end should have no slop but the width of the paper gives just enough movement of 1 axle to keep everything on the rails. A piece of glass to check that the wagon sits square on all 4 wheels at this stage is another must however. Another handy thing is the Brassmasters axle spacing jig that ensures the axles are parallel. It doesn’t matter how nicely your wagon sits on the glass if its constantly trying to steer itself off the track!
 This is the underframe with all the supplied bits in place (except the steps) Its up to you if you chose to stop here or not.
 I went for ‘not’ and added the break linkages and safety loops. If you are going to do this drill the holes you will need in the brake shoe moulding before you fit them to the model, it’s nigh on impossible to do after. The safety loops are glued in to bits of 80thou microstrip that have a hole drilled through them. This is my stop point as there’s more detail that you can add regarding the correct shaped linkages and operating gear behind each wheel. It’s not something i can see on the layout unless I make a really determined effort to look for it.
Hang on a minute, what was all that rubbish about bits of paper and not compensating stuff then? Well sometime you can kill 2 birds with just the single bit of garden aggrigate! Of all the options I am on record as believing that rocking compensation is not the first or even second best option of the 3 we have. However the internal ones do handily provide more rolling resistance than pinpoint bearings and on a brake van and a layout with gradients thats not a bad thing.
 Let’s talk about buffers. If your plastic kit has moulded plastic buffer heads, let’s not beat around the bush here, they will be crap! I have yet to see any that aren’t! Options for replacements come from Lanarkshire models, MJT, Wizard and Accurascale. As always check your prototype pictures as the ones on the wagon you are building might not be the ones the kit represents. This applies to axleboxes a lot of the time too.
In this case I opted to keep the moulded stocks and replace the heads with those from MJT, The housing was drilled out very carefully using a hand held pin chuck. Don’t be tempted to use a powered drill as the wall you are left with is very thin and even the slightest bit of heat from the drilling will melt it. A 0.5mm hole was drilled through the centre of the buffer and through the bufferbeam to account for the tail of the buffer head. You can chose to spring the buffer if you like. I don’t find it makes any real difference though.
 Weight – I try to aim for 50 grams for a 2 axle wagon. If you have the room inside then these self adhesive car wheel weights are ideal. This brake van needed an extra 30 grams adding.
 Next stage is the running trial. With any kind of van I do this before fitting the roof as once its on i don’t want to try and get back inside. The wagon is tested through all the pointwork and sidings and any derailments or unpleasant jolts or bumps are investigated and corrected. In this case I’m happy to report there were no problems.
 The finished build, even at this stage you still need to constantly check your work. note the bit of white near to the closest handrail? Something I’d not noticed until I looked at the photo. I used the Revell liquid polly shown earlier to fix the roof. The reason is that the Tamiya stuff evaporates too quickly. The Revell version is thicker, wont run and gives me a little longer to position the roof.
Weathering
Im very much of the opinion that a restricted pallet is best for all sorts of modelling applications, You don’t want to go too mad! As discussed earlier unless you are going for the scrap yard look you kind of need your weathering to be one of those things thats there but its not really noticed. An important point I feel is don’t expect one technique to give you all the effects you want and try to work with each technique rather than against it, Things are so much simpler if you do!
 So stage 1 washes – to represent washed on dirt you need to wash on the dirt! I make the wash from a mix of Revell 89 and no 9. If you are doing multiple wagons at once keep changing the mix and the paint to thinner ratio unless you want them all to look the same. Don’t be afraid to go in with neat paint as well to mix it all up a bit and work ‘wet in wet’. Ive done that here on a few planks and the roof. It doesn’t matter if it looks a mess at this stage as you will need to leave it for no longer than 24 hours and potentially clean it all off again with cotton buds and clean thinners. A big part of weathering is not about how you put stuff on but how you clean it off. Having said that I have found on many occasions, especially with planked vehicles, you can skip the cleaning stage and this was the case here.
 Next stage is airbrushing. For this I use AK interactive dark mud as it comes and a mix of black and Humbrol gummetal for greasy/ sooty deposits. Think about in the real world the direction that the atomised dirt hits the vehicle and try to emulate this. Track dirt from about 45 degrees below the model and roof dirt straight down. As aways refer to photos. What you don’t want is a rally car look as if the model has been flinging itself around a Welsh forest for a week!
 The last stage is best described as titivating (and its pretty hard to show the effect it has in pictures but i still think its worth doing). I use the burnt umber gouache for small deposits of rust. It doesn’t want to sit on enamels all that well so will naturally give a rust like effect. This can be fiddled with with water or paper towels/ cotton buds until you are happy. Its worth noting that if you are doing a vehicle with a lot of rust it’s best to do the gouache stage before the washes. Ak interactive also make sets of weathering pencils, including a set just for rust, which work well in combination with the gouache.
The lighter brown and gunmetal were used to dry brush areas of wear on the steps and the underframe respectively. The grease is a wash that contains particles and is used neat around axleboxes and bits of the underframe that are greased in real life.
 As I said its hard to see the difference this has in photos. The oval crop is before and the main picture after. While you have the gunmetal out you can pick up some of the thicker paint that always forms on the inside of the lid with a cotton bud and dab it on to the buffer faces to represent more grease.
 And there you have it. All that work for a mundane wagon that will hopefully just blend into the scene and go about is business in a most unremarkable, unnoticed way!
Here comes the PR!
A while ago I showed a picture of a Powsides ED 7 plank wagon. ED stands for Earl of Dudley and I said at the time that it was a bit early for the layout and that that PR, Pensnett Railway would be more appropriate. A chance discussion on an industrial railway modellers Facebook group revealed that Planet Industrials actually do a set of transfers for PR wagons so a set was duly ordered.  A couple of existing wagons were repainted into red oxide (the ‘shunters truck’ and a grey 7 plank RCH design) and a couple more RCH wagons were knocked up from good old Parkside kits. I decided to keep the Powsides ED one as it was (although weathered a bit more to make it look more tatty) and do the shunters truck as ED too in a sort of crossover period. Ive never found a photo of ED and PR wagons mixed together mind you.
The above train is all very ‘corporate’ and it wont appear at shows like this. The PR wagons will be jumbled up among other mineral wagons. One thought I have had though is by making Brettell Road 2 tracks the industrials will look too out of place on the mainline so the plan is to extend the siding the train is on to the fiddleyard and have them appear from behind the warehouse, using the yard as a exchange sidings.
 I was intrigued by the recent Oxford rail tank wagons and decided the yellow Carless Petrol version would break up the sea of grey and bauxite wagons on the layout. As with the ED wagons its really a bit to early for Brettell Road so I’ve weathered it up to look pretty tired. Theres a few things worth noting with this model. The first is the axle length is odd. Happily its still 2mm and its not odd in a crazy short, Lima way so you can swap P4 wheels onto it and use the original axles. The second thing is that the lettering and the red stripe don’t react well to white spirit. If you want to remove them then great but if you use enamel washes thinned with white spirit for any of your weathering, as I do, and you want to preserve the livery its best to give it a quick coat of matt varnish first.

Just the simple things.
Sometimes it pays to drop back a gear and just do a few simple things that are not too taxing. Things like a few simple wagon kits or just some pictures.  And what could be more simple than the good old Airfix mineral wagon kit? This ones been converted to a diagram 102 variant and weathered with gouache and a hint of AK interactive weathering pencils for the rust.
  Next up a mix and match of parkside bits to produce a Hybar. The rail itself is a neat little etched kit from Rumney Models.
Below a few pictures.


The last few DMUs
 Long time followers will recall this old picture of a Hornby Class 110 DMU that I intended to chop up into something a little more ‘local’. With the acquisition of a Bachmann Derby lightweight as a gap filler it kind of fell off the radar a little. I did debate doing another class 100 but in the end I have decided that a Park Royal class 103 would be the target of my attentions.
A little about the prototypes
These units were introduced in 1957 to the Birmingham LMR region. 20 sets were produced and the last vehicle in passenger use lasted until 1983. A few vehicles survived a little longer in departmental use (Derby RTC Lab5 lasting until 1991) or as a Sandite unit (1985). There was another oddity in that one set was converted to a Viaduct Inspection Saloon. This was withdrawn in 1978 but was saved for preservation.
The 20 sets were all allocated to the Birmingham area for their first decade operating mainly Walsall services before moving on initially to Chester then spreading further afield. Although none standard they did use the blue square coupling code so could work with the majority of other DMU types. Pretty early on they started to suffer from cracking in the bogie frames and their poor reliability saw steam hauled services return to many of their diagrams while the problems were sorted out. Aside from the oddballs mentioned earlier they only carried 2 liveries. Green (with or without whiskers and later with a small yellow warning panel) or BR Blue (small panel or full yellow end). None received blue and grey livery.
The Model
The similarity between a class 103 and the class 110 is reasonably obvious and (as with my class 100 and 114 conversions) the desired result can be achieved buy cutting parts out and shuffling them around, Plus a few spare panels from previous projects.
 The above diagram may be of assistance. The red lines are cuts or areas than need to be removed. The orange areas are surplus and the blue areas need filling in. On the driving trailer everything aft of the last door stays the same as the class 110. I didn’t cut into the roof.
 Initial stages of assembly. You can see the additional panel from another body shell in white.
 Face on you can see where the windows are opened up to match the class 103. The new frames are 10 x 30 thou microstrip secured to the inner edges. Incidentally in working on this conversion I have come to the conclusion that the class 110 windows aren’t right as supplied. They need to be wider and the angles tops need a slight curve.
 The 2 body shells after a coat of primer and more work with filler. The angled tumblehome Hornby used has been rounded off and any missing hinges replaces with etched ones from Southern Pride. I need to add another cental filler to the DMBS yet.
Why do one when you can do 2?
 While in a DMU kinda mood I have started work on a class 129 DPU using a DC kits body kit.
A bit on this prototype as well
3 of these single car units were ordered from Cravens by the LMR. These had a none standard coupling code (yellow diamond) meaning that the could work with the original Derby Lightweights. Introduced in 1958 they lased until 1973 with one going to the RTC initially for brake testing but later for hydraulic transmission tests and gaining the name ‘Hydra’. None of the 3 survived into preservation. Although 55997 was initially allocated to Walsall it was 55998 that was most often to be found working int he Birmingham area during the late 1950s mainly on New Street to Walsall, Wolverhampton or Coventry services. Later it would regularity continue on to Rugby and one slightly unusual service was Alrewas to New Street with produce from market gardens. As with the other DPU class, class 128 they would regularly pull a tail load.
The Model
Charlie supplied his class 129 kit with a standard class 105 cravens DMU cab moulding (no doubt tooling up another cab just for this class of 3 units wouldn’t make a huge amount on commercial sense). So there is a little work to do to make it closer to the prototype, mainly removing the destination box and moving the marker lights down. I elected not to use the supplied flat bass etch for the route indicator box and made my own from microstrip.
 The main bodyshell assembled with extra little details. On something so plain sided it pays to add these little things to break up the sea of grey plastic
A slight diversion

One thing that’s always bugged me a little about the above image is the coupling rods on the class 11 (left). I cant remember why but I used the Brassmasters standard rods rather than their finescale ones. Well I finally got around to swapping them over.


Another little distraction is this Bachmann anchor tank wagon.

A simple wheel swap with a new etched discharge wheel and new ladders from Stenson models.

A bit more of a ‘proper’ project was this diagram 1/163 iron ore hopper from Wizard models. Quite a neat little project this one.

Finally, i don’t want to remind anyone but the nights are drawing in again!

Class 120 revisited.
One of my earlier DMU conversions was a class 120. Built from Craftsman overlays on a Lima 117 it’s done many shows on Moor Street and was probably due a bit of an overhaul.

I had already rebuilt the underframe to better match the prototype and a few years ago I swapped the bogie side frames for Dapol ones* as they better matched the Swindon design the class ran on.
*the older ones from their trans pennine mode not the newer ones from their bubblecars

The big thing I wanted to address was the inner ends. When I built the model the inner ends were void of detail and the instructions just said to stick the Lima gangways and exhausts back on. However the class 120 exhausts are somewhat distinctive and look nothing like what Lima supplied. So the ends have been detailed up to better match the real thing.

As mentioned before I am a fan of the Masokits gangways for DMU’s however I don’t see a lot of point using them if they are hidden behind the exhausts. So for this model i have use paper bellows and moulded gangways I had in my spares box.


A somewhat unfocused post.

Something that always bugged me about my Heljan class 27 was the somewhat odd buffers. A long time ago i got a set of replacements from Sutton Loco Works and its just one of those things I never quite got around to. Well now that little job can come off the list.

Finished the roof of my station building – just need a layout to plant it on!

The gutters are a recent introduction from Modelu. I found they don’t like superglue at all but stick very nicely with liquid Poly (in this case Tamiya extra thin).

Popped back to my Kirtley to pick up a few things that irked. The loco to tender gap has been tightened up a bit and the rain cover tidied.

Crew from Modelu

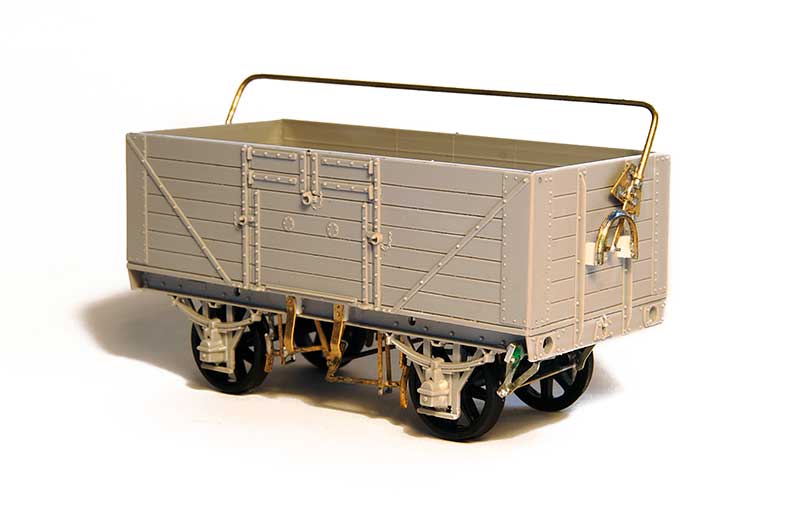
Bit more off a proper project this one. A clasp braked 16 ton mineral from a Parkside kit on a Rumney Models underframe. The only down side to Justin’s stuff is it looks better not painted! A few pics below for history.


Project Coronation – Tender part 4

Progress on my tender build continues. This is the front end with some of the detail started.

And the rear end.

Inside showing the fire iron tunnel and and the coal pusher which is a 3d print.
Below are the some images of the tender in its nearly complete state. There’s still a few bits I need such as the ladder etc but focus will now shift back to the loco.


Some Steel wagons.

The diesels have escaped to Brettell Road again. Actually its just a convenient photo background but there you go.
New Street isn’t known for its freight operations but there were some services booked through the station on a fairly regular basis. Normally late at night and of those steel traffic was quite common. To that end I have recently finished off a few old Cambrian bogie wagons that have been lurking in my half started box for a while now.

First up a BDA. When I started this model there was no Stenson Models so sometimes, letting a model live in the half started area for too many years works out as a positive. The little kit for the braking gear lifts the model. I’ve used Jon Hall etched bogie inserts with the cambrian bogie sides but if you want better, sprung bogies with nicer sideframes then Stenson models do those too.

I replaced the supplied bolsters (when i say replaced I actually mean lost!) with microstrip which better suited the wooden ones fitted to the earlier conversions anyway!

In a not entirely unrealistic scenario, a class 56 heads towards Round Oak.

BAA also from a Cambrian kit.

… and a BBA.


Although my Yorkshire DE02 is part of the Brettell Road fleet they were still very much around in the late 1980s and still in their original wasp livery so this scene isn’t implausible either!

25th of April 2020

Long time followers may remember my project to build a 15xx tank loco. This is as far as I got but this may hopefully change as Warren shepherd who does a kit in 7mm scale is considering a 4mm scale version. http://www.warrenshephard.com/gwr.htm
He needs at least 24 firm sales to make it viable and expressions of interest are being collected on the GWR modellers Facebook group https://www.facebook.com/groups/921387308231483/?ref=share
Project Coronation – Tender part 3
Moving on to the tender body…

Brassmasters supply a basic sub structure with different overlays for the 3 main types of tender found behind a Duchess.


This is the coal shute and front bulkhead assembly.

The 2 sub assemblies test fitted together.
Bashing Buildings
When it comes to building I admit I tend to just get on and scratchbuild them. Part of this is due to ignorance of whats actually out there but recently I picked up a couple of Wills kits and have had a go at these instead.

First up is the kit for a lamp store. You actually get 2 in the kit and these are for the slightly different GWR design but can be adapted to something more ‘midland’ pretty easily by shortening the sides to form a 6ft square structure. I cut out the door and remounted it flush as well as replacing the roof with thinner plasticard. On the other end I added a few extra window bars (see below).


The other kit was for the ‘station garage’ which i have chopped about to give a industrial looking wooden building. The roof again is plasticard (the wills stuff is quite thick) and the vents are from unit models.