Finishing touches
With a little over a month to go before Brettell Road is back on the road*, I’ve been finishing a few things off.
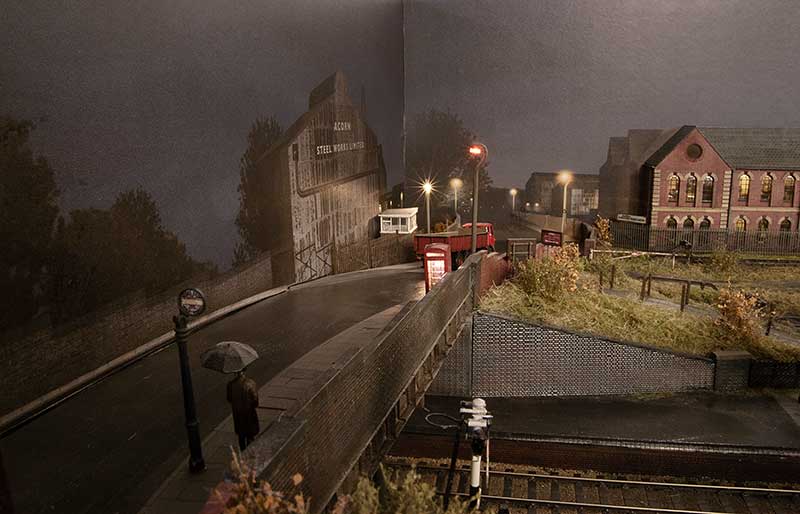
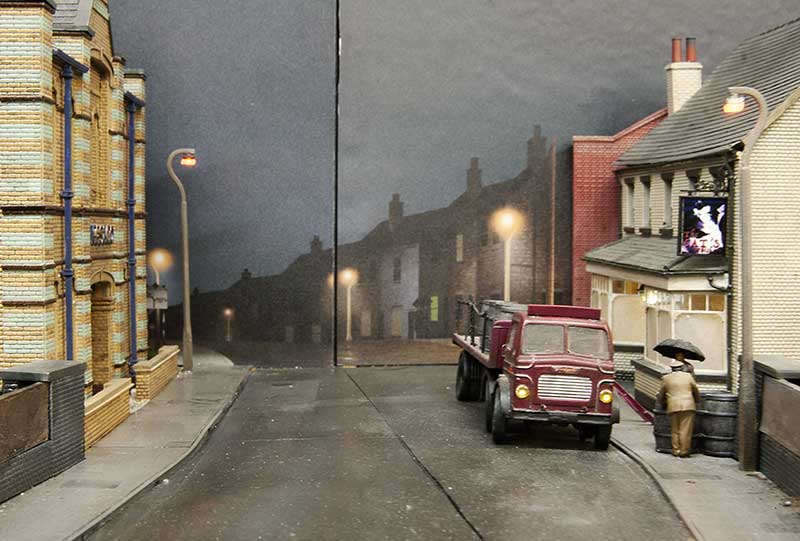 The last backscene is now in place so the road in the middle of the layout now gives the impression it goes somewhere. The Leyland Steer seems to have lost its licence plate somewhere.
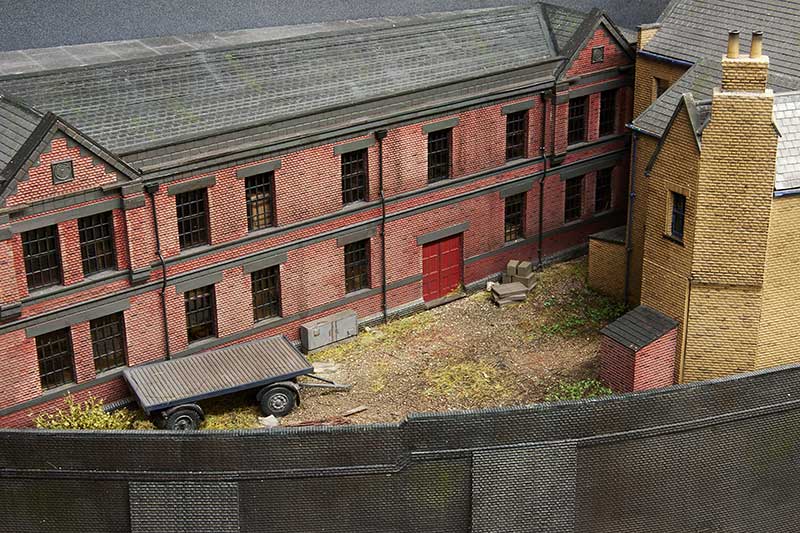 The little back yard on board 2 is done – I wanted a used but not particularly looked after feel.
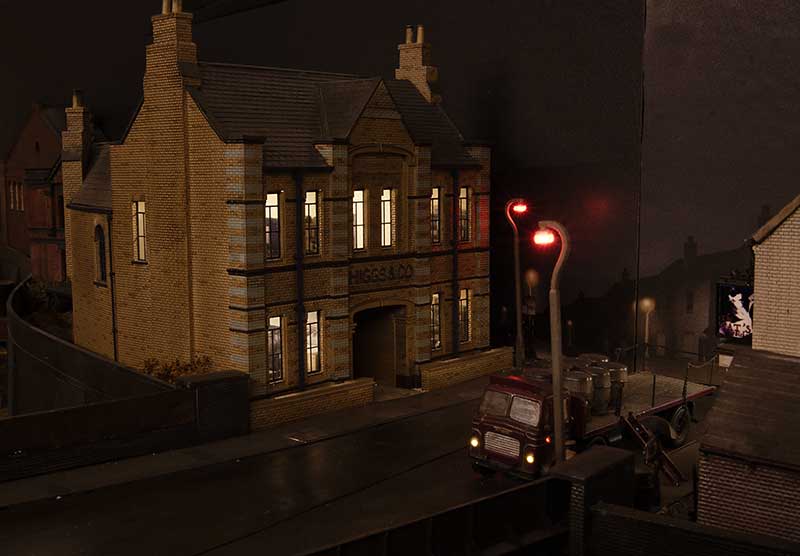 I realised I’ve not actually taken any images of this building in its finished state before now.
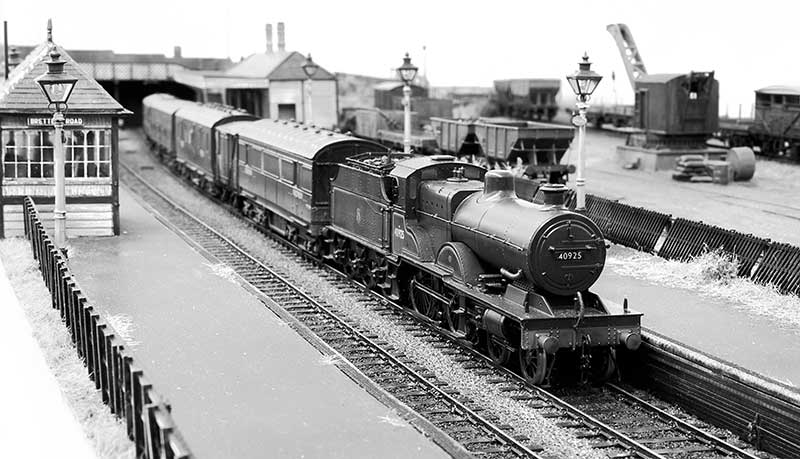
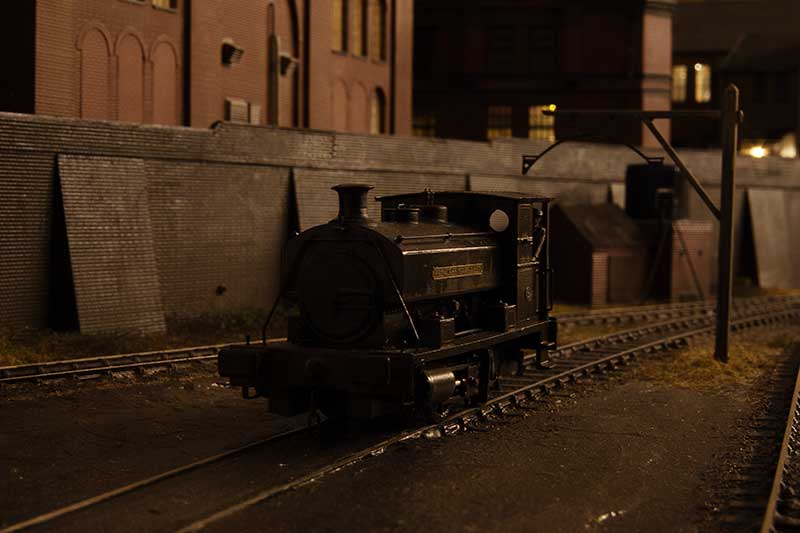 Princess Margaret heads back to the Wallows for the evening.
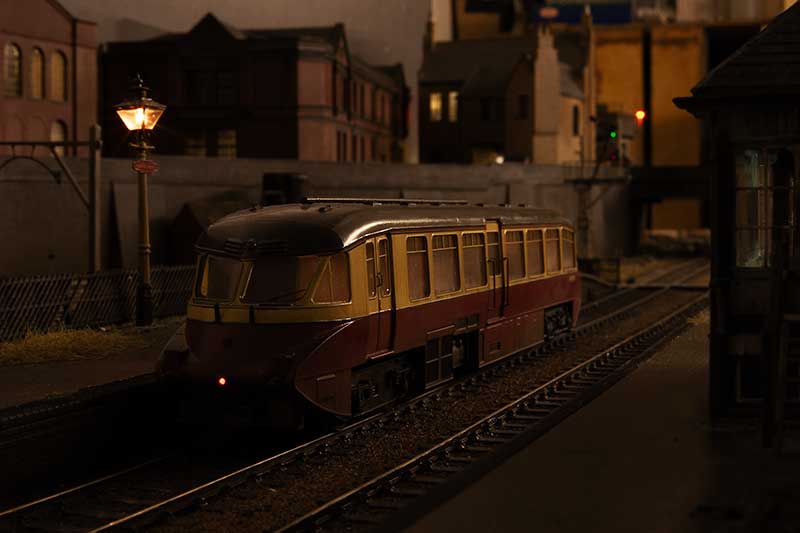 GWR railcar catches the last of the sun as it heads off to Dudley.
* The show is a local one on the 7th October. Click here for more info.
Back scenes done (well most of them anyway)
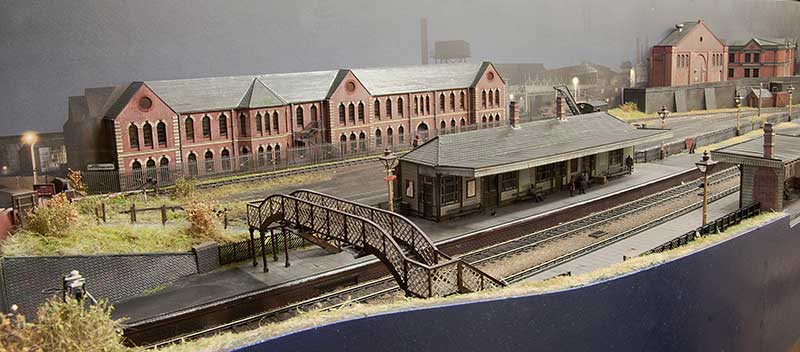 My Back scenes have been printed onto self adhesive vinyl and most of them mounted to the boards. Just the last one still to do. I used a local company who kindly did a couple of test prints so i could tweak the colours. Anyone local to Stourbridge area who are after something similar I can highly recommend them – SAC Graphics
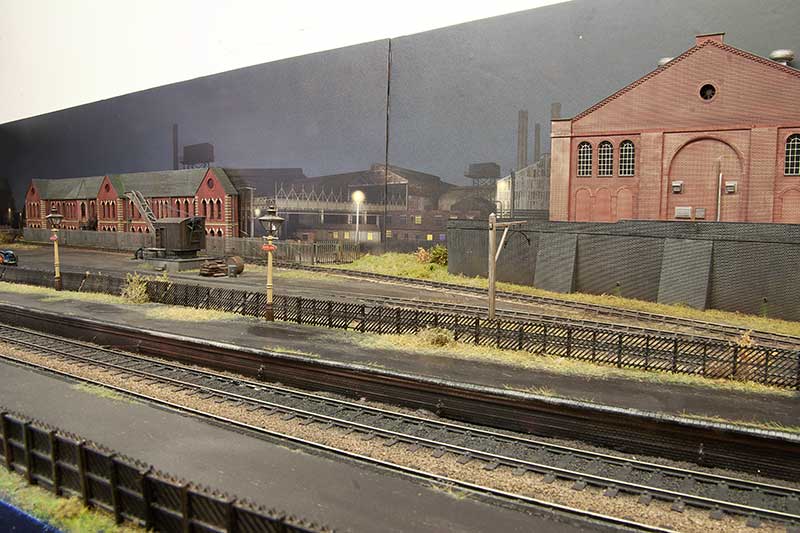
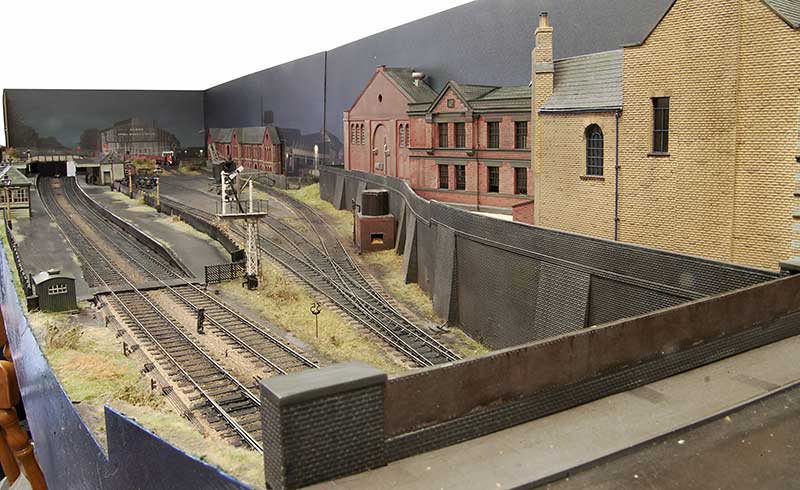
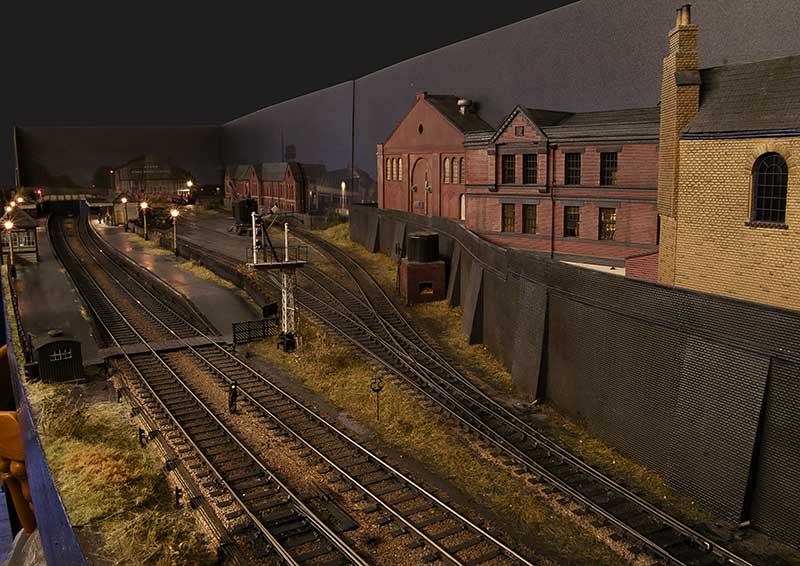
Below is how it looks in something close to the intended light.
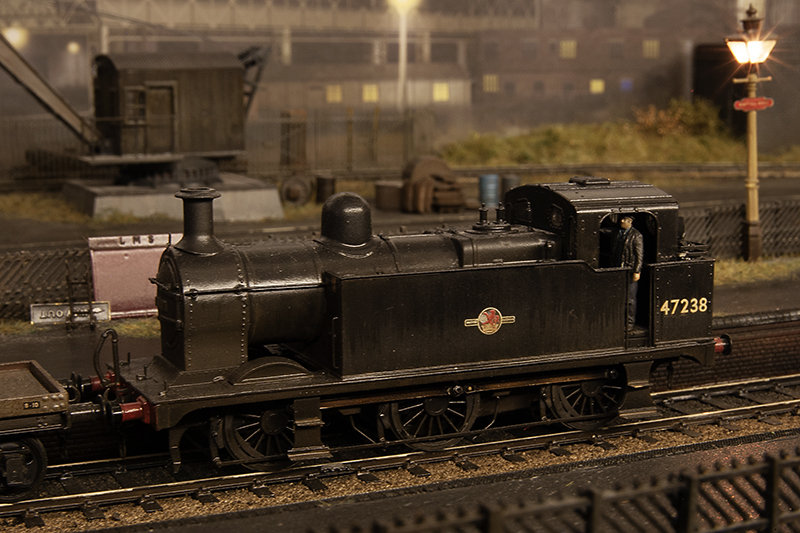
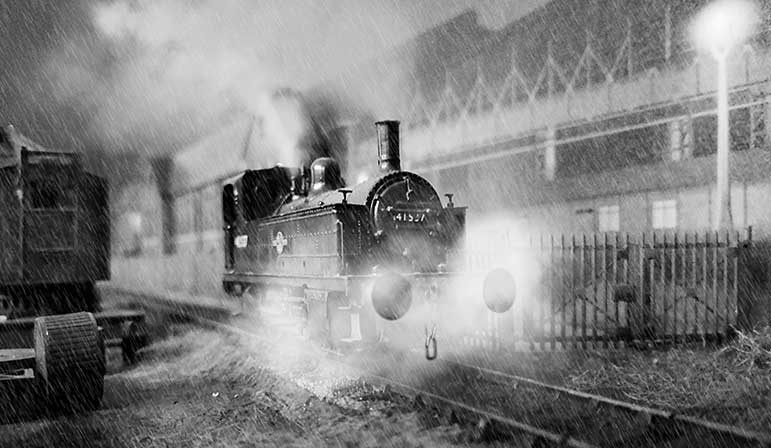
Haven’t done a bit of photoshopery for a while but i found a pic of a Deeley tank in a cloud of steam and thought I’d emulate it
simply back
Today, 21st June 2023 marks a small but significant date in the life of Brettell Road, in that it’s exactly 2 years since Tim and I first cut wood for the 2 new baseboards. I think it fair to say that a reasonable amount of modelling water has flowed under that particular bridge since that day and I’m now drawing in to the layouts final destination somewhat.
Drawing being the word as the big thing thats always been missing from any pictures of the new boards is the backscene. Long time readers may recall that this is an area of the layout that I have revisited on more than one occasion and, with every intention of this being the last time, I find myself deciding to get this particular subject closed off once and for all.
The method
The method I use is like modelling but in a 2 dimensional world rather than 3. Starting with drawing up the basic structure in much the same way as I do the modelled buildings.
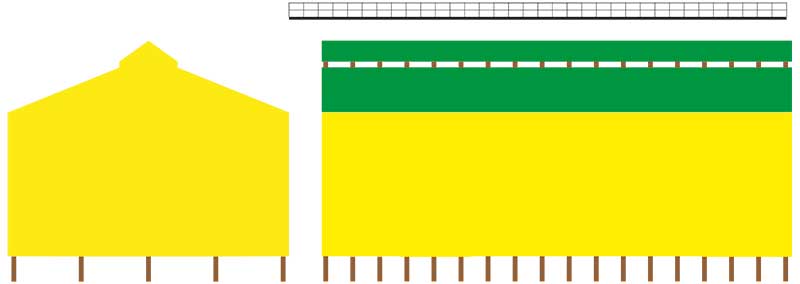 Above is the basic drawing of a typical industrial shed. Think of it like a kit of parts. This is done in Adobe Illustrator and the rather bright colours are simply so that they are easily selectable at the next stage.
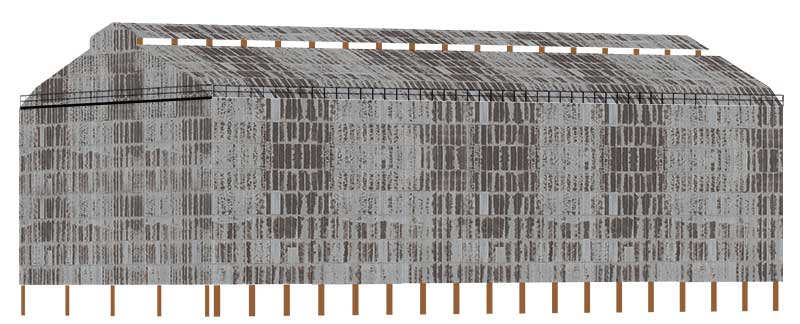 Which is to transfer the basic drawing to Photoshop where Scalescenes textures are overlaid and the bits ‘assembled’ into something resembling a basic 3d building. You will note theres no shading and no perspective yet.
 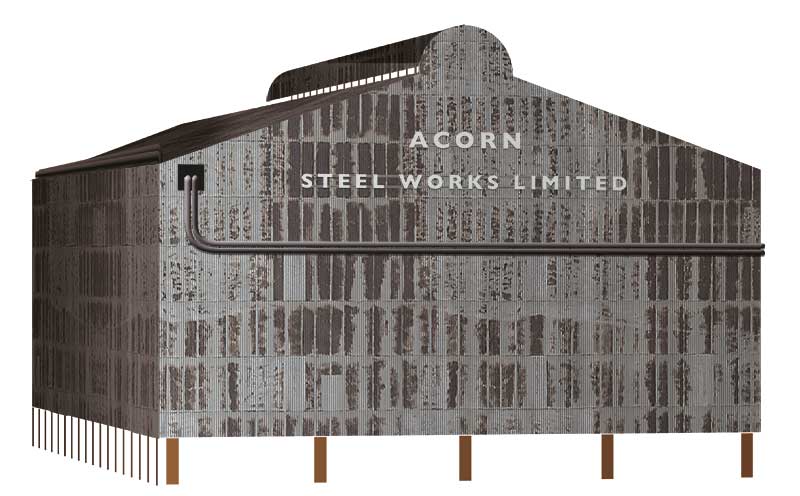 A different building showing some shading and some perspective. The image is still made up of separate parts in a folder so that I can fine tune it once applied to the finished backscene.
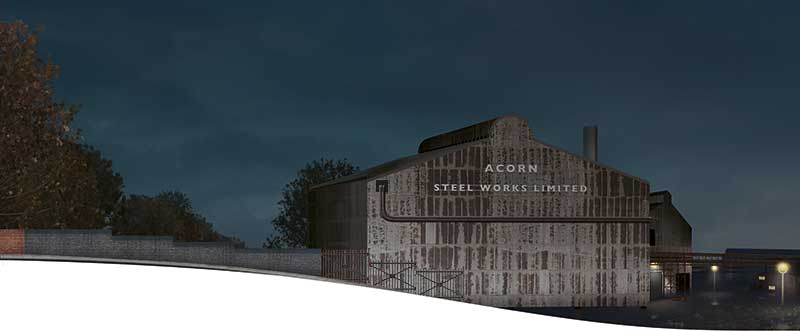 Of which this is the end board for the left of the layout. Some consideration, such as the metal fence, needs to be made for elements of the layout that will cross from the 3d world to the 2d one. The line the railway takes, under the bridge on the left is hinted at by the arrangement of the trees.
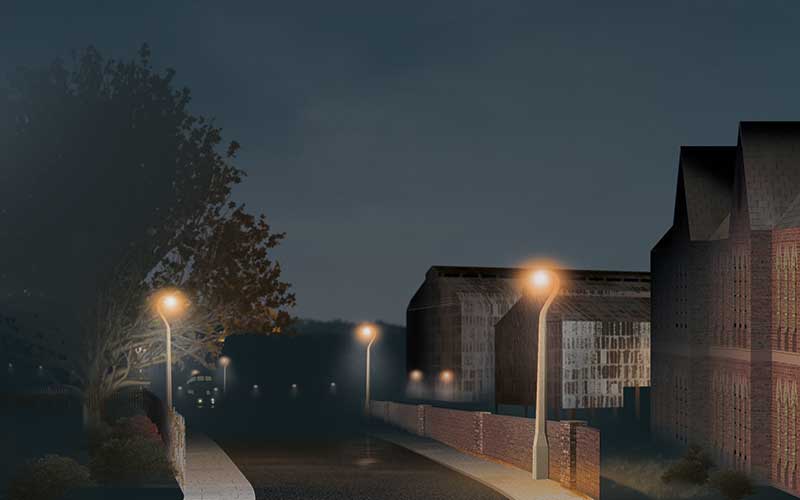 This is the view of the bottom of the hill on the left. Again the wall and the building on the right of the image are intended to match up with the 3d model.
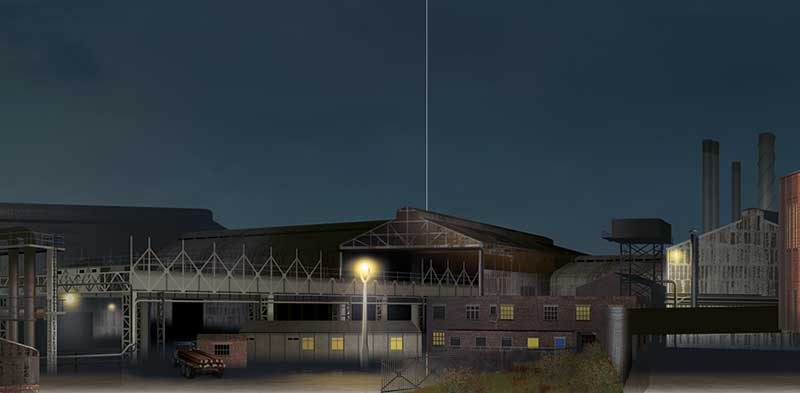 And finally the middle bit of the 2 new boards. Based on images of the real Round Oak. Of course the point of all this is that its there but not really all that noticeable at the same time.
Revised fiddleyard
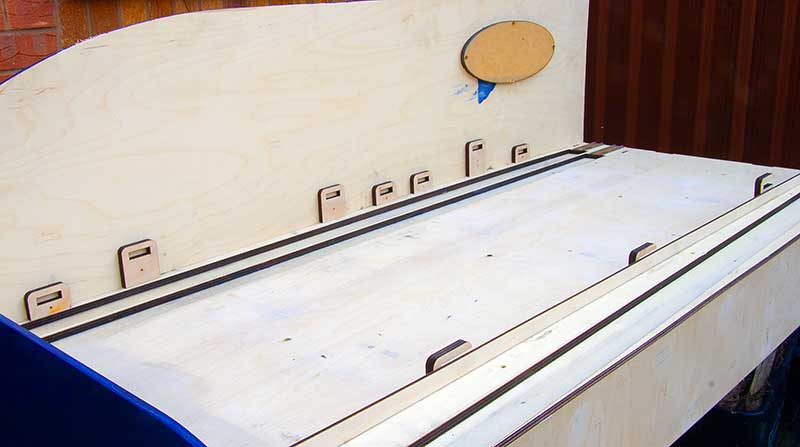 Ive mentioned before that enlarging Brettell Road would mean I need to build new fiddleyards. The reason for this is the way the cassette system worked was to have a recess in the board which given that the layout is now 2 tracks meant the old ones couldn’t really be made to fit. I also took the opportunity to make some improvements and the result can be seen above.
The boards are 6 inches longer and this time I’ve included a little barrier on the near side edge to stop anything falling off It never did but it was something that bothered me. 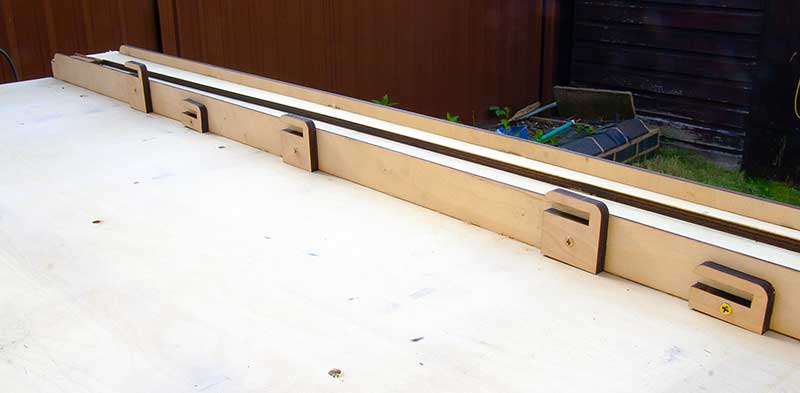 View from the front. I decided that the Round Oak industrials running on the mainline was a no-no, so now they will appear from the right of the layout behind the warehouse. As the mainline drops away this means that i needed a different level for this bit.
With the cassettes I have also made some improvements. The originals use 9mm ply which as it was unsupported did bend somewhat. I now have 3 sizes instead of the original 2. A short one for locos, A medium one for units and a long one for coaches/wagons. I have made the long and loco ones reversible but I only expect to reverse some of the locos.
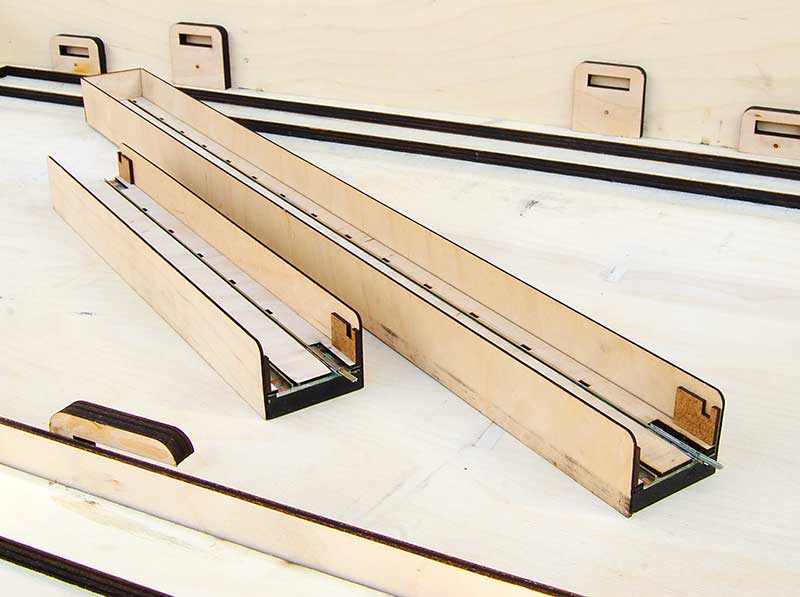 Pictured are the loco and unit versions. The base is 9mm MDF this time.
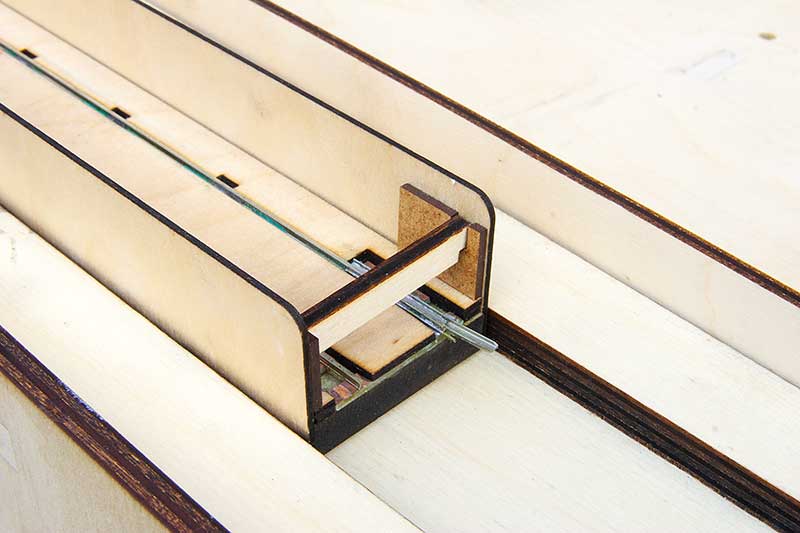 The little bits on the inner ends are for rudimentary buffer stops. This stops the trains running off the end but also adds a little security when lifting the cassettes so that nothing rolls off.
 The way they connect is a tweak on my original design of using a bit of flat bottom rail on its side – positioned in the web of the running rail for alignment and electrical connection. Originally these were both sides and the rails on the cassettes were angled outwards a little for a good fit. Making the loco cassettes reversible main this wouldn’t work and so a small bit of 0.6 straight wire is soldered to the inside of the web to help with alignment.

You may be wondering what the little blocks are for in the first 2 pictures.
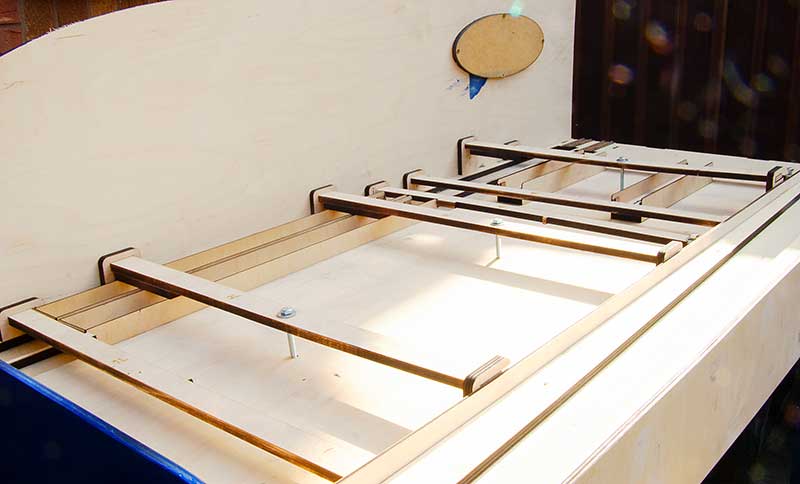 Taking a hint from Amlwch (a layout i used to help out with) I decided to make the storage of the cassettes integrated with the fiddleyards. This one will store the locos and units, the other one the long cassettes. Most of the braces slot in place meaning I can lock in place 8 unit cassettes with just 3 bolts and 16 loco cassettes with just 2. The less time spent faffing about at an exhibition the better!
Thanks as always to Tim for allowing me to hijack his laser cutters.
Heavyweights done
Just a super short post this time. The wagons featured last time are done and can be released into the wild.
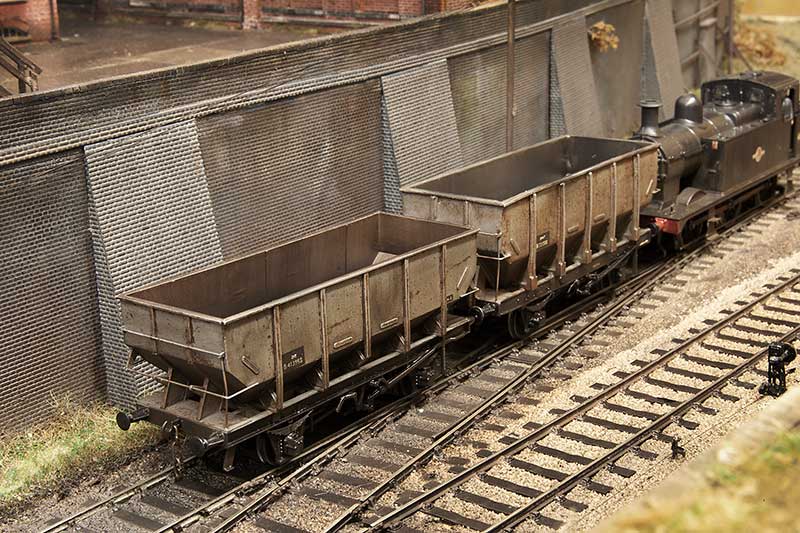
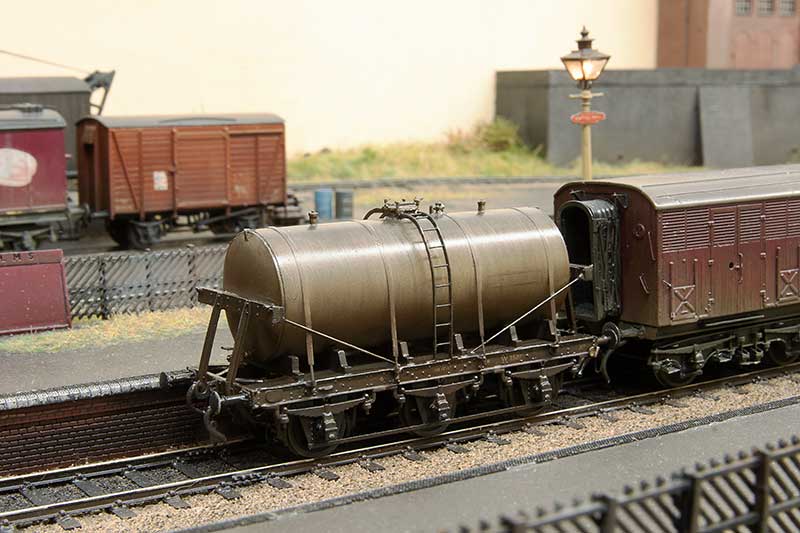
Is it just me or do metal kits always just seem a bit ‘meh’ once they are painted?
A couple of WIP heavyweights and breaking the golden rule.
When my friend Tom kindly gave me the Ks kit for the Coral glass wagon (featured earlier) he also gave me another Ks kit for the 24.5t coal hopper. Further investigation showed that this was a kit that was based on the prototype B333000 which was not really like the production ones in that the ends were different. I suppose back in the day this was your only option however now you can buy 24.5t hoppers ready to run this strange little oddity might have a little value as something different from what everyone else is doing.
B333000 was one of 2 prototypes and was built at Shildon. The other B333001 was built at Ashford and it seems to heave been this latter example that influenced the production run. I believe B333000 was later used for experimentation of the automated doors used for MGR trains but photos of it are rare as hens teeth. Simon Bendall kindly supplied the only picture I had to work from.
So, breaking a golden rule I have had to make educated guesses about some of the details of this wagon. The underframe in Simons picture is very dark and looked to have been modified in some way. It was claimed the Shildon design was basically a taller 21 ton hopper and the lack of outer discharge doors kind of backs that up. So getting hold of a parkside 21t kit to use as a guide I set to work.
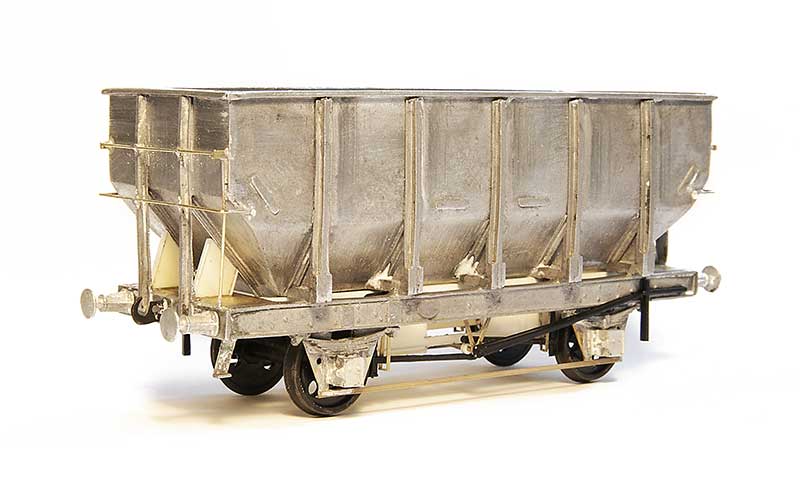
The hopper had some chunky mouldings on the inside of the corners that gave quite a positive location. But as I wanted it to be empty they had to go. I replaced the W Irons with Bill Bedford sprung ones (from my nearly depleted stocks) and Wizard model axle boxes. These were soldered in place as supplied and when I was happy everything was square the centre of the w irons was cut away to give an open floor. The end platforms were replaced with a bit of brass as the moulded ones sat on top of the solebars and were too thick. The kit had no hopper doors so these were made from plasticard using a parkside 21t hopper kit as a guide.
The finished wagon (well almost finished – I haven’t added the door mechanism handles yet) is a bit of a heavyweight in that its 78 grammes. About 50% more than my usual target of 50g.
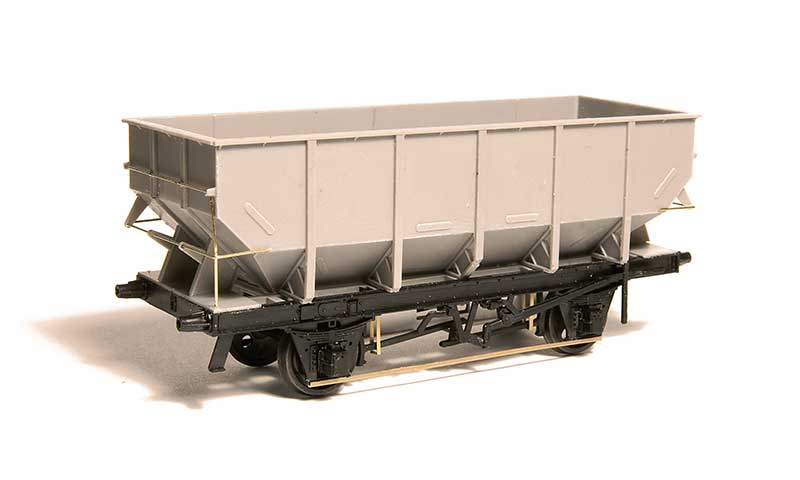
The parkside kit built up. This is the opposite of the Ks kit as while i added some lead overlays to the inside lower hopper its a tad light at only 38g.
Moving away from hoppers I’ve also finished of the construction phase of this…
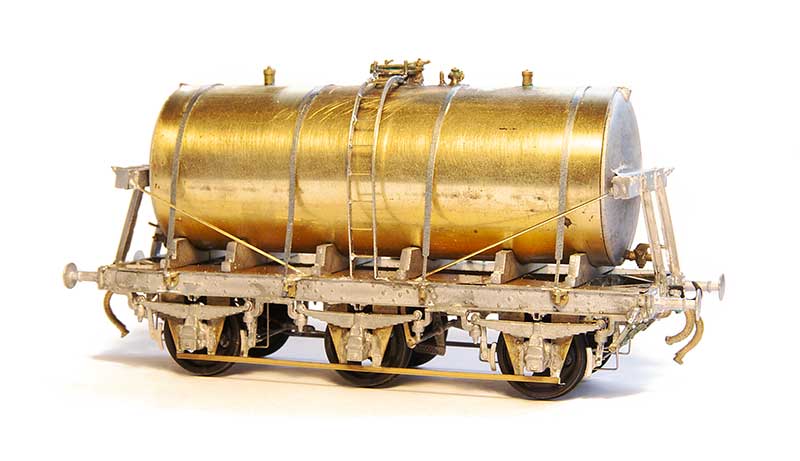
A David Geen milk tank which I was told by the man himself when I brought it was the last one! This uses a Rumney models chassis and has, to be honest, been a bit of slow burner. Its one of those kits that I just seemed to struggle to get any enthusiasm for but I’m pleased with it now it’s done. I thought the hopper was heavy but this weighs in at 88 grammes!
Back to the beginning (and then a bit more too) Part 2
My 2441 tank is now done. Heres some images
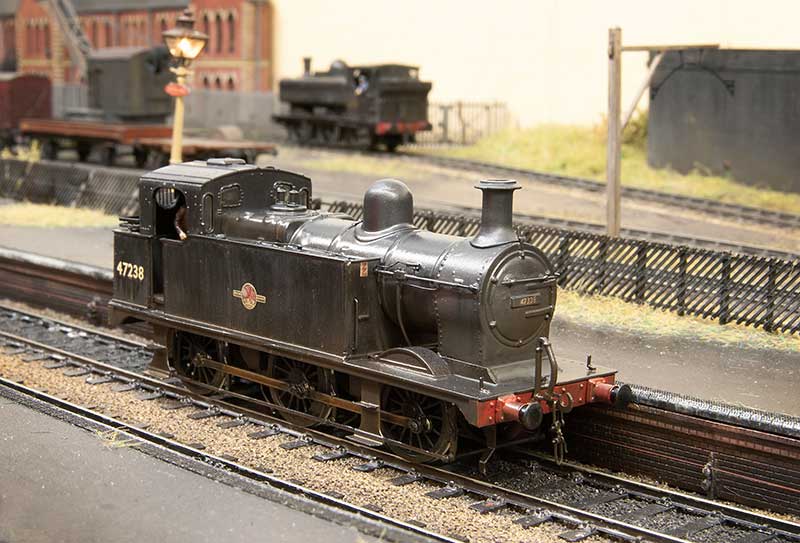 I will need to straighten that station lamp. It’s amazing how things are so obvious in a photo but equally so invisible to the naked eye!
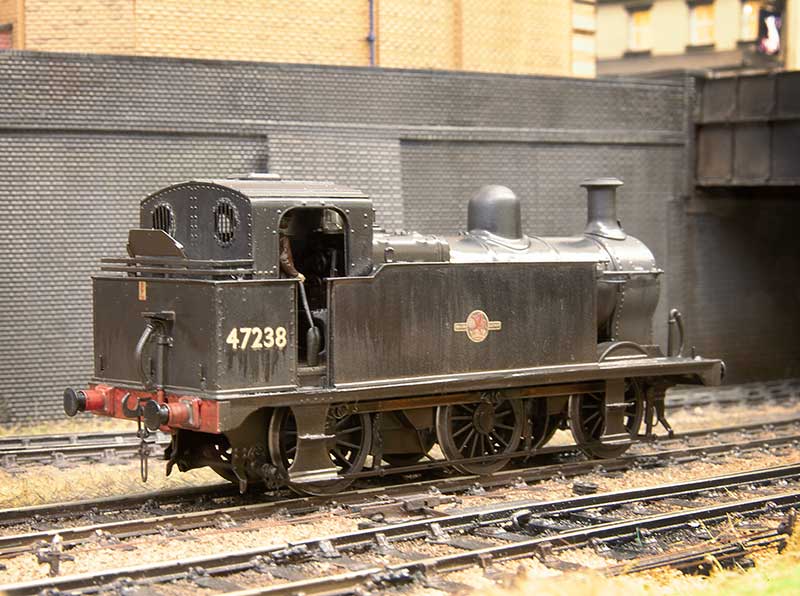
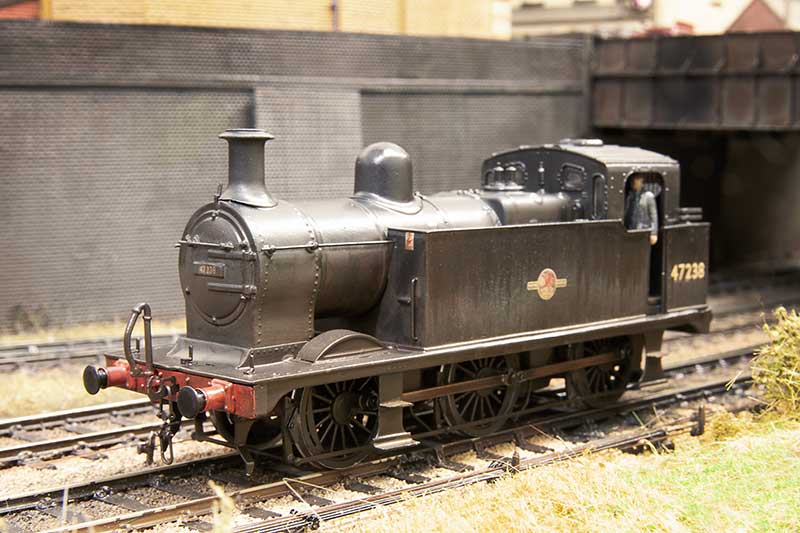 Crew by Modelu which is pretty much standard these days
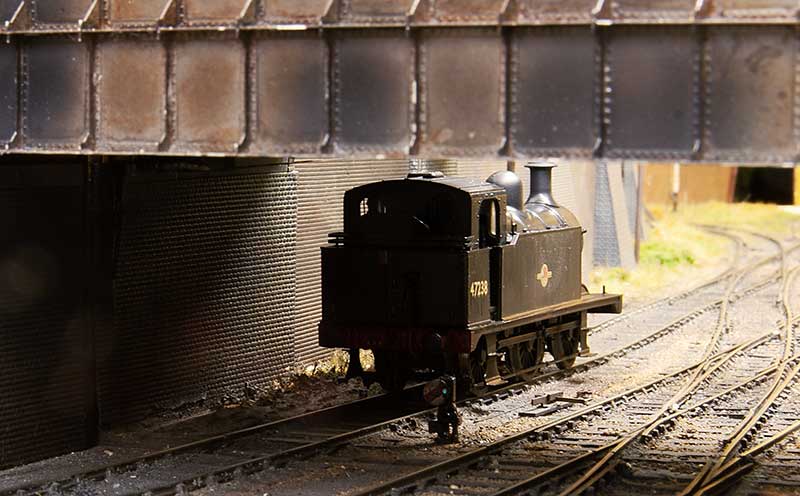
Lurking
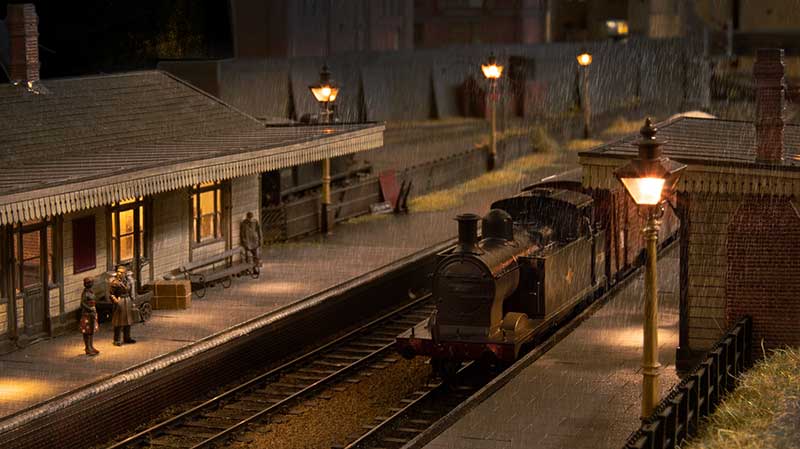
Back to the beginning (and then a bit more too)
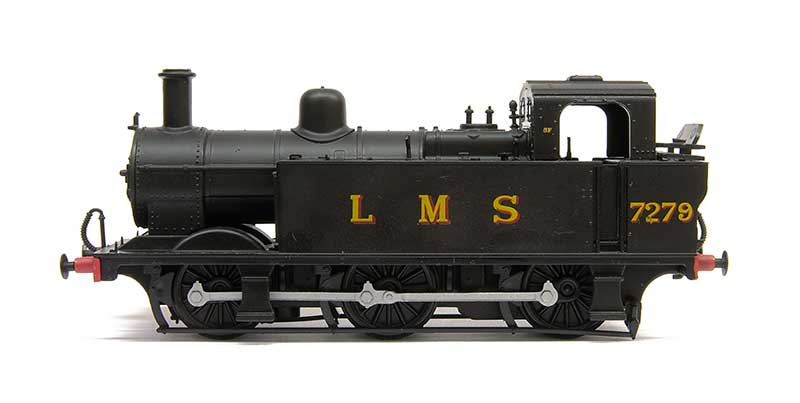 The Great British Locomotives Jinty. The model that started this whole diversion into the late 50s era. When they first appeared (as part of a magazine series) they were so cheap that I brought a second one just so I could do a before and after picture.
Recently I dug it out but I didn’t want to just do another Jinty so my focus has been on its predecessor, the Johnson designed Midland 2441 class. Just for a little bit of clarity before we go any further both classes were referred to as Jinty’s or Jocko’s so going forward, if I mention Jinty’s I mean the later LMS Fowler 3f.
So the 2441 class. The Midland built 60 of these which were considered as heavy goods tank engines. They were later rebuilt by Fowler which made them look very similar indeed to a Jinty. Initially there were 2 distinct types. with or without condensing apparatus. For those interested in these locos theres a good book on the subject, Midlands Engines No.5 by David Hunt, Bob Essery and Fred James (ISBN 1-874103-94-1)
The Model
Work required can be broken down into 2 areas. Stuff you might want to do anyway and stuff you will need to do to depict the 2441 class. Let’s start with the stuff you might want to do anyway.
The handrails need replacing as do the lamp irons. The Chimney is a bit naff as are the safety valves and whistle. The coal rail is too chunky and the buffers are somewhat generic. The steps would benefit from something a little more refined.
For the 2441 specific bits the smokebox needs to be shortened and its saddle is a different shape. The Dome is also a different shape (more rounded) although I believe some had the more flattened off type. The front splashers are different too. The biggie is the tank sides which are taller and drop down by the cab area to be a little lower than a Jinty. The bunker is also lower and squarer with no overhang. The footplate is actually a little longer on these locos and the fairing at the ends is different.
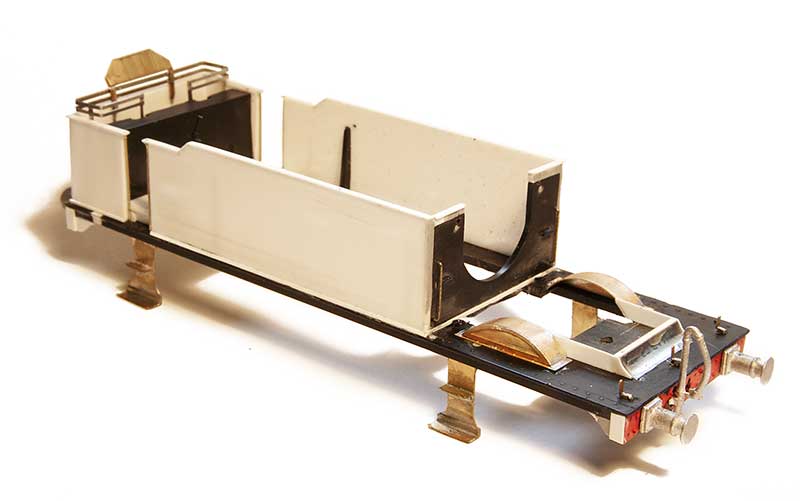 So let’s start with the footplate. The body of the model separates into 3 parts. The footplate, tank sides and bunker. The boiler, smokebox and tank tops and the upper part of the cab. Handily everything is plastic so carving it up is easy. I believe that the Bachmann Jinty has a cast metal footplate so it might be a bit more tricky.
The tank sides and bunker are from 30thou plasticard topped with microstrip. The coal rails come from my spares box (Brassmasters 1f etch) and the steps are from Mainly Trains. Splashers are also from Brassmasters (1f again) and the buffers and vac pipes are from Lanarkshire models. The lamp irons are from Stenson models. You can see at the back of the footplate where it’s been lengthened.
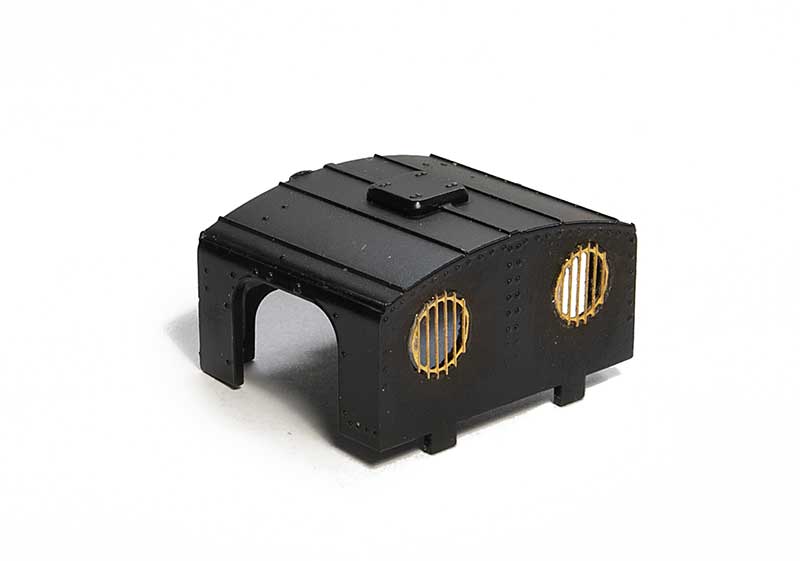 Not a lot to do the cab. New rear spectacle plates from Mainly trains.
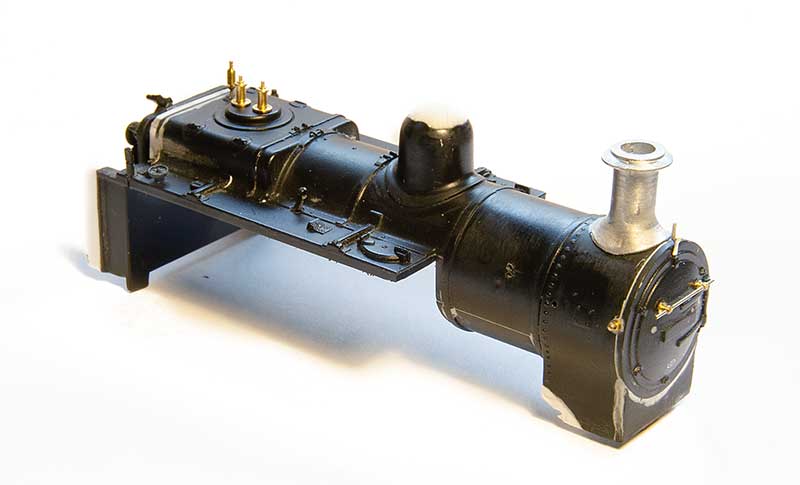 The Boiler. I cut the smokebox back and remounted the front piece (which is separate). It seems that the condenser fitted locos had the handrail below the upper hinge like a Jinty but the others has it mounted above the hinge. Chimney is from my spares box (Brassmasters Jinty detailing kit I think) and the safety valves and whistles are from Markits. The top of the dome had been filled and blended into a new shape.
When it comes to the tank tops, the drawings show the filler caps to be more central and they certainly would need to be on the condensing locos as theres a big pipe in the way. However pictures of the non condensing ones show what looks like the bracket at the front of the tank indicating that they might be at the front as seen on the model.
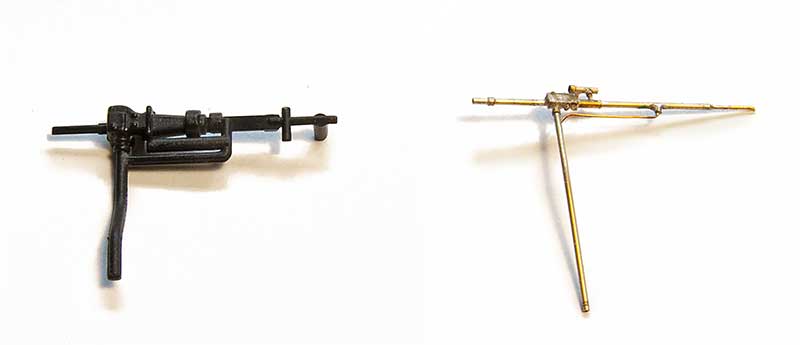 A little bit of fiddlyness for the ejectors. The moulded one is a bit clunky and I believe depicts a combined large and small Ejector. When I did my other Jinty I used a cast detailing part for this from (I think) London Road Models. Some 2441 class locos had these. The fiddly one depicts an earlier type and is cobbled together from 0.4mm wire with 0.6 and 0.8mm tubing.
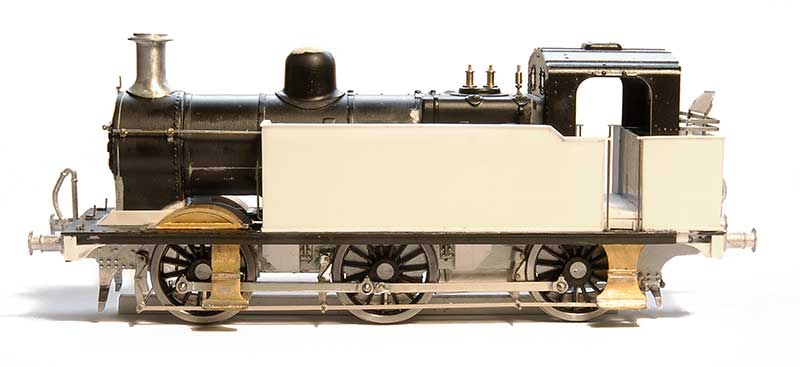 The assembled loco (so far) The chassis is a High level Jinty with the frames altered to be shallower. Otherwise it’s built as per the kit. I didn’t go for working inside motion as you really cant see it at all on these locos.
Steel and Glass
Let’s talk about glass. Something Stourbridge is particularly renowned for. It is believed that there has been glass production in the area for hundreds of years with a factory opening at the lower end of what is now Brettell Lane in the 1640s and production continuing in the area ever since.
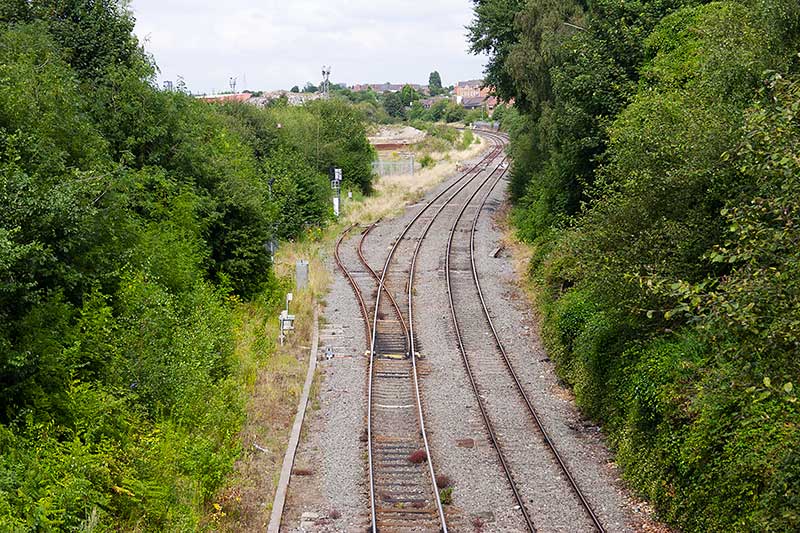 You’re going to need your imagination for this bit! Regular readers will know that Brettell Road is not an accurate model of the real Brettell lane but is inspired by it and the local area. The above picture taken in August 2014 (that long already?) shows what was left of the goods yard at Moor Lane. Brettell Lane is behind us. The line to Pensnett branched off on the left and the yard is petty much straight ahead of us. You can see the flood lights against the skyline. This was the view from the left hand end of the original version of Brettell Road and is now the view from the middle looking to the right. On the model the line is not an S curve but a continuous left hand bend. Also the main line descends from this point on the layout while the real line rises as it goes away from us.
On the right, long gone now, there used to be a siding which served the Brierley Hill glassworks. The buildings are still there and can just be seen behind the trees in the distance where the mainline disappears.
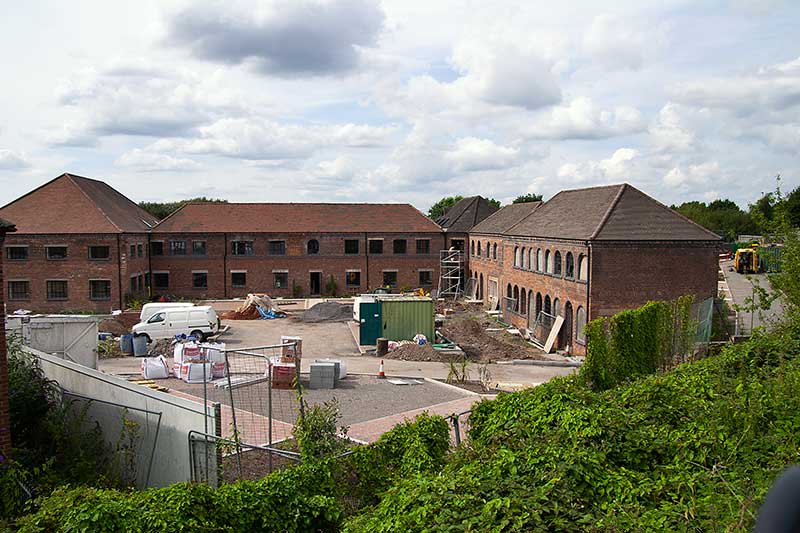 Another view from 2014 that shows the building being converted into apartments. If you stand looking at the right hand end of the layout you would effectively be standing in this building. The line runs behind it and you can just make out the ironwork of Moor Lane Bridge on the right of the picture above the yellow van. This building is represented on the layout as part of the backscene.
Brierley Hill glass was more of the decorative, cut glass and crystal type than the industrial large sheets and I have a few shockvans as a nod to glass traffic but of course they could be carrying anything so only I know that. However thanks to a gift from my friend Tom i now have something a little more obvious…
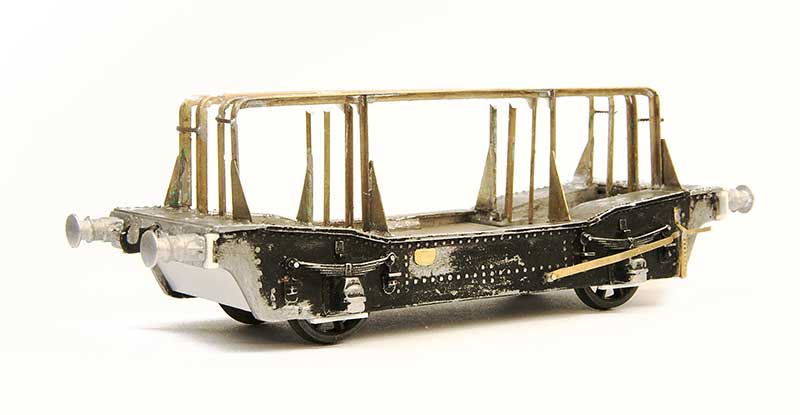 I present you the ancient K’s kit for the GWR Coral glass wagon. These were built in 1908, to 2 diagrams, by Swindon to carry large plate glass in crates. BR briefly continued with these building 6 more examples before switching to the LMS design but even then only building 42 wagons (also at Swindon).
I decided to build one of the BR types with the main differences being (as far as i can tell) the shape of the ends of the frames, the GWR ones being more curvy, and the brake levers. The model had been started by Tom’s dad but was dunked in some cellulose thinners which dissolved the glue (but not the paint strangely) before it was reassembled using low melt solder. The kit had some nice brass buffers which were replaced with Lanarkshire models which better match the BR examples. The upper frames were cast in whitemetal and there were only 2 of them so they were replaced with brass section. A part of the original casting was soldered to the end of the underframe and reshaped to better match the BR design. I used the slotted bearing and central pivot method of compensation as previously used on my lowmac. 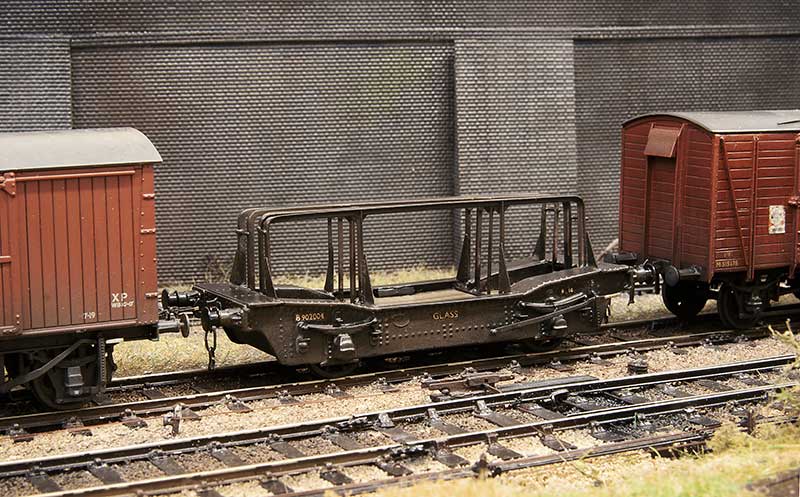 In service on the layout. As mentioned its not really the sort of glass that Brierley Hill was known for but it is a nod to the industry. Apparently some of the real wagons were transferred to the steel industry anyway so perhaps its on trial in the area for that reason instead?
Thanks go to Tom and his dad.
A couple of classics
This time we have a couple of classics from the Cambrian range
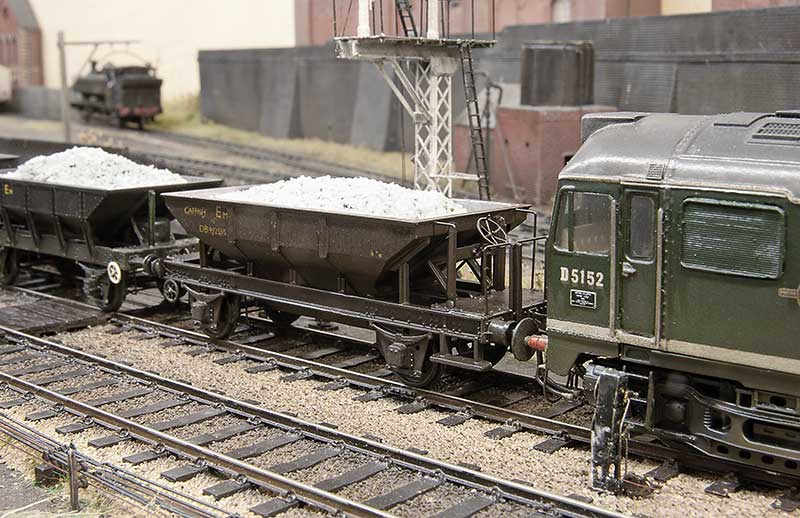 The good old catfish. Built with the use of Stenson models hand wheels and replacement handrails. One thing with these, as supplied, is that the wheels seem a long way away from the w W-irons, even in P4 so I cut the moulded rings off the back and moved the solebars closer together. A lot of people say these are a bit tricky but the only real difference to any other kit is you just need to take a lot longer and really let things set. They aren’t really a bung it together in an afternoon style job. I found another 2 kits in my stash which i will build up for New Street and might do a bit of a step by step on how to do them.
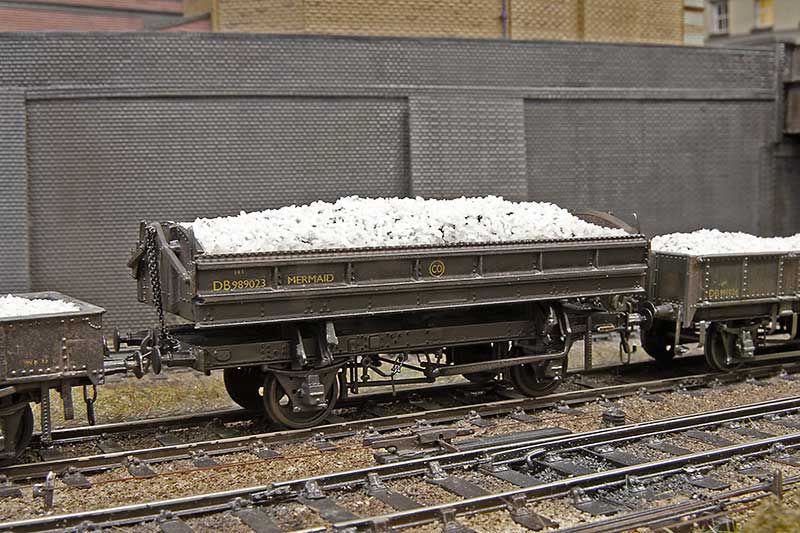 Next up the mermaid. I have built this as an early one which were the same as the original GWR builds. The main difference is push rod brakes instead of clasp, no vacuum brakes and earlier buffers. The rail clamps were replaced with Roxey mouldings shackles.
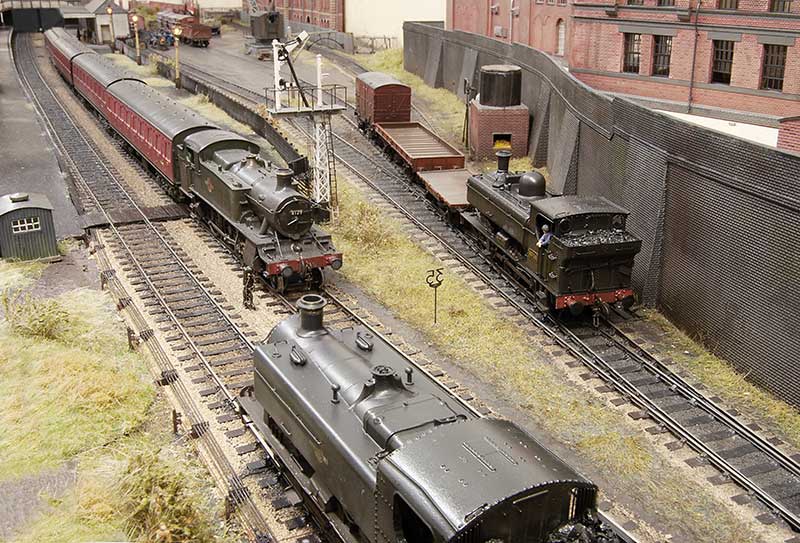
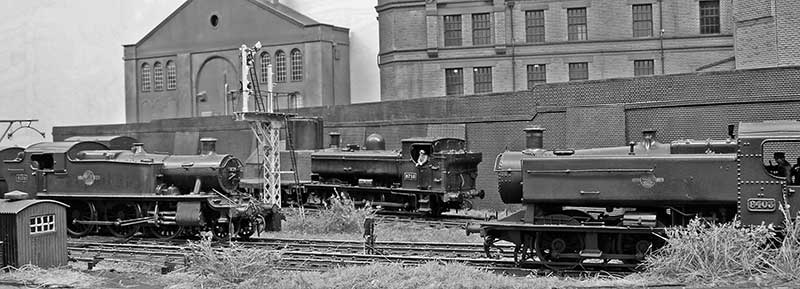
Below – It seems Brettell Road has had something of a GWR take over today!
LMS iron ore hopper
Let’s start with a little observation. Modelling railways is expensive these days, the reason for this has been discussed elsewhere but if I were starting out now I certainly wouldn’t be able to afford it. I actually think the prices are what they are but there are one or 2 things where manufacturers really are taking the mick.
Case in point is the 24ton LMS iron ore hopper. Firstly its not one, at all! Basically yes it is a hopper but thats about it. It’s a loose model of the Charles Roberts hopper with a body stretched to fit a generic 10ft chassis. When you consider that this model first appeared in the 1977-78 mainline railways catalogue charging nearly £30 rrp for a completely wrong, very old tooled model is a fictitious livery is more than a little bit dodgy, Considering thousands of these are out there in various liveries for a fraction of the price you have to wonder who’s actually buying the things?
So let’s look at what this model attempts to be.
LMS hoppers are something of a gap in the RTR market as they have been hardly touched by either RTR or kit manufactures. I believe that the model is trying to masquerade as a diagram 1893-1942 iron ore hopper. From what i can tell these were all the same except for the materials used.
D1893 – 50 wagons built in 1934 by the Metropolitan Carriage, Wagon and Finance Company out of Chromador Steel
D1894 – 300 wagons built in 1934 by the trade out of mild steel
D1941 – 450 wagons built in 1936-38 by the trade out of copper bearing steel
D1942 – 100 wagons built in 1936 by the Gloucester Carriage and Wagon company out of an unspecified material.
Many of these lasted into the BR era and were cascaded to various steel works meaning theres quite a few liveries that can be done and an enterprising manufacturer can cash in on the current rise of interest in industrial modelling.
The model
While the RTR hoppers wheelbase of 10 ft is actually closer to the LMS wagons 10ft 6 than it is the Charles Roberts 9ft wheelbase theres nothing about the model that can really give you ahead start on constructing one of these so the easiest method is just to scratch-build one.
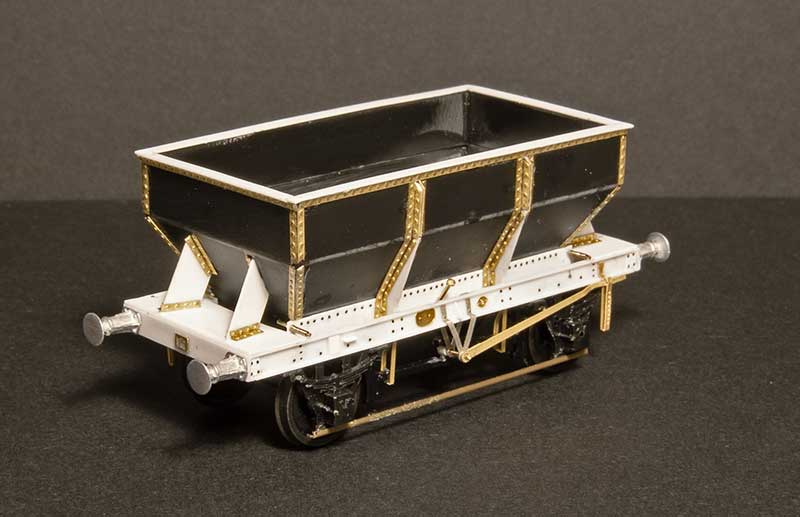 Which is what I did. Construction is plasticard with evergreen sections for the chassis and rivet strips from Mainly Trains or transfers from Archers. Buffers are from Lanarkshire models and underframe ironwork from Ambis and Bill Bedford. The axleguards, axle boxes and springs are salvaged from parkside kits. Drawings in LMS wagons volume 1 were used as a guide.
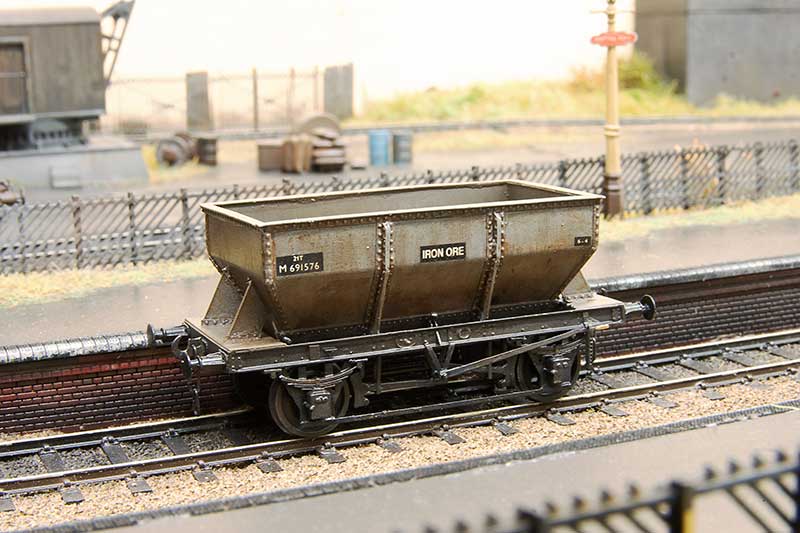 Painted up with transfers from Modelmaster and Fox.
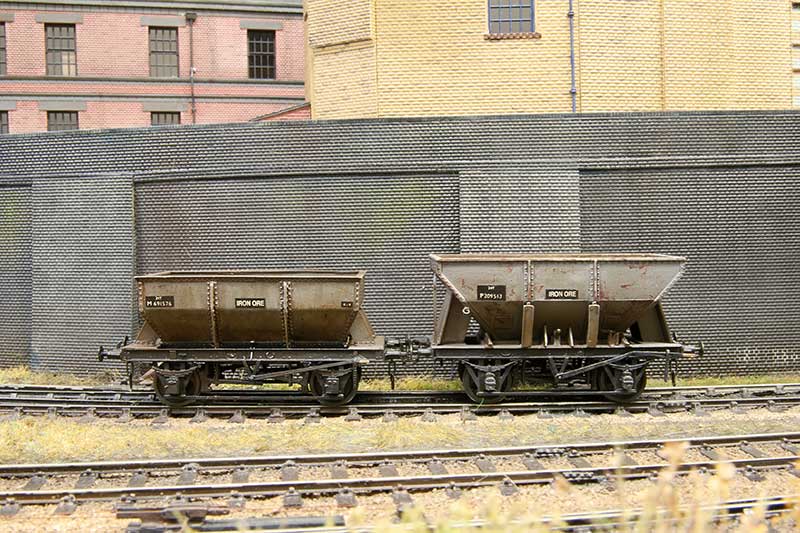 Comparison with the Charles Roberts wagon on the right. This has been shortened and rebuilt on a 9ft chassis so its not a direct comparison with the RTR model as supplied. To see what I did to that one click here)
An unremarkable little tank engine – Part 2
Thoughts turn to the remaining detailing on the body of my 57xx tank. I like to take pictures pre paint for prosperity before it all disappears under plain black and grime and no one really notices what you’ve done anymore!
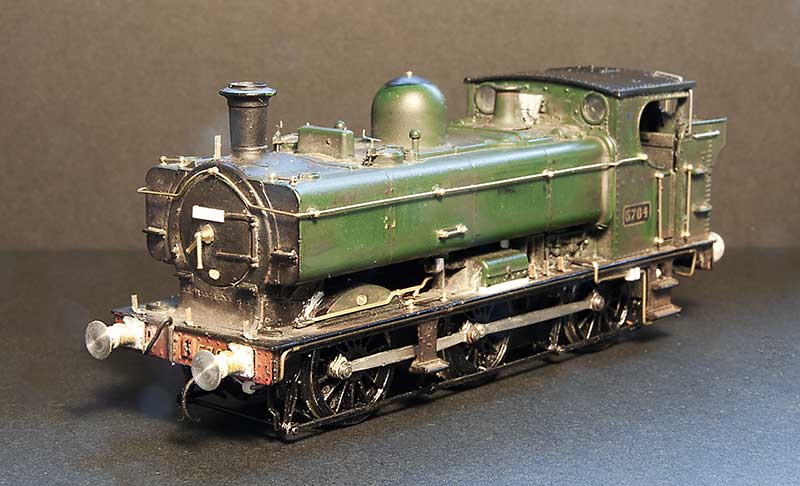 Front 3 quarter view. You will notice that the buffers are different. Due to a timely new casting arriving from Lanarkshire models. Lamp irons are from Masokits and the sanding levers from RT models.
 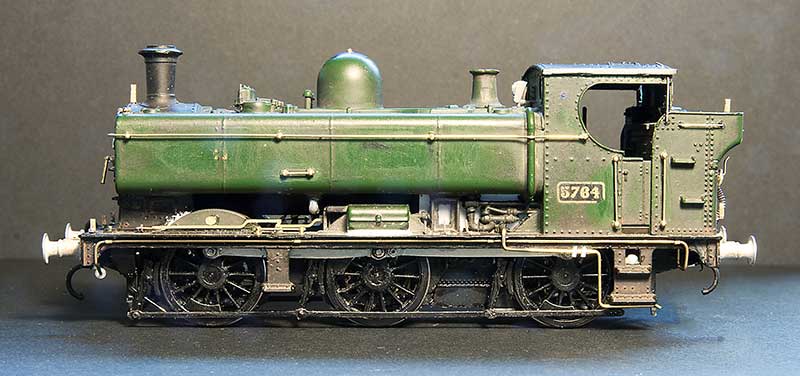 The footplate pipework has been replaced with wire The Whistle shield is from Modelu reinforced with a bit of wire. The tool box seemed a little ‘floaty’ as mainline had modelled it so I filled in the gap and re-scribed a finer one.
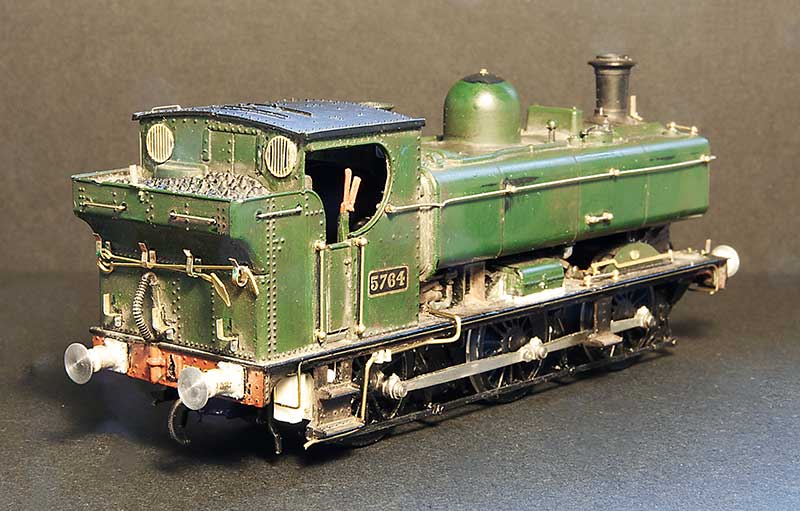 Rear view. The fire irons are from Springside Models and the rear windows from Mainly Trains (now Wizard models). I’ve thinned down the cab sides
 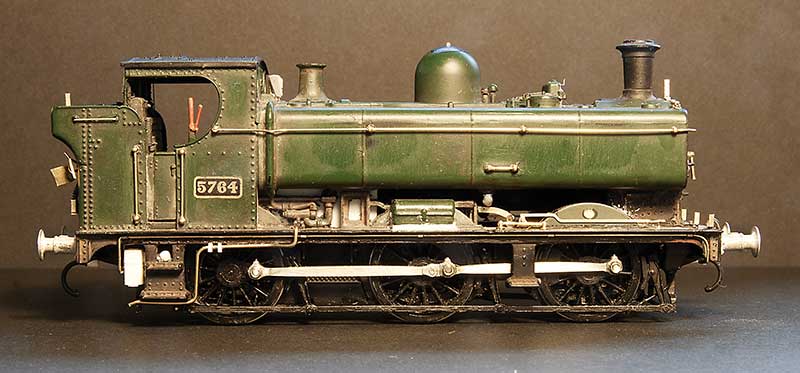 I tried to do the water balancing pipe as one piece secured by magnets but as its all a little bit small the magnets weren’t really strong enough. I had fears of it falling off and causing havoc with the inside motion so I had to settle for it being in 3 parts instead. Not sure what the little box is behind the rear footstep not all locos had them. I think it might be related to the AWS gear.
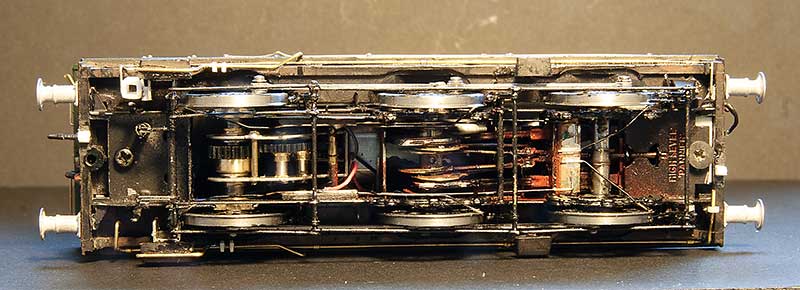
Underside view – you can just make out the way the pickups are arranged.
My intended victim for this model was 8718 which in Brettell Lane era was a Kidderminster Loco. It later went to Stourbridge where it lost its number plates and gained painted on numbers in a reasonable attempt at the GWR font. I preferred the proper number plate. Searching for pictures I couldn’t make out a BR logo on the tank sides. A request to the GWR modellers and British Railways Steam era 1948 to 1968 facebook groups didn’t yield any answers either so reverting to my ‘model what you see, not what you think you know’ approach I left the logo off.
Below a few images of the finished loco. The crew are the customary Modelu products.
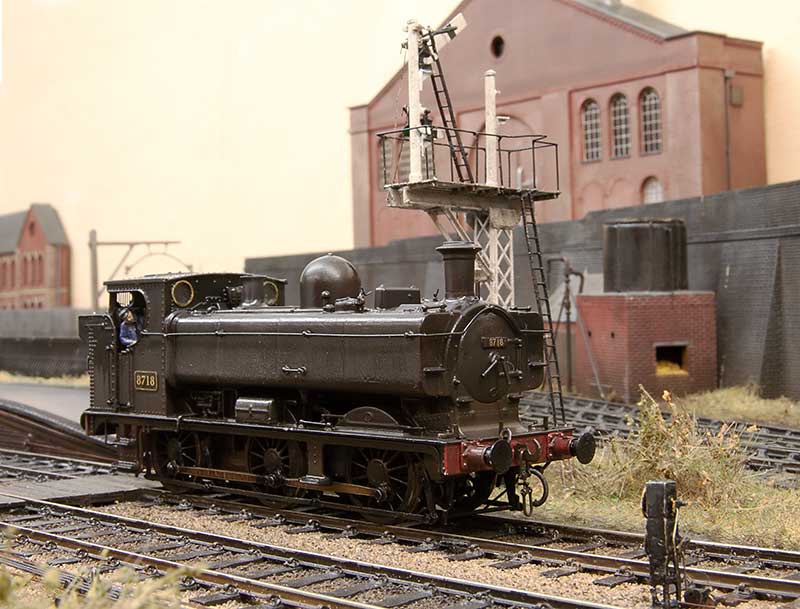
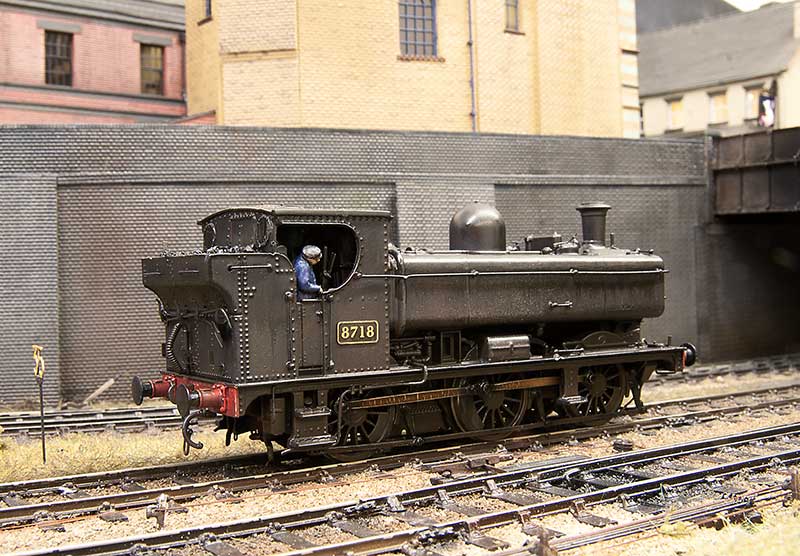
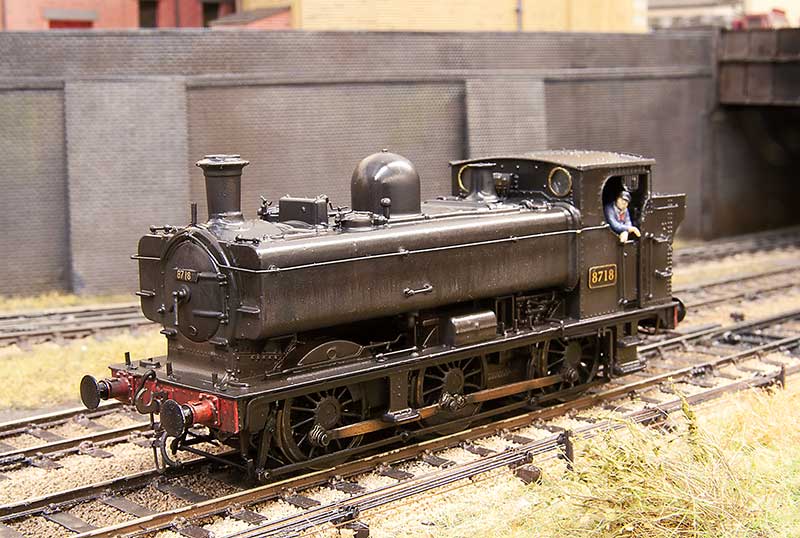
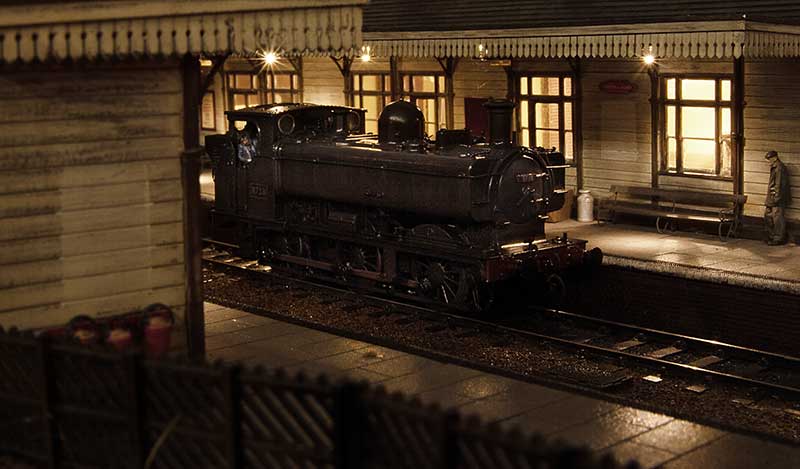
So there you have it – An unremarkable little tank engine.
An unremarkable little tank engine – Part 1
One of my slow burning projects has been a humble little 57xx tank. A combination of the old (But essentially quite good) Mainline body and a High Level Kits chassis but with a bit of twist.
Iain Rice wrote about these back in MRJ 61 and 62 using a similar route, in his case using a Perseverance chassis as that was what was available around the time, and I would urge readers to refer to this as a start point.
The High Level chassis
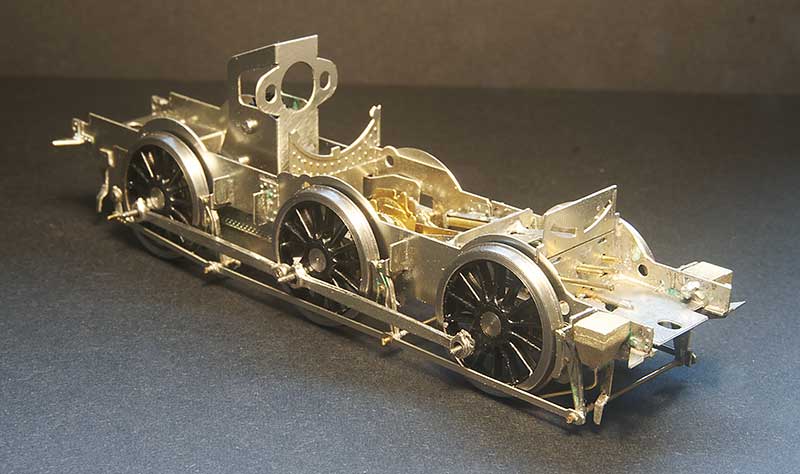 Like all of Chris’ chassis this was a joy to build (this is my 4th of his chassis kits now, who would have thought it?) I opted to use Brassmasters bearings which may have messed the alignment up a little as I found I needed to mount the break gear 1 mm lower than as supplied. Strangely though the buffer height seems fine. I differed a little bit from the instructions by making all of the brake gear removable. The rear rods that go behind the wheels seems to trap the rear axle in place as supplied.
Eagle eyed viewers might spot something little odd and yes, you’ve guessed it – I’ve gone off piste again.
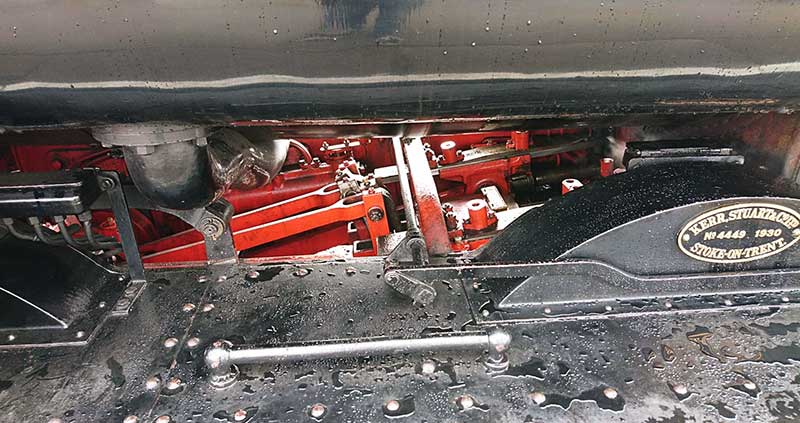
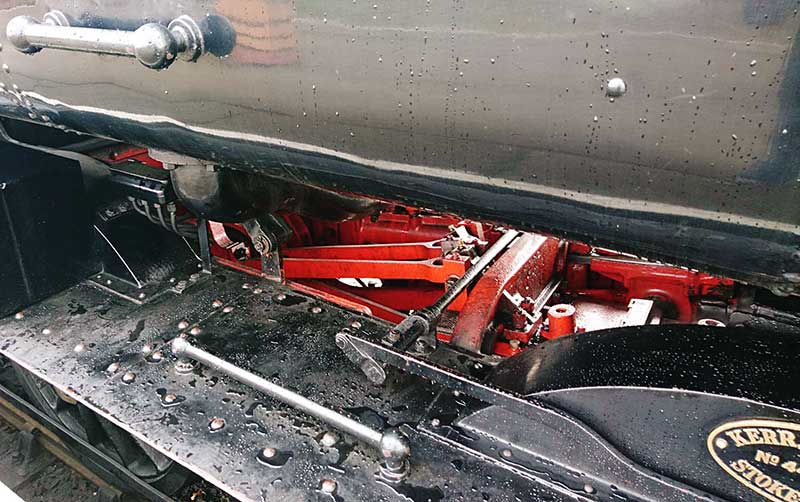 A couple of prototype pics from the Severn Valley. Personally i though the inside motion was pretty obvious looking at the real thing and while there is a representation of it in the High Level Kit I wanted it to move.
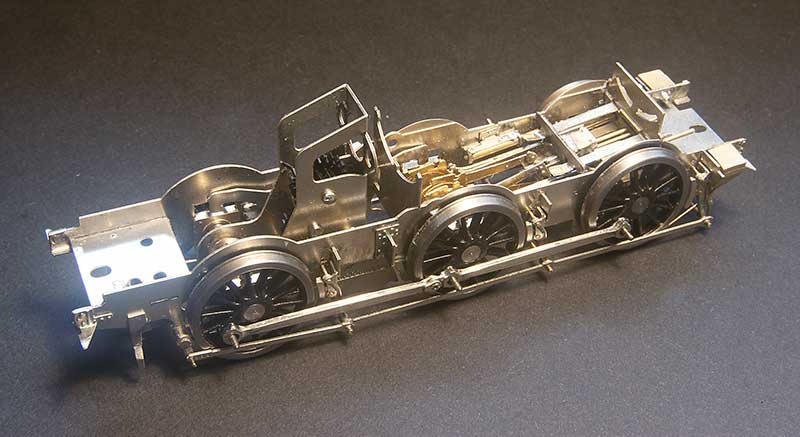 So this is a mish mash of bits – Brassmasters 4f bits at the axle end and Finney GW bits at the front. The GWR version of inside motion seems much simpler that the midland one and the hardest part of this task wasn’t putting it all together but getting it in place. Being a small loco theres not a huge amount of wiggle room.
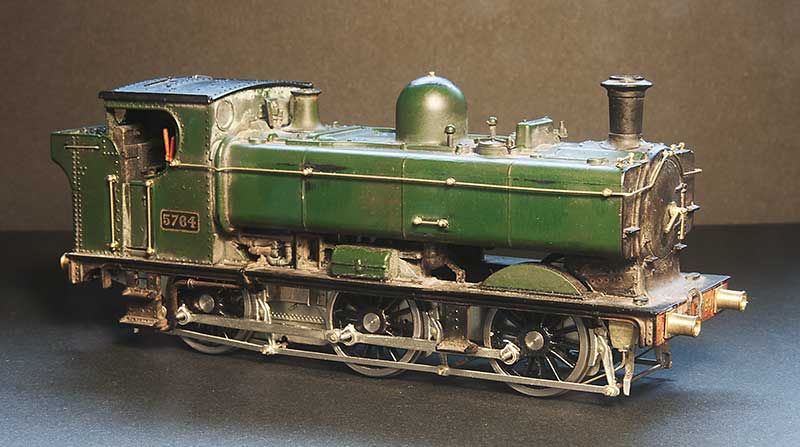
The body is essentially good, you could say extremely good for its time. The obvious stand out bit of weirdness was the top of the dome but nothing a spot of filing can’t sort out. It did come with a separate main handrail and some wire ones around the bunker but they were all a bit heavy so i replaced those along with those handrails that were moulded on. I reduced the size of the front wheel splasher by cutting it off and gluing it back on, The width of the cut being all you really need. I didn’t feel the need to fiddle with the centre and rear ones. While on my 94xx I replaced all the pipework under the tanks in front of the cab with this model I thought it was good enough as is, although I have cut away the ‘holes’ as per Iain’s article. Theres a bit more detailing to add to the footplate yet and the lower pipework will need to be replaced.
Latest building and what does it have to do with lions?
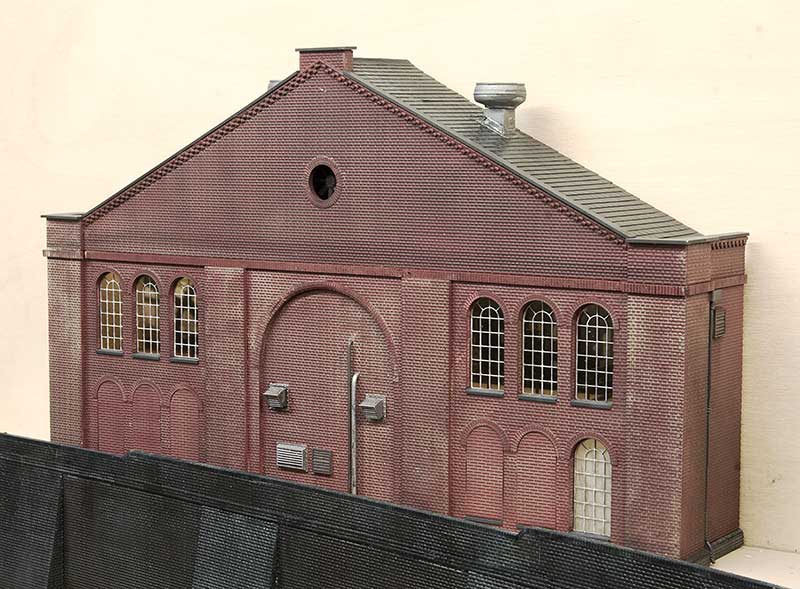 This is my latest building for Brettell road and likely to be the last but one physical model building for the layout. I have plenty more buildings to create yet but as those will be on the backscene they will need to be illustrated instead.
As usual it takes its inspiration from a local structure and this time its the Lion Health building in Stourbridge. Or at least a bit of it. Construction is the same as the others featured recently so I wont go over old ground again. Before it was a health centre the Lion Health building was an Ironworks built by Foster, Rastrick and Company in 1821. John Urpeth Rastrick was originally from Morpeth and had previously constructed an early railway locomotive for Richard Trevithick in 1808. The company would continue to produce steam engines as well as proving machines for chain cable, saws, mills, and boilers. It also produced structural components for buildings, bridges and gas works and in 1825 it listed railway components in a catalogue of products including rail, sleepers and chairs. Its fourth locomotive, Agenoria, was built for the Earl of Dudley’s railway and it survives to this day at the National Railway Museum. The company fared far worse than Agenoria and it was officially dissolved on 20 June 1831 and it was absorbed into the Stourbridge Iron Works of John Bradley & Co. James Foster was already the major partner (John Bradley was his half brother) and after 1832 James became the sole owner.
The site went through several more owners but they kept the name John Bradley & Co. (Stourbridge) Ltd. The first was when, in 1919, the Stourbridge Iron Works were sold to a company owned by Edward J. Taylor and then in the interwar period, N. Hingley & Sons Ltd took over but it still continued to trade under the John Bradley & Co name until 1963. The company was finally wound up in 1966 but the Stourbridge Ironworks continued as a rolling mill within the F.H. Lloyd Group until 1982. The building became derelict was nearly destroyed completely due to a fire in 2004. In 2012 it was renovated to become Lion Health which opened in 2014. In 2009 a couple of urban explorers managed to get in and took some pictures, these can be seen here.
What have lions got to do with any of this?
In 1829 Foster, Rastrick and Company built a locomotive for the Delaware & Hudson Canal Company in the USA and this loco, Lion, or rather the Stourbridge Lion is noted to be one of the first foreign built locomotives to be operated in the United States, and one of the first locomotives to ever operate outside Britain. The locomotive performed well in its first test in August 1829 but was found to be too heavy for the track and was never used for its intended purpose of hauling coal trains. Parts of this locomotive also survive and are on display at the B&O Railroad Museum in Baltimore.
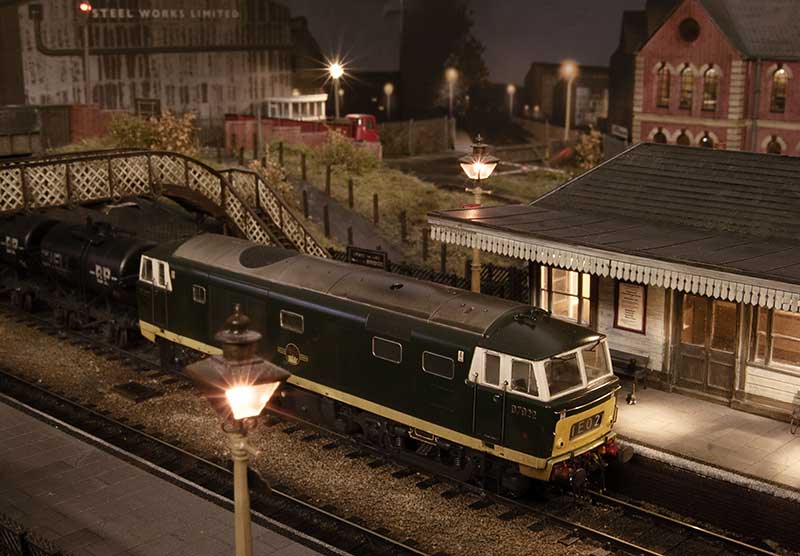
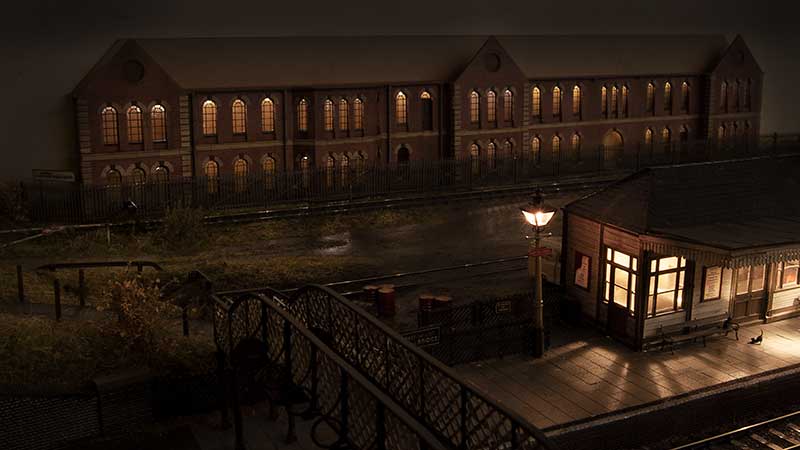
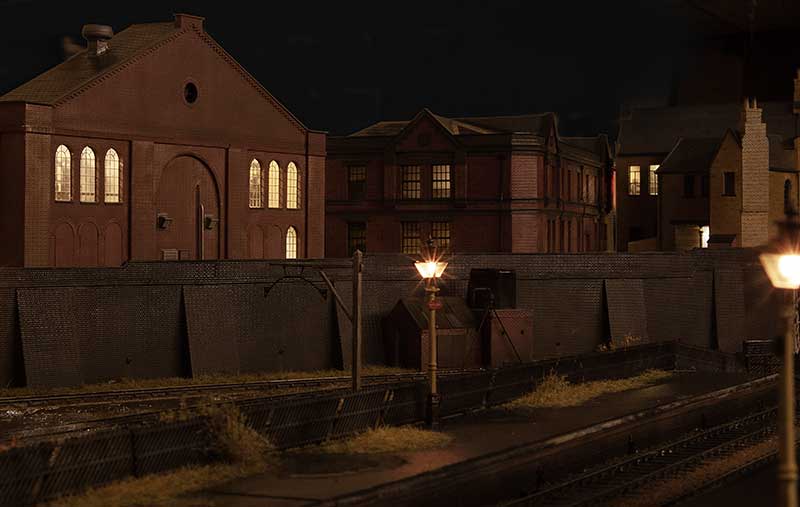 A view from the platform. I think i’ll tone the lighting down a bit more.
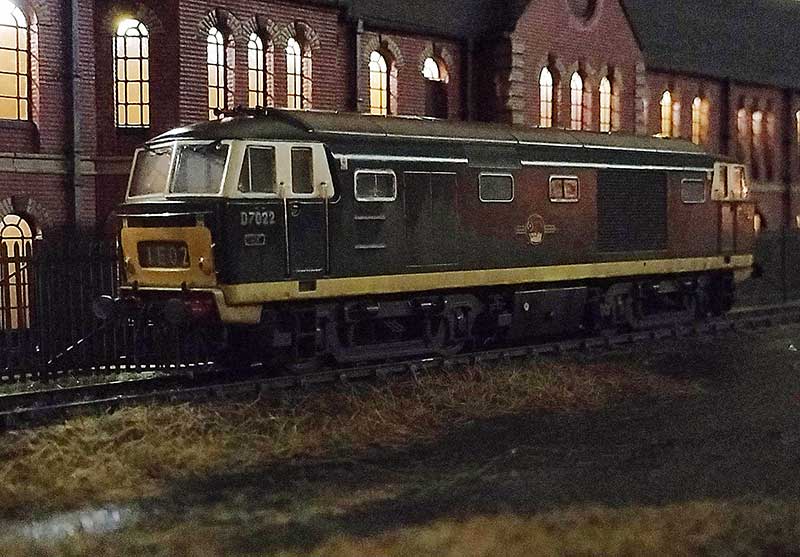
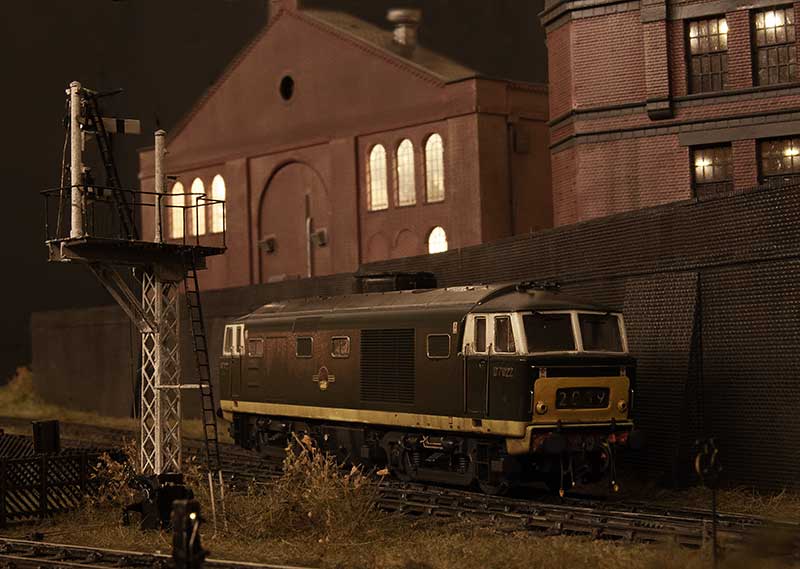 The recently completed Hymek trundles past.
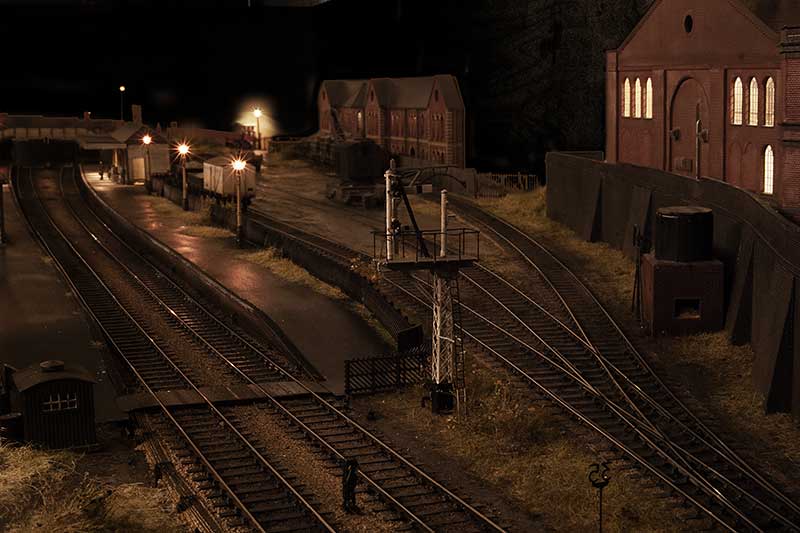
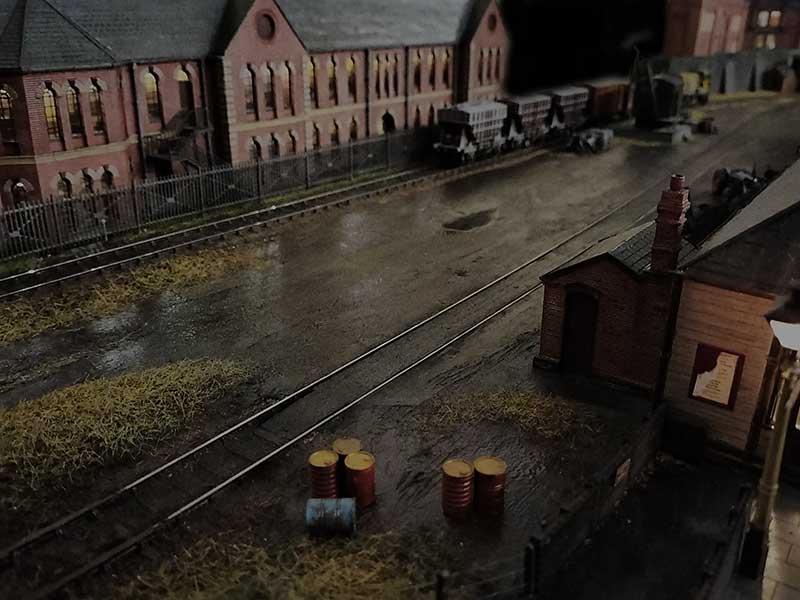
Below are a couple of overall layout shots which I think captures the wet look I’m after. The last one from my phone so apologies for the lack of depth of field.
Funny little Alien
For all of my lifetime, certainly my time aware of railways, mainline diesel locomotives have been powered by a diesel engine driving electric traction motors. However the Western region was never really one to follow what everyone else was doing and invested heavily in Diesel hydraulics. Of those the largest class and the only one to fit into the type 3 category were the Hymeks of which I missed out on. When I was born there were half a dozen still in service and they were withdrawn before I had transitioned from a 4 legged human to a 2 legged one. So they are all a bit alien really.
Apart from the transmission (and the idea of a mainline loco with gear changes) there were other things that were a bit odd. Why wasn’t the radiator fan housing central? Why didn’t they use no.1 and no.2 ends, Instead of having A and B and why was the radiator at the back not the front like everything else? Despite all the weirdness they were attractive little locos though so when a Heljan one popped up cheaply on Ebay (described as having intermittent running) I put in a cheeky bit and as no one else did, a Hydraulic is coming to Brettell Road. 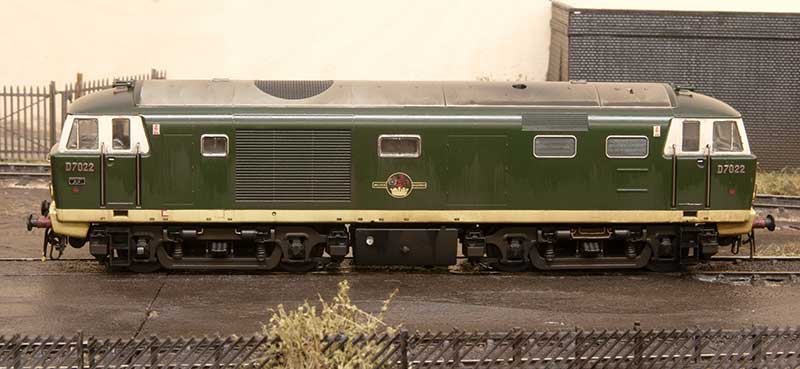 Not having any 00 track I didn’t investigate the reported running problems but the Heljan wheels were filthy and having swapped them out for some Alan Gibson ones no running issues were encountered. This model is one of Heljan’s early efforts and in terms of getting the shape right still one of their best. However there are a few tweaks that can be done. The roof horns were broken so they were replaced with Markits brass ones. The buffers were a bit naff so those were replaced with Lanarkshire Models ones. The numbers and builders plates are from Shawplan/Extreme etches. The rest is really down to working with what Heljan give you. The bodyside windows are flush glazed but not flush enough so they were cut out and remounted. The cab side and door windows are fine but I did add the droplight strips from 10×10 microstrip.
Not much to do on the chassis really – I added the mileometer on the leading axle of the B end (left) and I thought the pipework on the bogie frame at the A end was a little too fine so replaced it with wire.
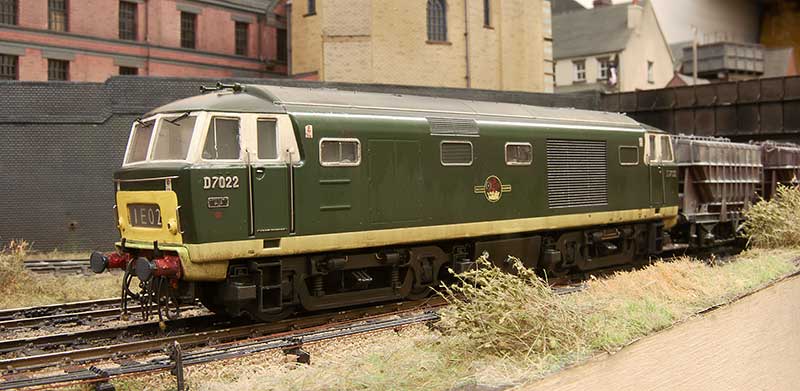 This is the A end from the other side. As I was doing an early batch loco I carefully cut off the headboard clips and touched in the yellow. The windscreens were also not flush enough but it was easier to just replace them with clear plastic cut to shape. Oddly the glazing on the headcode box (yes i know the headcode is wrong for the train) was too flush so this was replaced as well. Windscreen wipers are again from Shawplan and the brake pipes are from Hornby (the loco wasn’t supplied with any). I also remounted the tank under the bufferbeam and added a little pipework. To avoid confusion when it comes to DCC I’ve followed the diesel electric convention and set the fan end as forward.
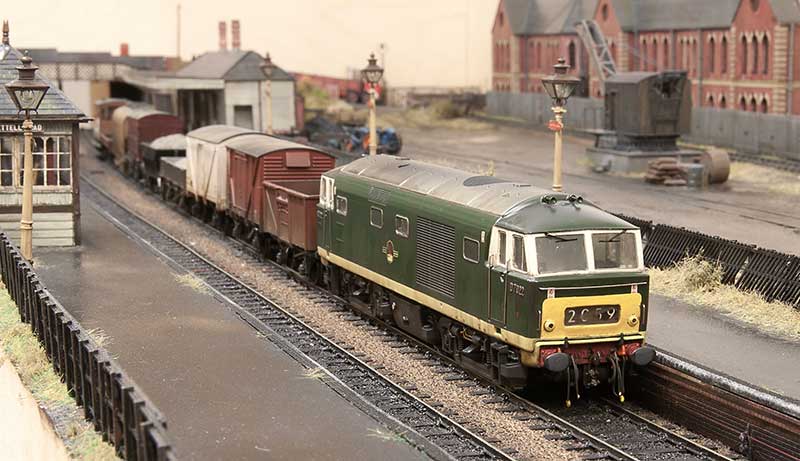 The model is weathered to look new but not 10 yards from the factory new. Im aiming for a few months and bear in mind the layout is set in autumn. There seems to be a tendency among modelers to weather Hydraulic locos to look an absolute state and most of them did end up that way in real life. So basically washes that I’ve pretty much cleaned off again as best I can before light dustings of track colour and roof dirt. This was followed with streaks from AK interactive spilt fuel and grease before finally the obligatory rain effect. Diesel locos tend to have characteristic weathering which is unique to each class (something which a lot of professionally weathered locos you see seem utterly devoid of). Class 24 to 27 have the water stain from the roof, just inboard of the fan. Class 50s have 3 leaks that run down the fuel tanks, class 20s have an odd direction for the staining deposits from the exhaust and class 31s have the oil leaks through the bodyside at floor level. Hymeks have this too but not as much and from my research only later in their (short) lives. They do however have a distinctive leak on the fuel tanks and this seemed to have been from new.
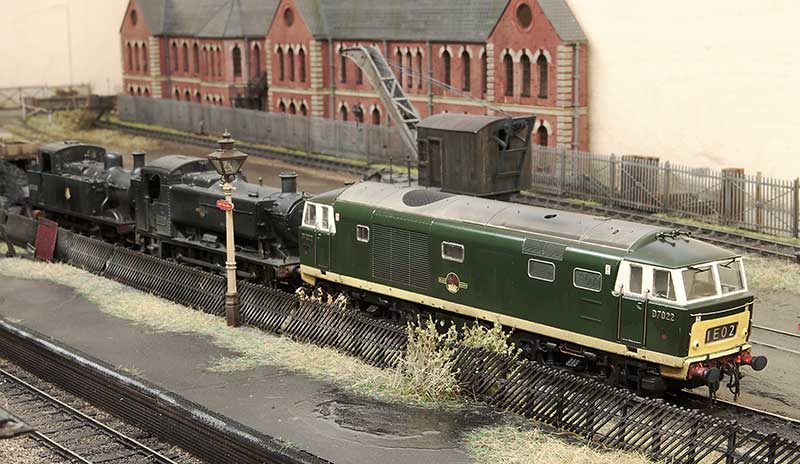 Any reason for D7022? Ive always had an affinity for the Lickey incline and these 3 locos were all regulars on banking duties over the years. The Hymeks went there much later than Brettell Road is set and were the second class of diesel to work the incline. The first being English Electric type 3s (class 37). A lot of Hymeks worked the Lickey but the initial ones were D7021-D7025. In his book, A life on the Lickey, Pat Wallace talks about them and mentioned that early on they preferred to have the A end facing north (up the gradient). If a loco turned up the wrong way round it was sent to Worcester to be turned on the triangle. He doesn’t give any detail on why this was the case but you could lock out first gear in a Hymek and the equipment cabinet for this was in the A end. The locos definitely had first gear locked out while on this duty. This was because the change from first to second gear was right in the range where trains were banked and they could snatch. The Hymeks having only one engine were a little worse for this than the Warships and Westerns.
One little anecdote Pat also mentions concerns the 17th January 1968 when a kitten was discovered in the engine room of D7025. He was adopted and named Hymek (of course). He crops up again 10 days later when he had managed to hide himself in the bogie of D7022 and refused to come out. It was reported that Hymek the kitten did 4 trips up the Lickey!
Stretching things out a bit.
One aspect of making Brettell Road longer is that the original fiddleyards will need to be replaced. As such the opportunity will be taken to increase their length from four feet to five which means I can increase the cassettes from three feet long to four and a half. Any bigger than that and cassettes start to become unpractical and a bit sketchy anyway.
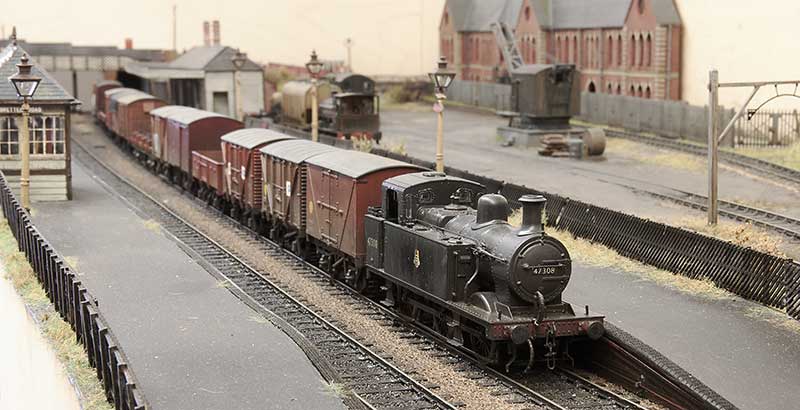 A four and a half feet long freight train on Brettell road.
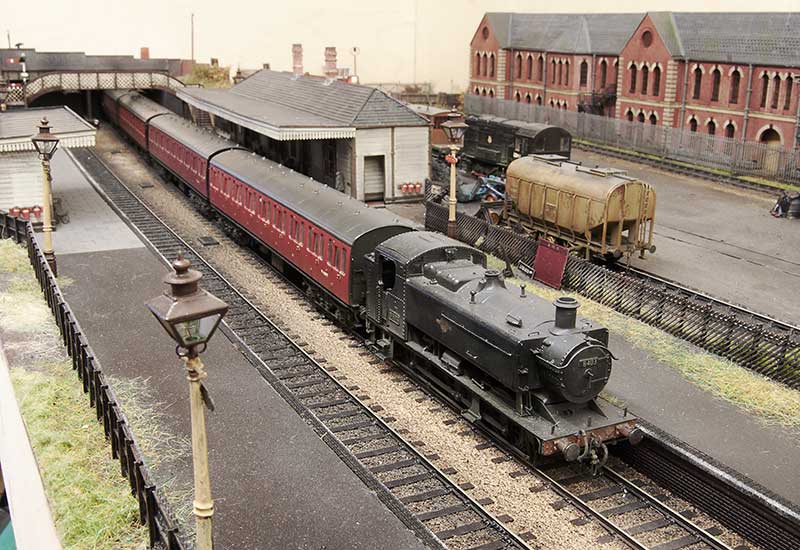 A four coach passenger train. When I built this originally one of the (then 3 coaches) wasn’t finished as I hadn’t detailed up the underframe yet and just swapped the bogies. This was due to Brettell Road’s first outing coming up (Scaleforum 2018) and it never got moved from the ’roundtuit’ list since.
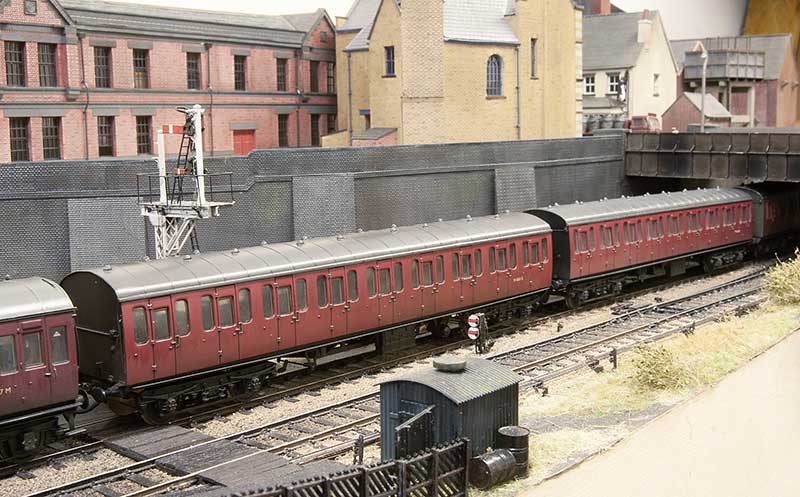 But when another cheap coach popped up I decided to get this little train ticked off so they were both detailed up together. Leaving just one thing outstanding…
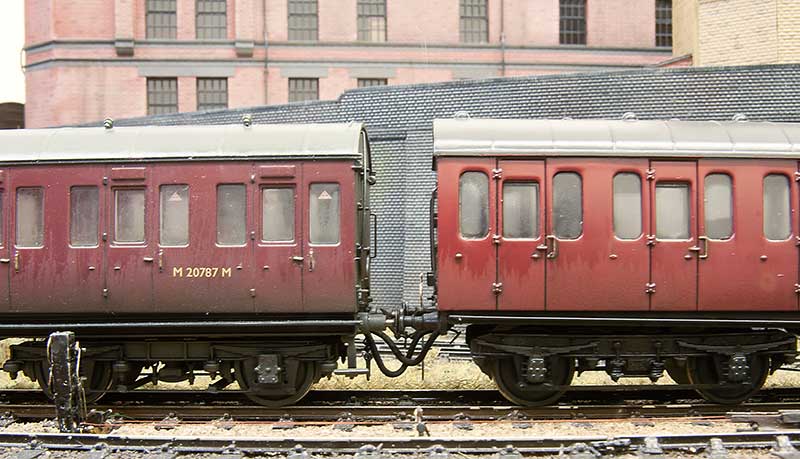 …the brake pipes. I admit to not using working ones on my wagons, as the layout is principally a shunting one, but as this is a fixed rake of coaches why not? I came up with the original idea for this back around 2005 and articles appeared in update and MRJ. The original update article can be downloaded from here. Where I have differed from my original article is to have one long pipe for the vac pipe and another long pipe for the steam heat pipe I figured 4 short pipes would just stick together in a clump! So theres a magnet on the end of the pipe that connects to a magnet in the bufferbeam. All simple stuff really but it does mean that the coaches and their pipes have to be couple up or the pipe will drag on the track and no doubt get stuck!
Tired of tiles!
After working my way through a lot of laser cut strips of tiles I can call my building(s) project effectively done. 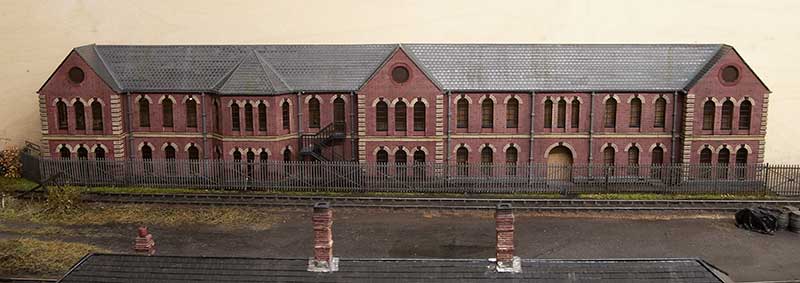 There are several schools of thought when it comes to what to do with low relief buildings. The easiest is to keep them parallel to the backscene however if you don’t (as I haven’t) then the roof can actually become a little bit of a problem area. Theres 2 main ways to address this, Keep the pitch of the roof the same and cut the top at an angle. Or keep the top parallel to the rest of the building and adjust the pitch. My personal opinion is that the latter is the better option. The pitch on my acorn building is significantly different from the left end to the right end. One advantage of using tile strips over embossed plasticard is you can adjust the rows to compensate for this and hopefully no one will notice what trickery you’ve been up to!
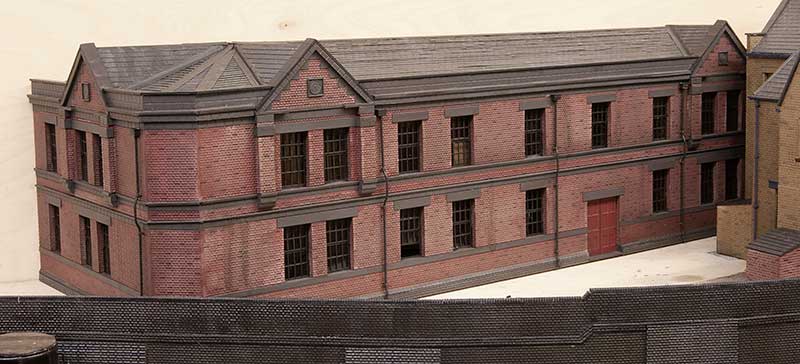 The same applies to this building although it’s not quite as dramatic.
 The thing with lighting buildings is they look a bit weird if they are just empty boxes. I don’t feel you need to model everything inside though, just enough clutter to give a hint of something inside. The shelving and cardboard boxes are from scale model scenery. I have found its something people at shows to look for and I think is nice to have some little ‘treasures’ that people can discover for themselves.
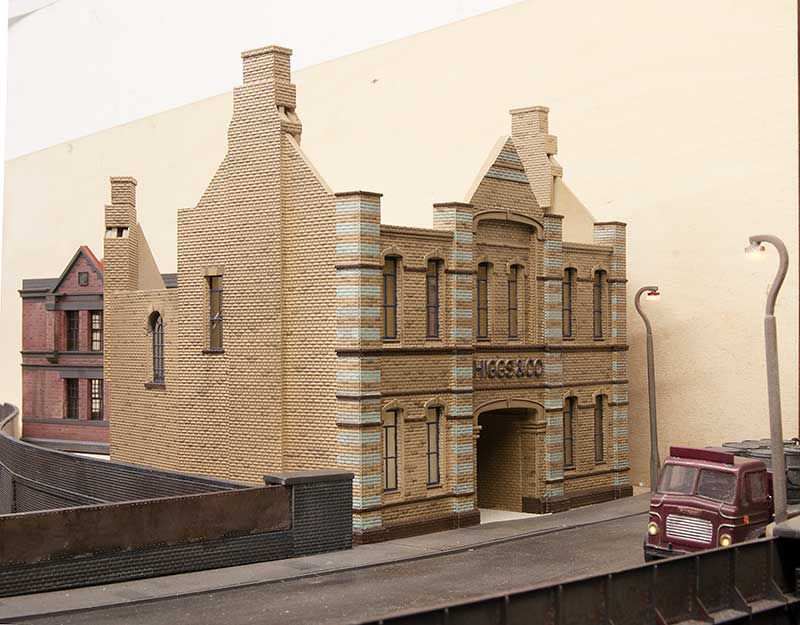
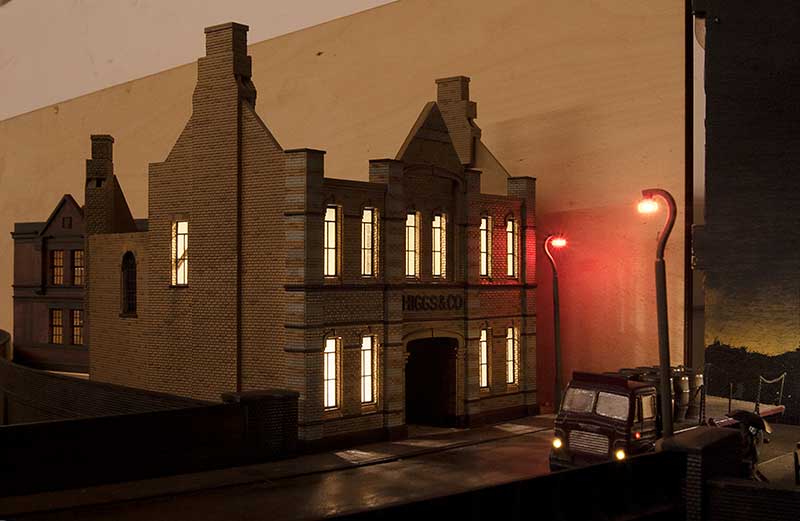
 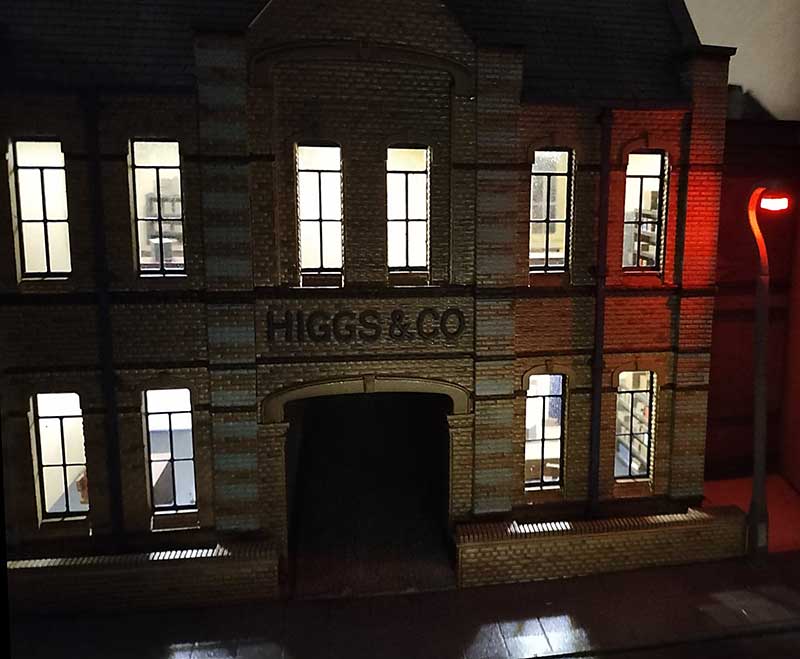 The Higgs and Co. building also has some ‘officey’ clutter. In the late 50s offices seemed to be laid out more like a school classroom than the more ergonomic arrangement we see now.
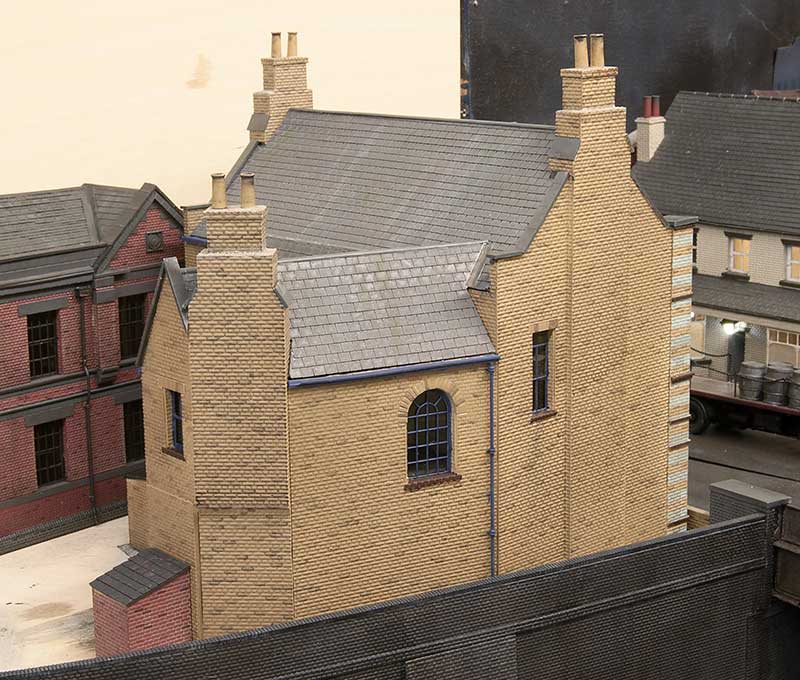 The roof of the rear of the Higgs building has some weird shapes that were a bit of a faff to work out if I’m honest.
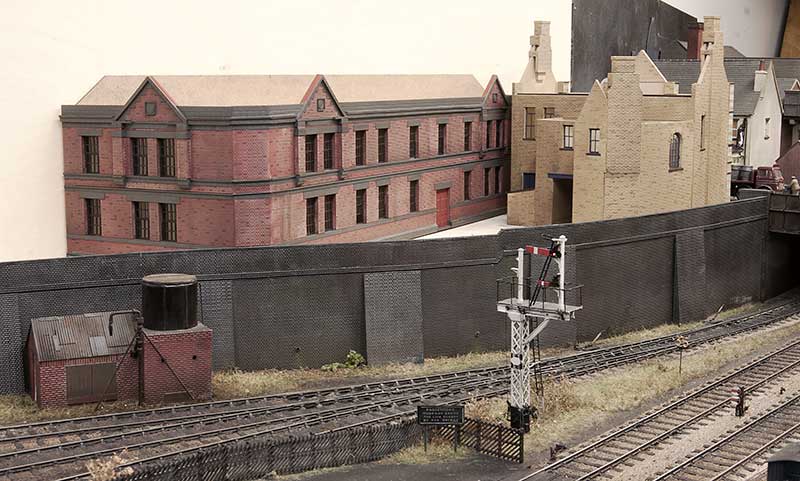
 I do feel that the middle of the layout has a suitable black country-ish feel to it now.
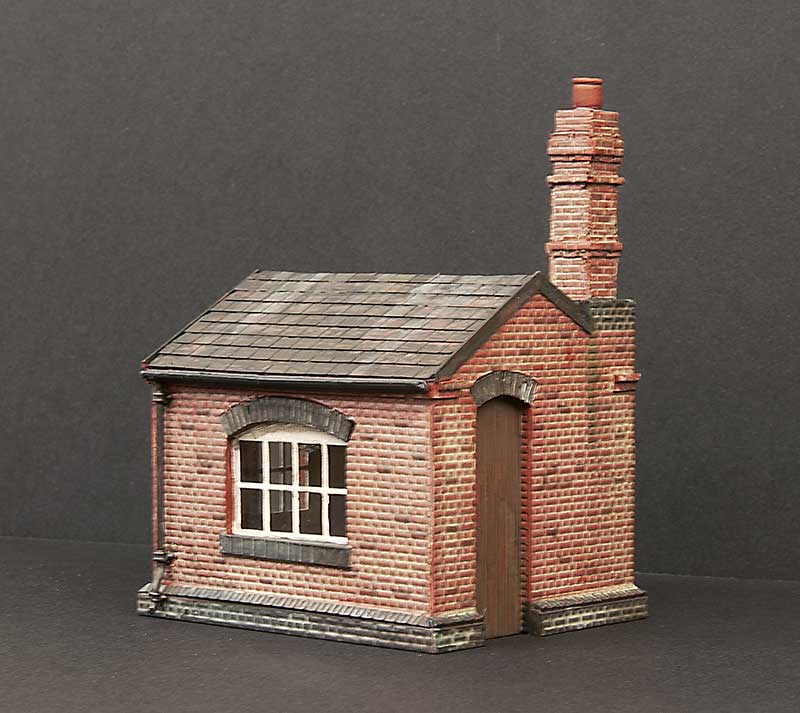 One little building I bunged together is this little weighbridge that will sit behind the main station building. Its based on the one at Wombourne (See here) and I was initially attracted to its over the top chimney and the way its just stuck in a corner. I did have to reel my enthusiasm in a little as the chimney at Wombourne matches the station so to model it exactly as it was when the ones on my station don’t look anything like, would have been a little weird.
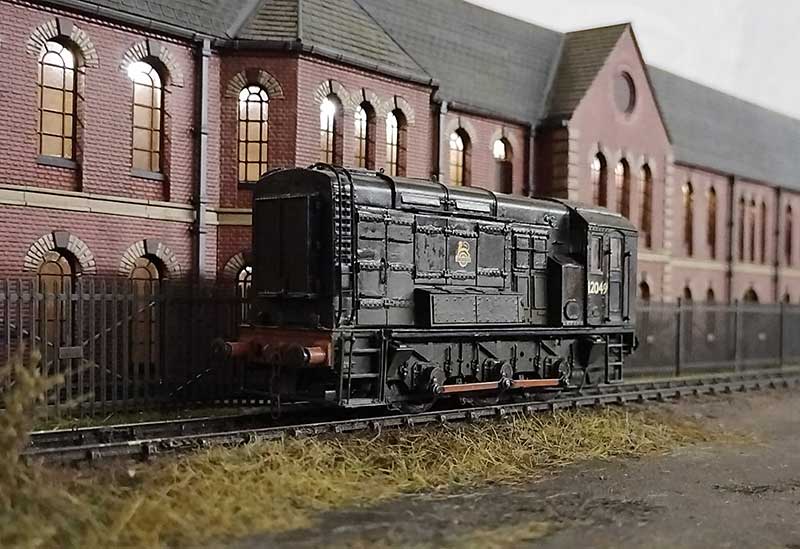
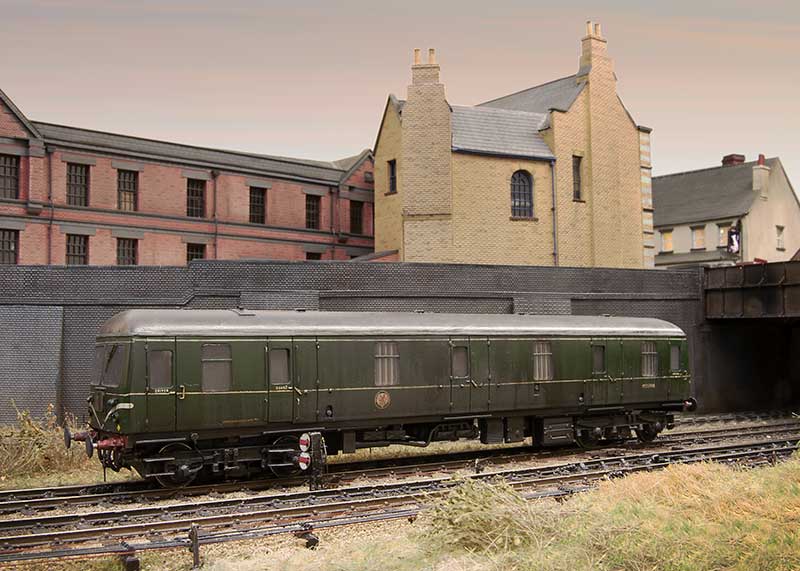
Below a few pictures, I feel the last one really captures the feel I want for the layout.
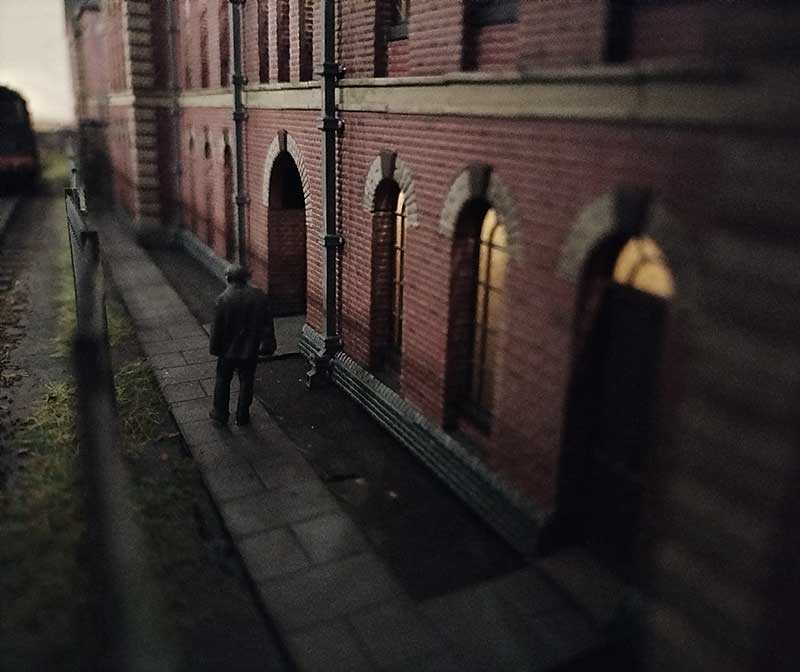
building boom – now painting boom
Ive been busy painting. Not a huge amount to say really so I will let the images do the talking. Next will be roofs and tiling. Lots and lots of tiling!
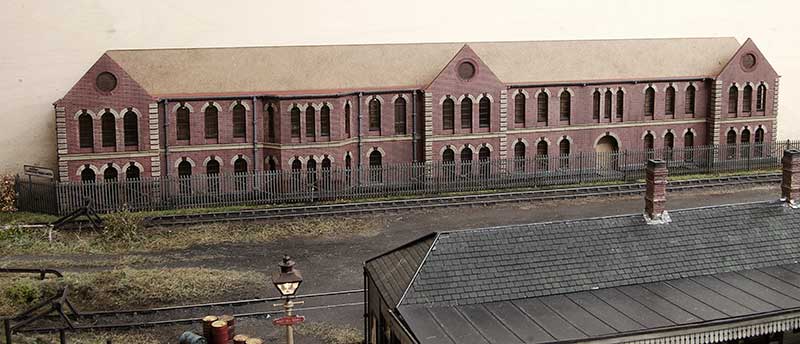
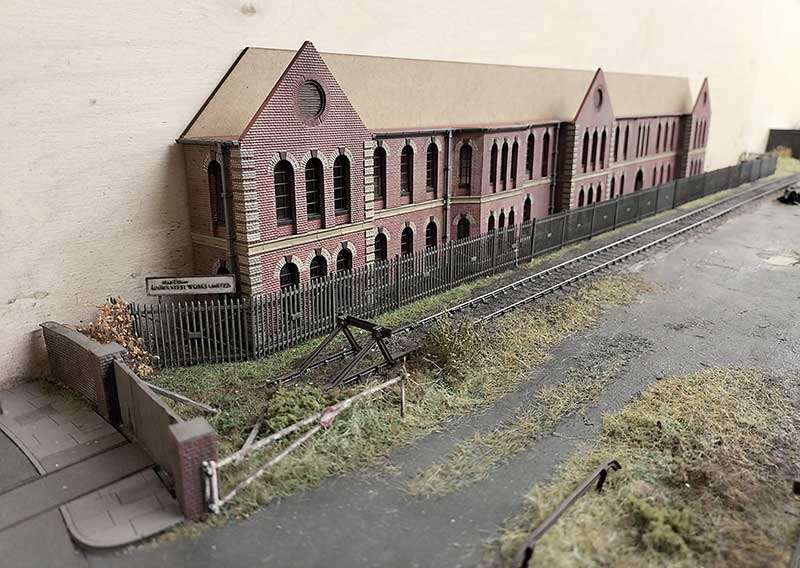
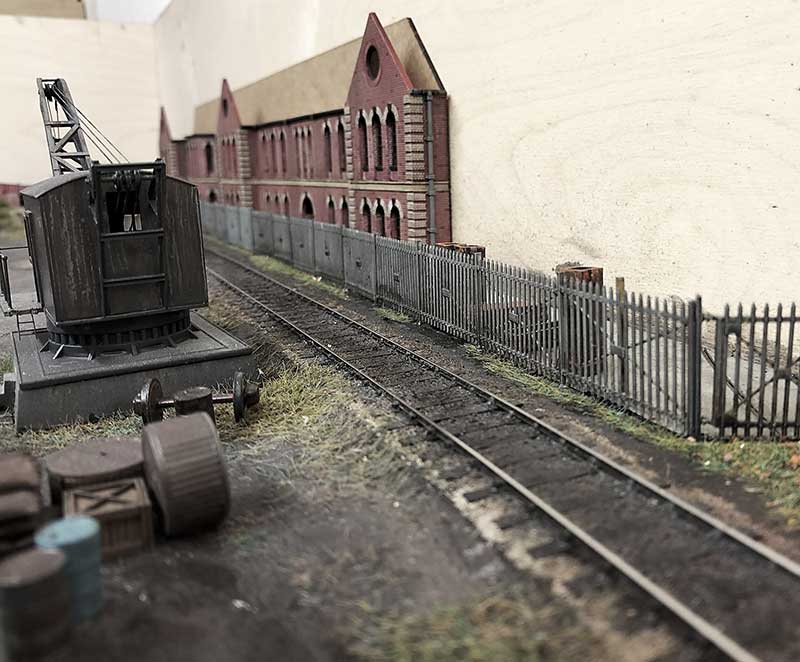
Building boom
In an attempt to keep some momentum going I’ve been doing more building work. This time for the right hand end of the new bit.
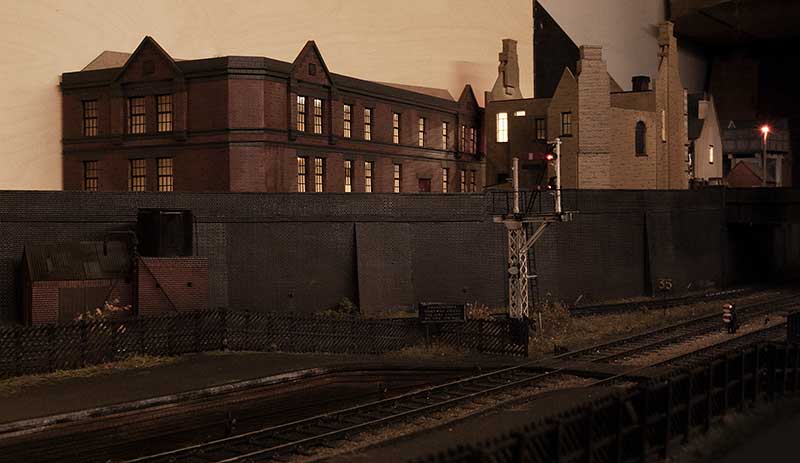
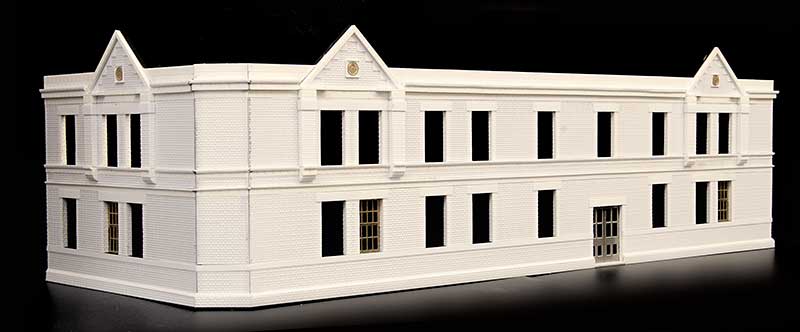 This building is based roughly on the office building from Birmingham central goods. Same method as before but this time using Brassmasters etched windows.
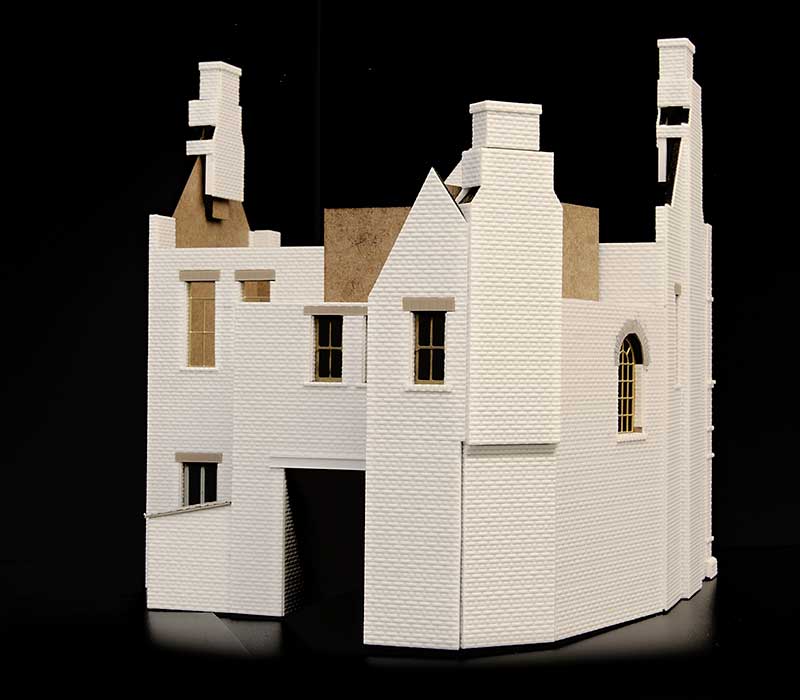
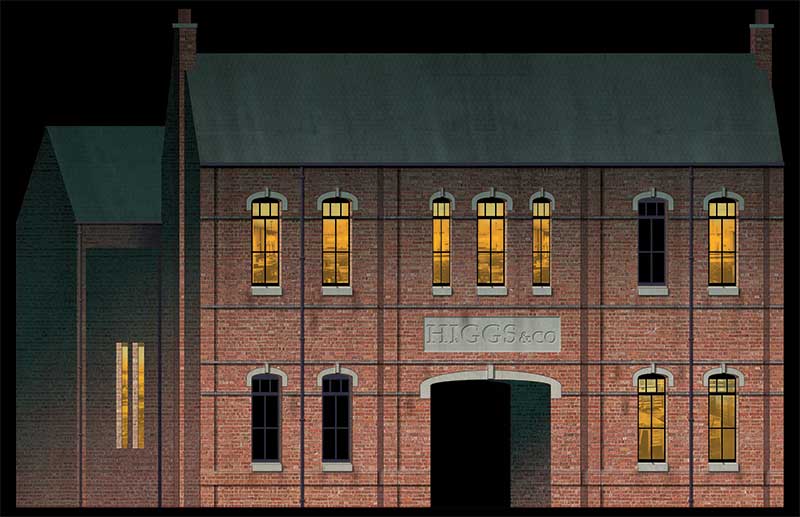 Originally the area in question was the end backscene of the original layout and this drawing was based very loosely on the Harris and Pearson building on the real Brettell Lane (see here for more info). The original basic drawing was modified and sent to Tim to be turned into an MDF carcass.
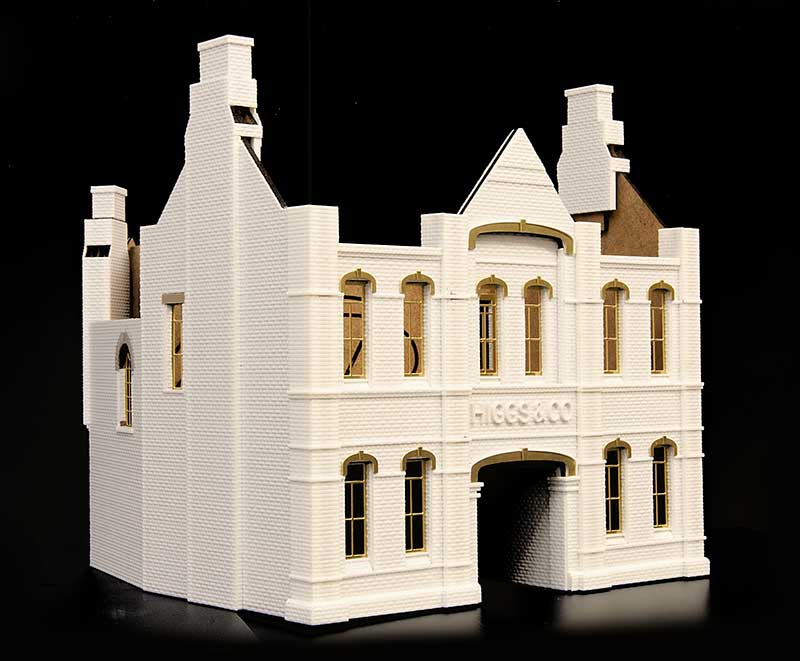 And here is the result so far. Windows are a combination of my own and Brassmasters etches.
 This is the much less ornate but somehow at least as interesting rear view.
 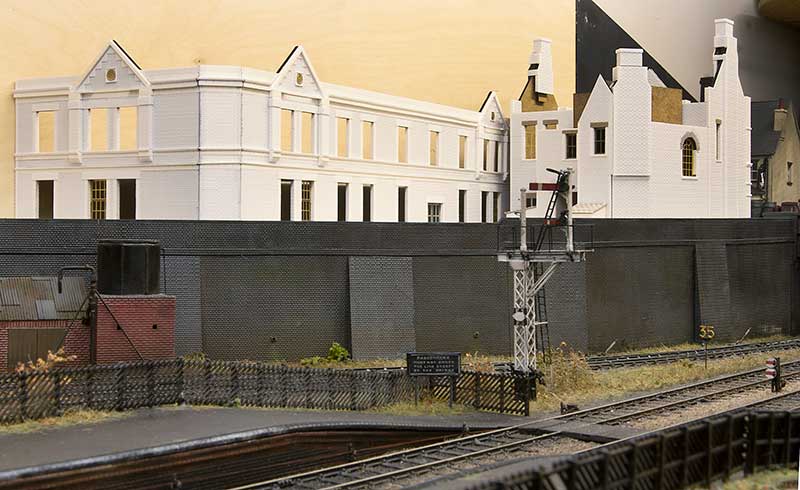 A rough idea of where it all goes.
From Little Acorns, Part 2
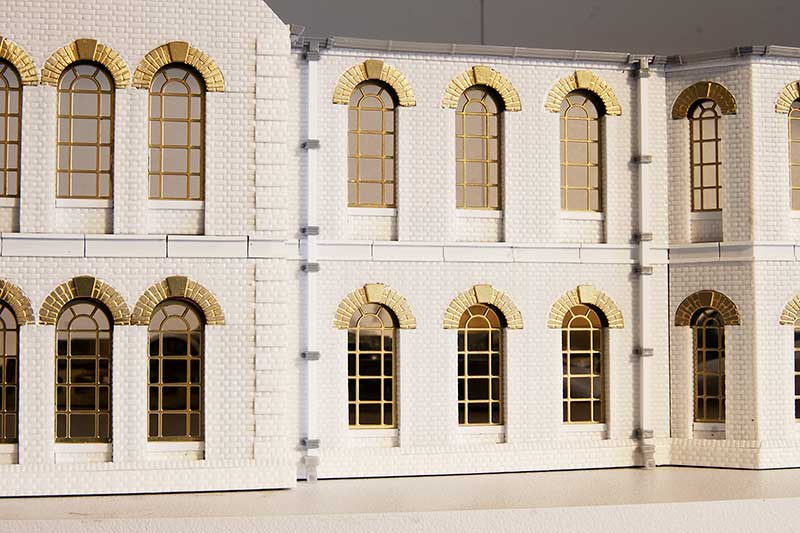 Work continues on my latest building. Gutters are from Modelu. When I last used Modelu guttering I found getting it stuck on was quite problematic however this time I tried Ultraglue from MIG (which I’ve mentioned here before) and I am pleased to report it works very well.
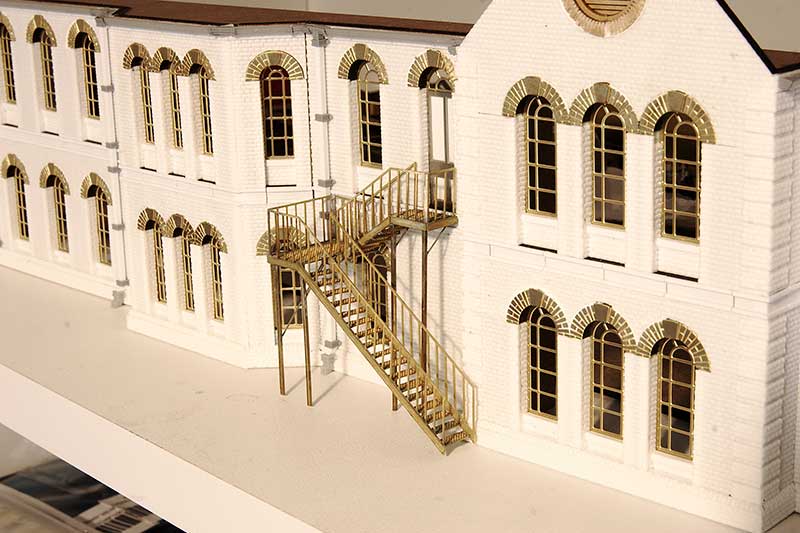 Fire escape from Langley Models. A few people noticed the upper door in my last post.
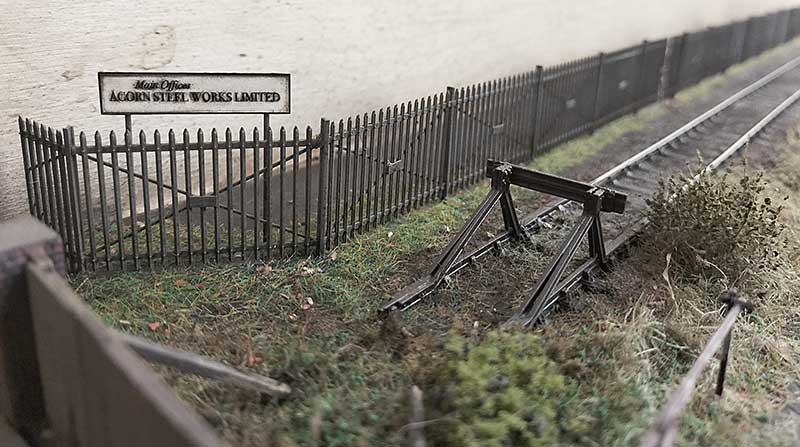 I’ve started to work on the base for the building to sit. The fence is Knightwing security fencing modified to resemble that seen in pictures of the real Round Oak. The sign was part of the etch I drew up for the building windows. I decided not to call it Round Oak as its not a model of the real place but Acorn Steel works had a nice ring to it as its smaller. Acorn was the name of the company magazine issued at Round Oak.
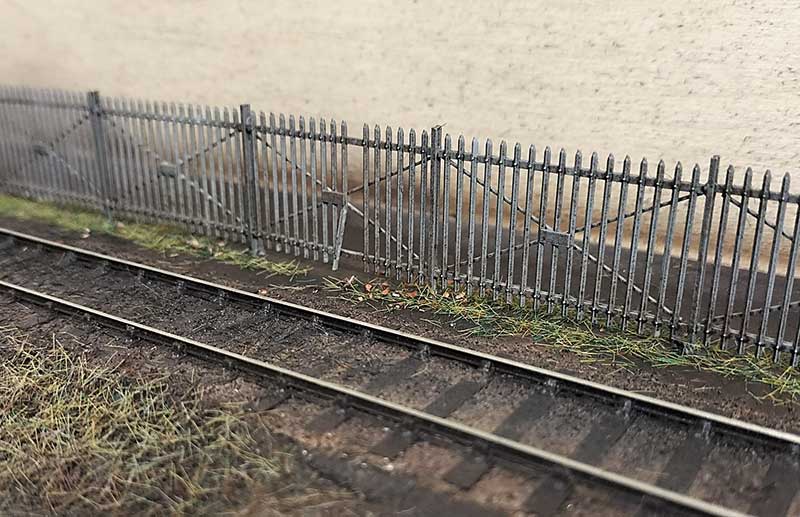 Moving along the fence we find an area where someone has made a hole! Perhaps it was kids trying to get in or perhaps it was a worker looking for a short cut to the station?
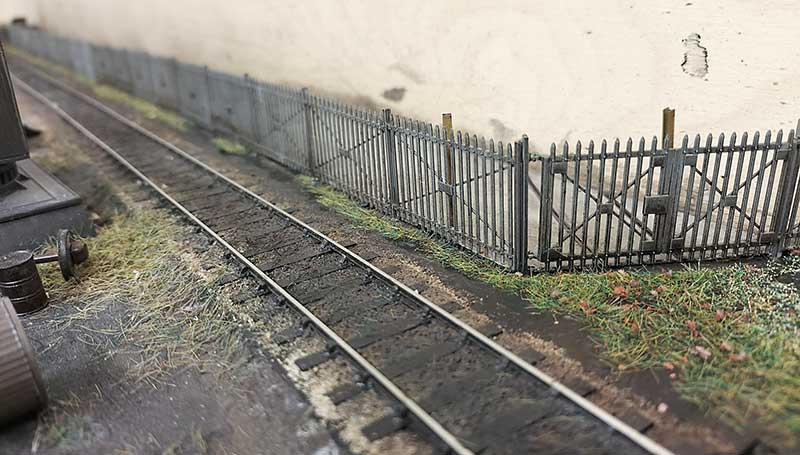 The other end. I decided some remnants of an internal line into the works would be an Idea. For the surface behind i have tried out some AK interactive concrete. Theres areas of the building that will need to be concrete or stone however the texture is too heavy for 4mm scale. It would work as very, very rough concrete or as a base for rough ground perhaps. In this case I sanded it pretty much flat.
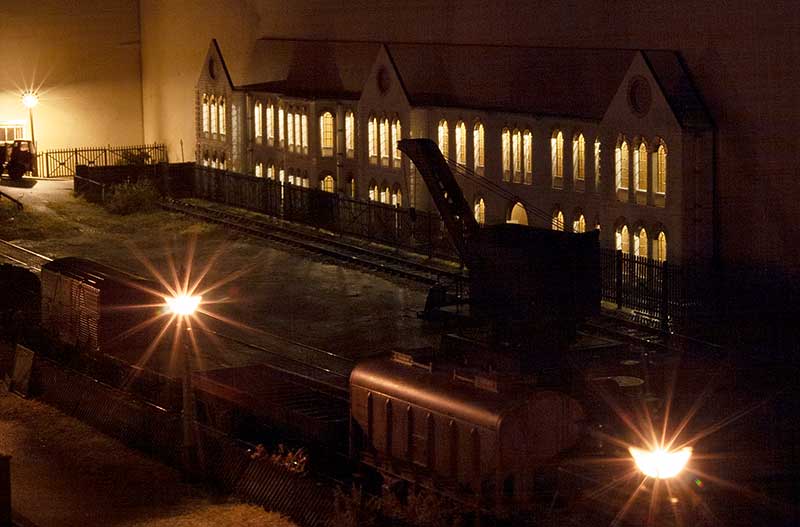 Finally I couldn’t resist a little test run of the buildings lighting.
Another wagon diverson
Breaking away from the current building works for a moment a little wagon based diversion. As per normal mundane stuff with a few little bits of tweaking that most people will likely never notice.
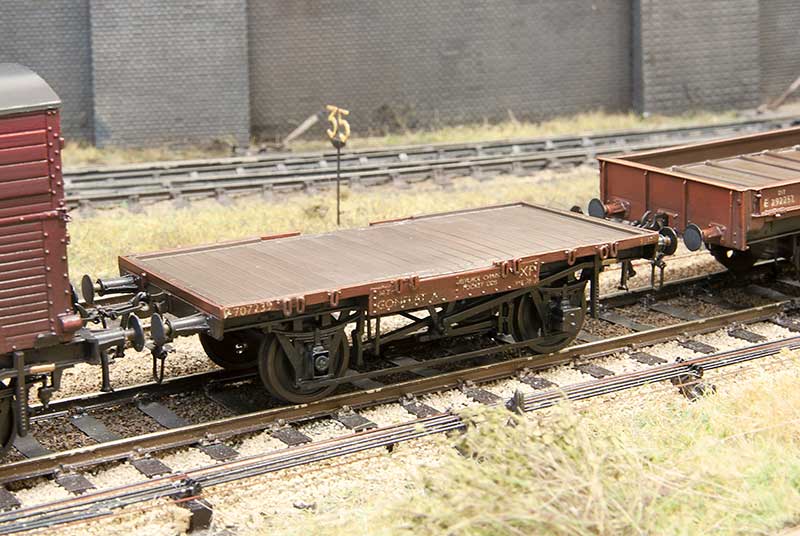 Conflat A from the Parkside kit. As per the last time I built some of these I beefed up the links a bit as I thought they were far too subtle. I fancied an empty one for a change and also added a missing (yeah sounds a bit weird that doesn’t it?) axlebox cover.
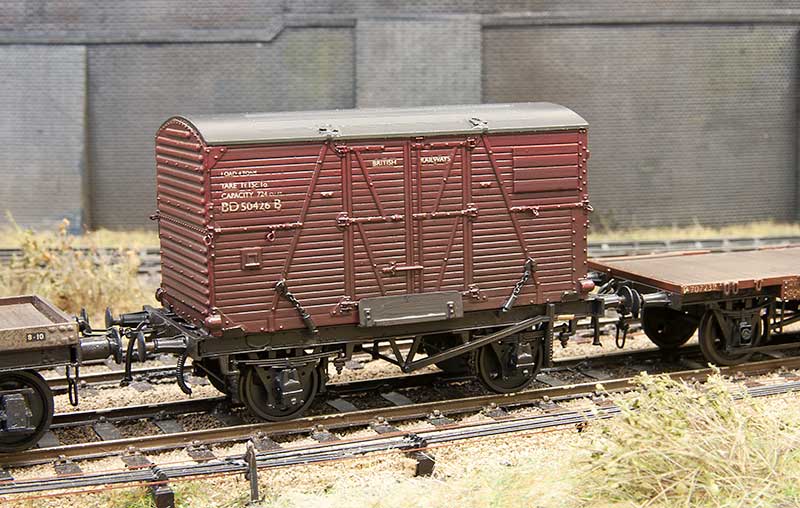 Next up an LMS diagram 1838 container flat. Built from the parkside fitted LMS chassis kit with extra bits and bobs.
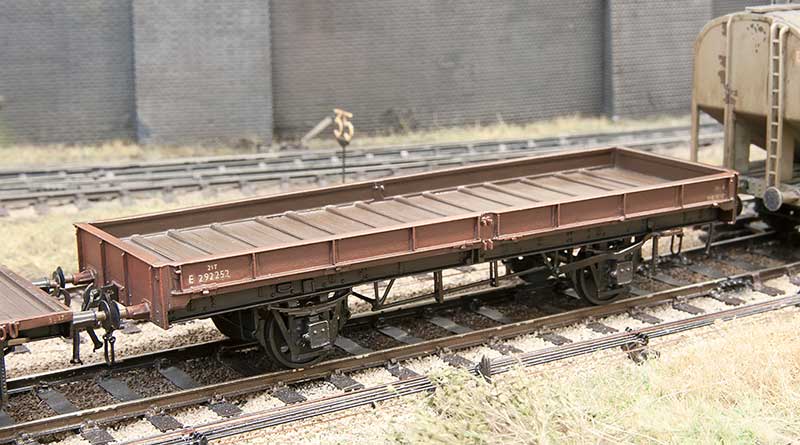
Finally an eastern region plate. When i did my fish van a few posts ago someone on the clearing house facebook group (highly recommended if you are on facebook and like wagon building) pondered if the chassis could be used to do an eastern region plate. Personally i thought it easier to go with the supplied chassis and replace the brake gear. Another Parkside kit.
From Little Acorns, Part 1
Construction has started on the latest building for Brettell Road. I’ve tried to incorporate some lessons learned from the previous efforts.
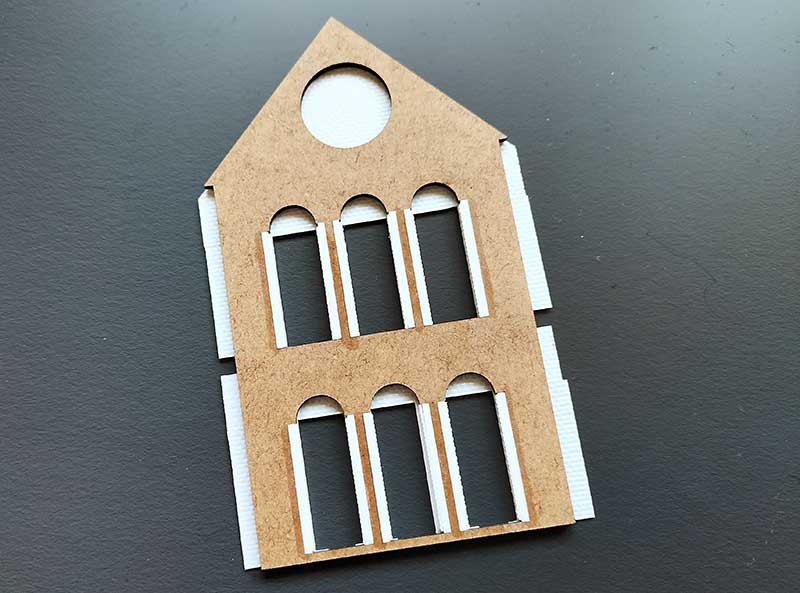 The main lesson being to do something more robust with the corners as these have been slightly problematic in the past. I decided to laser cut the main carcass and overlay it with plasticard. It may have been easier in the long run to laser cut everything but I like working with plasticard and scalpels and i didn’t fancy a huge session on my computer drawing bricks. As usual Tim kindly did the cutting for me. As you can see from the picture I’ve cut recesses in the corners and mounted some evergreen strip to give something solid for the overlays to stick too. It’s early days but it seems very solid so far.
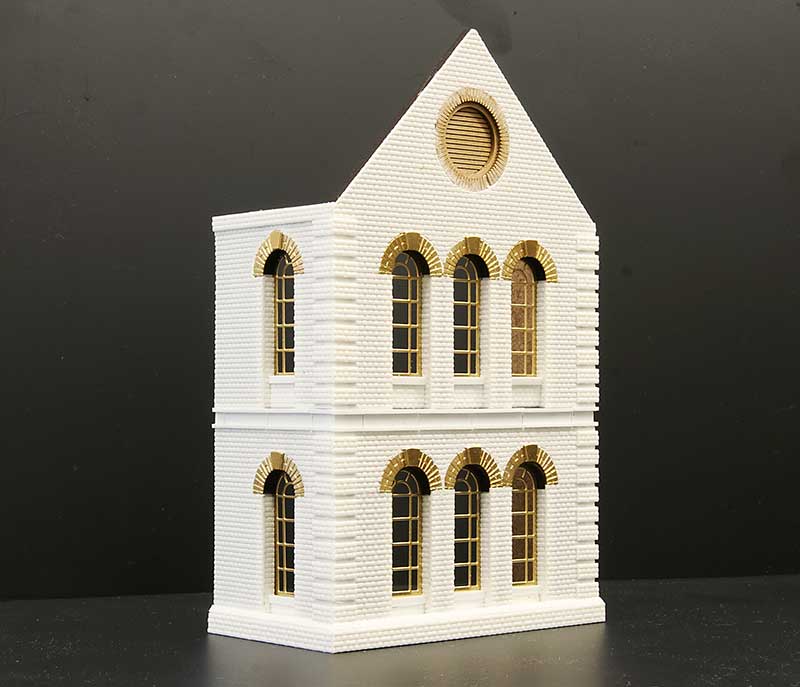 Turning the part around and moving on a bit, this is the front. Ive built this in a kind of modular way. I drew up the windows and arches and had them etched. There are 3 of these sections required for the building.
 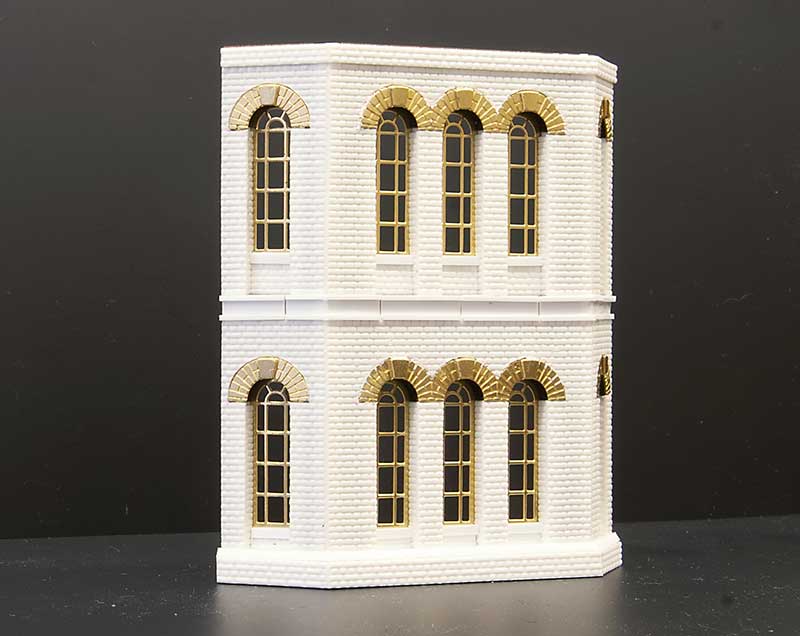 This is another section. Ive used the admin building from Round Oak as my inspiration but moved things around and adjusted them to suit. It’s an ‘inspired by’ model rather than an exact replica. This section was on a different face to the one I am modelling as it overlooked Dudley Road.
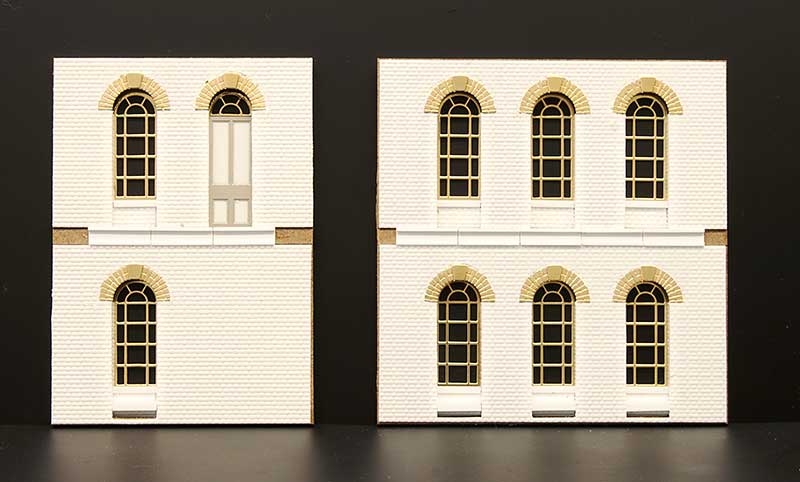 To join these bits together are some flat wall sections. These are the smaller ones. Ive missed some bits off at this stage as I figured it would be easier to add them once its all together.
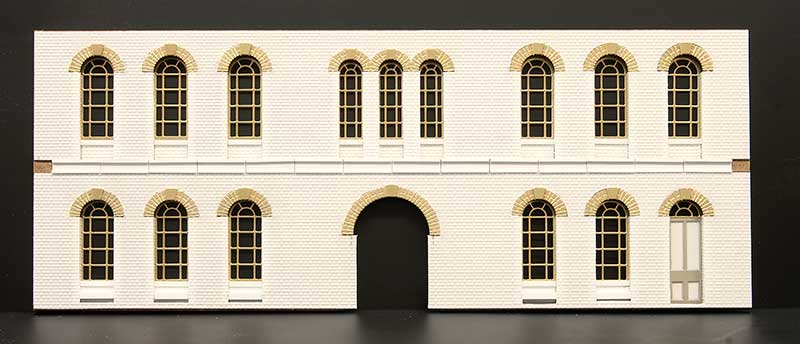 And the larger one.
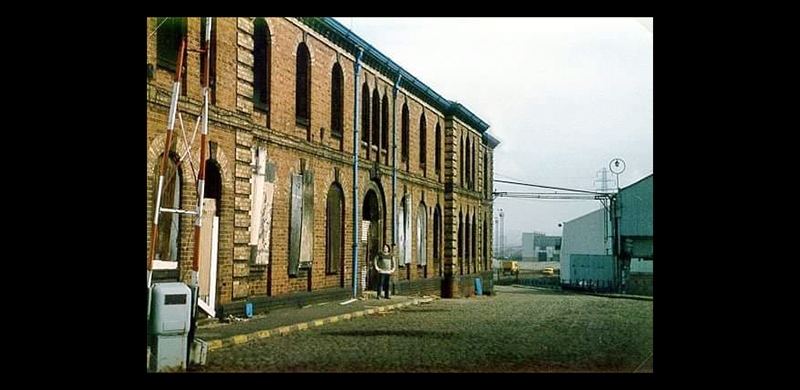 I didn’t manage to find a huge number of images of the real building. Theres one in Ned Williams book on Brierley hill and this one that my friend Frank Collins sent me. Sadly Frank passed away very recently and I missed showing him how I was getting on by only a month or so. I sincerely hope he would approve of my efforts. The model will be dedicated to him.
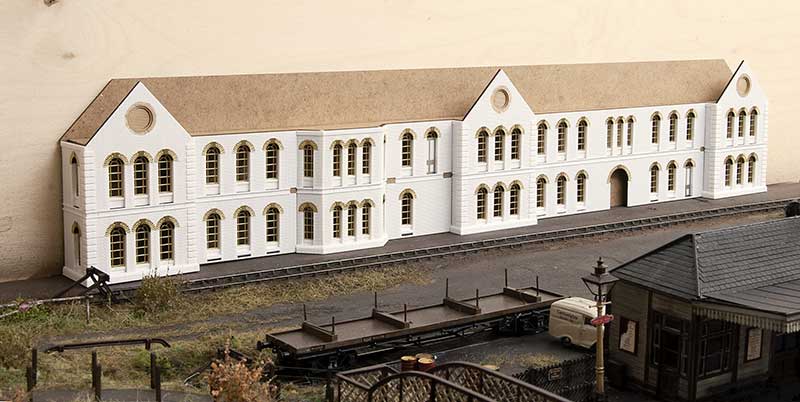 Progress so far roughly plonked in position.
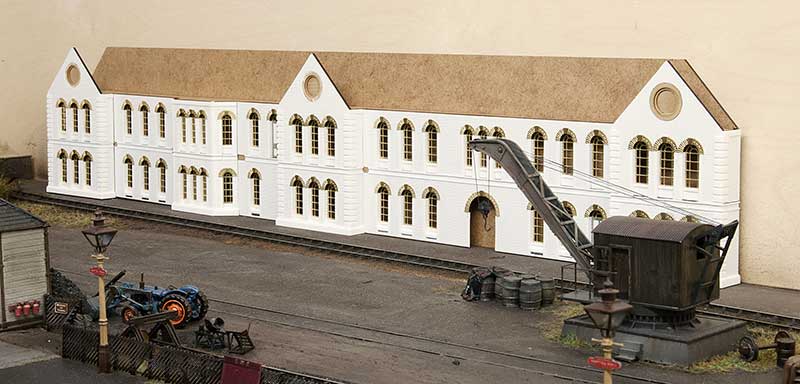 And from the other end. Much still to do!
Low cost modelling
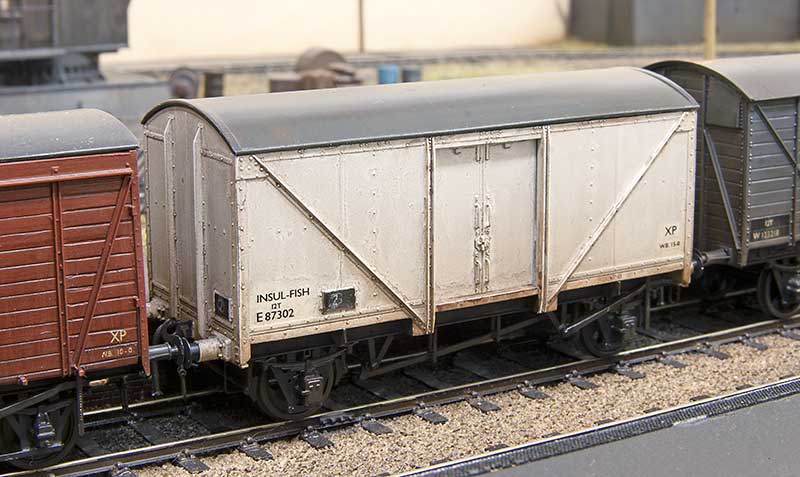 I was pleased to find that given the recent high temperatures and the layout living in a shed, that there appears to be no ill effects and all the rails are still straight and pointing in the right direction. I hope everyone reading this can say similar.
The above is a major blast from the past. Years ago when the West Midlands Area Group of the Scalefour Society was active, its organiser, Les, one week supplied us all with a parkside fish van kit. I think (memory is fuzzy if I’m honest) the idea was some sort of little competition to see what we would do with it. I don’t recall that anyone did but since then its sat in my kit stash contemplating its place in the world. As you can see it’s finally been built. I must admit the very long wheelbase produces a pretty ugly proportioned vehicle but its ready for service on Brettell Road. A note of thanks to Andy Hanson for kindly supplying the transfers.
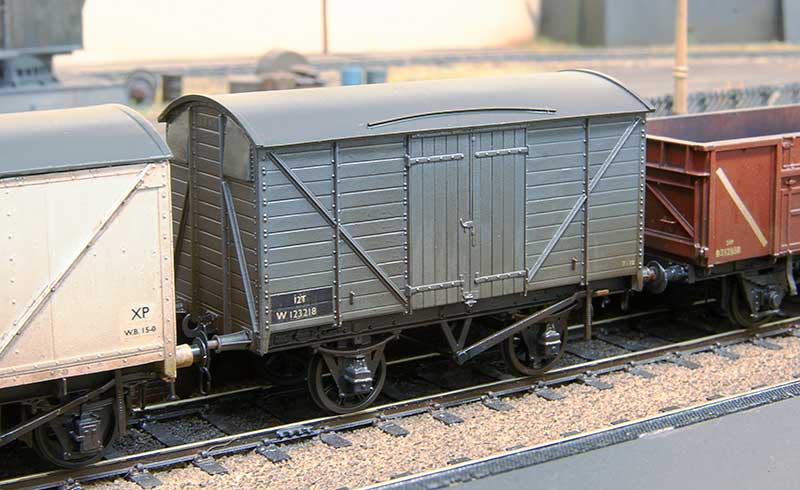 Above is a V33 van again from my spares box. It uses Ratio sides and a Cambrian 9ft wheelbase underframe. I don’t know how I ended up with the sides and while all the bits had, obviously, been paid for at some point I’m calling this one a freebie!
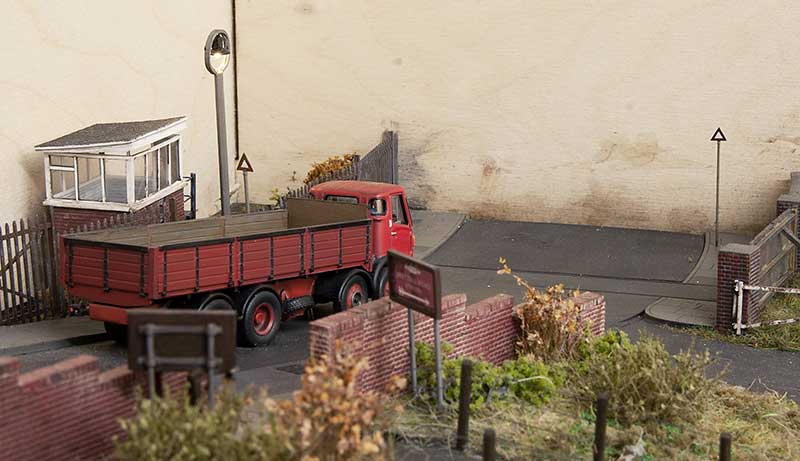 Added a couple of pre-Worboys road signs from Shirescenes. These are inspired by a picture of a Barclay tank crossing Level Street that I found. I made the furthest one about 80% the size of the nearer one to force the perspective a little.
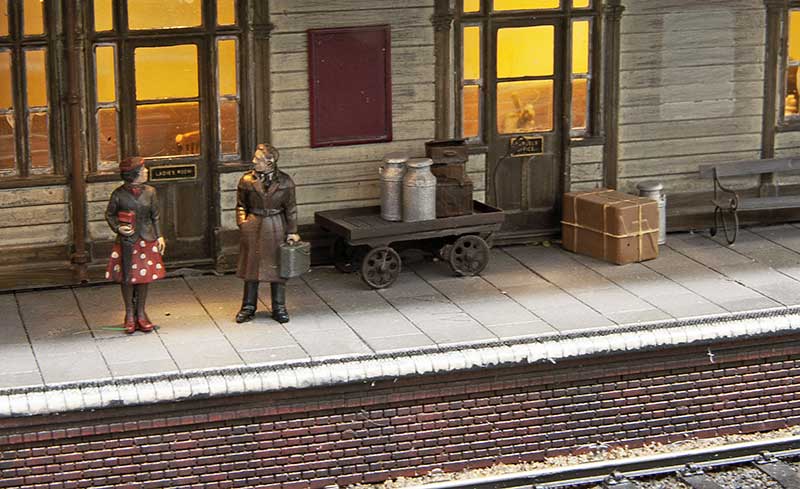 Finally a couple of milk churns from Modelu. To get the galvanised effect I painted them silver. Then a very light dusting of Halfords grey primer (holding the churn at arms length from the spray can) followed by matt varnish. I think it worked but if anyone will ever notice, who knows?
LMS long tube
Just missing out on my last post is this model
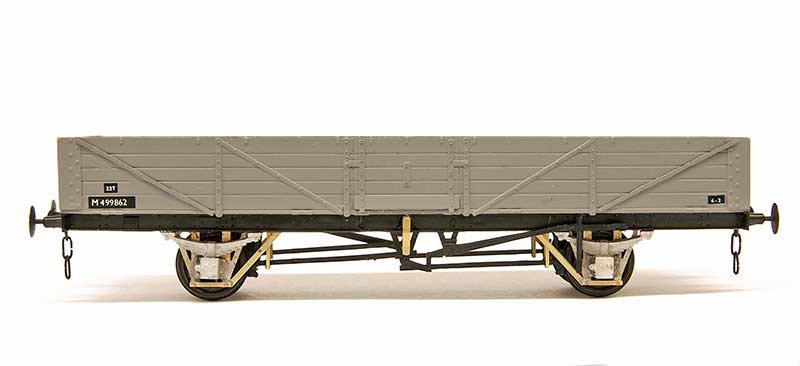
An LMS diagram 1945 Long tube. It uses a Parkside BR tube kit which has been shortened to 30ft 6in over the body (122mm) and 17ft 6in wheelbase (70mm). The corrugated metal ends have been replaced with planked ones from plasticard.
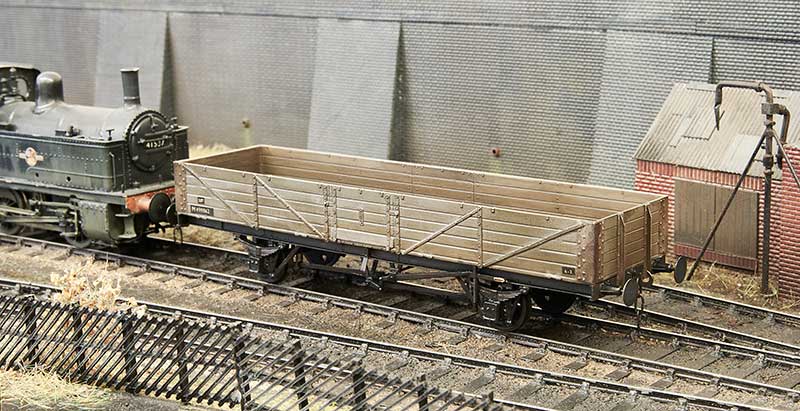
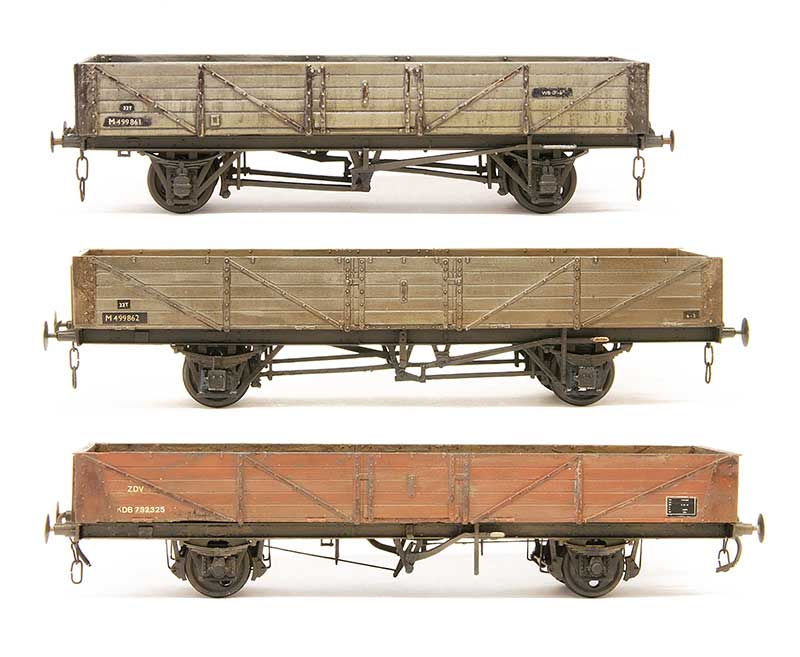 A bit of a family tree starting at the top with an old Ian Kirk kit for the diagram 1675 wagon. The wheelbase for the top 2 are the same.
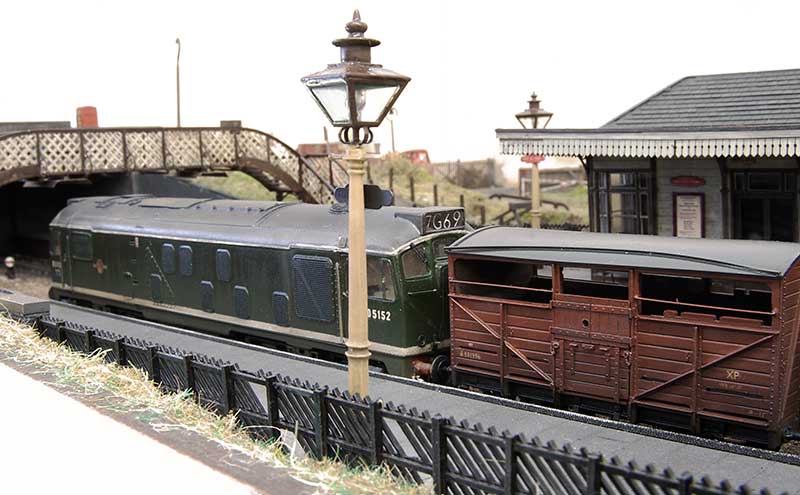 Just a couple of pics for the hell of it!