Flights of Fancy – Part 2
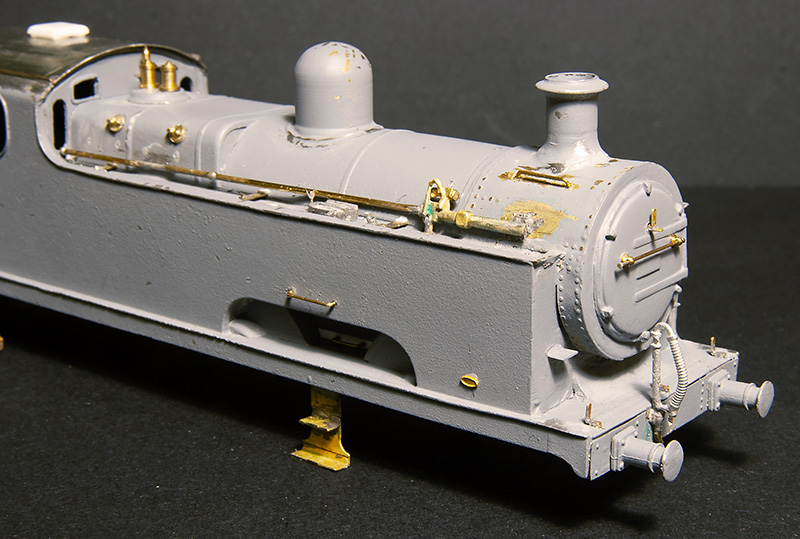 I ended the first part of this project by mentioning I needed some bits from Scaleforum. One of these was the injector which I modified a little from an Alan Gibson one.
 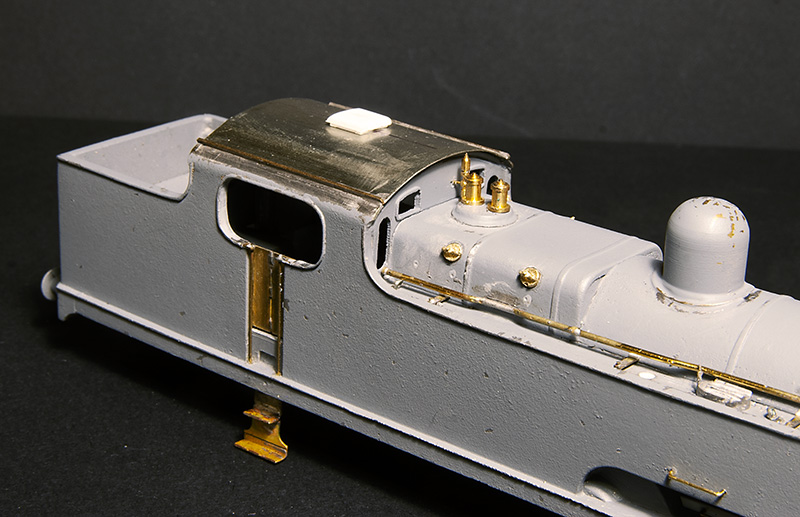 I also needed some firebox wash out plugs. Again Alan Gibson did the honours. It’s worth noting that they are not on the same places either side. The cab roof was just a bit of nickel silver rolled to the right radius and a few bits of strip for the rainstrips. The vent was filed up from Evergreen section. While on the subject of the cab the kit includes some bits and an etched floor. I found the handbrake column, if mounted to the cab floor as the kit was designed, gets in the way when trying to mate the body and chassis together so I cut it from the floor and mounted it to the body instead. The kit specifies that the reversing screw is mounted on the left side of the cab but, while hard to see in photos, it seems to be mounted to the right side so thats what I did.
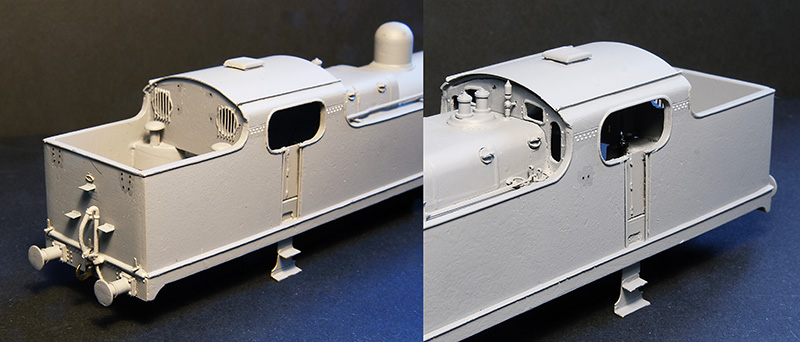 With everything in place and being happy wit the fit of things the body was given another light undercoat before the missing rivets were added from my dwindling supply of Archers along with some from Railtec. Thankfully the flatirons dot have a lot of visible rivets.
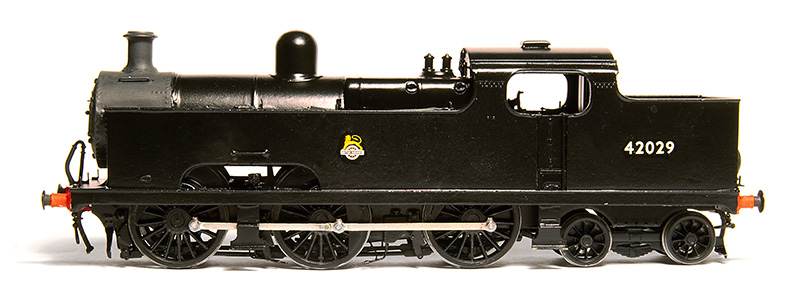 I don’t normally take a painted but pre-weathered picture but this time I made an exception. I mentioned in the last post that because of the carzatti front axle the coupling rods seemed backwards to the norm with the joint ahead of the middle axle not behind it. When No.2000 was modified this remained the case. The kit has the coupling rods the normal way round with the joint behind the middle axle and I’ve never seen a model flatiron (in either 4mm scale of 7mm scale) that addresses this. I found 52f models do a set that have the right wheelbase with the joint in the right place so I used those instead. One little tip that seems really obvious but I’ve never seen anyone mention (perhaps its because it is obvious to everyone else?) is that I line up the coupling rod on this side with the orientation of the grub screw on the final drive gear. It makes accessing the grub screw simple should you need to in the future as you know where to stop the wheels rotation.
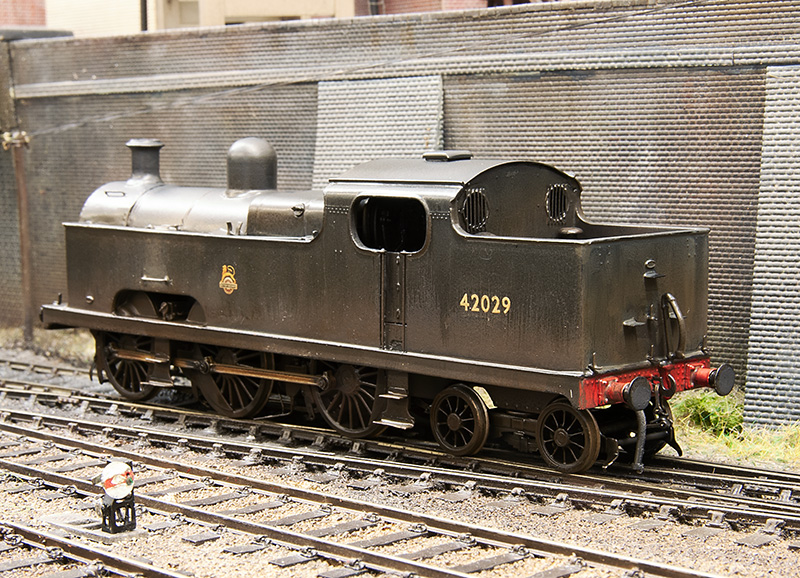
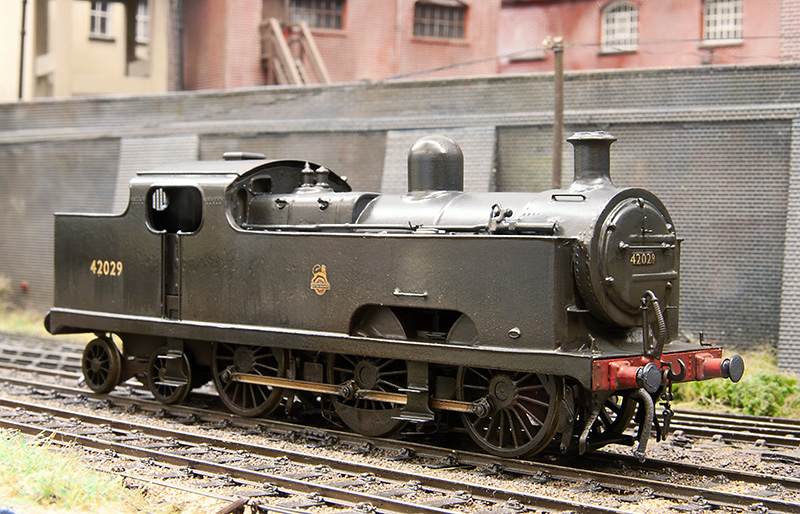
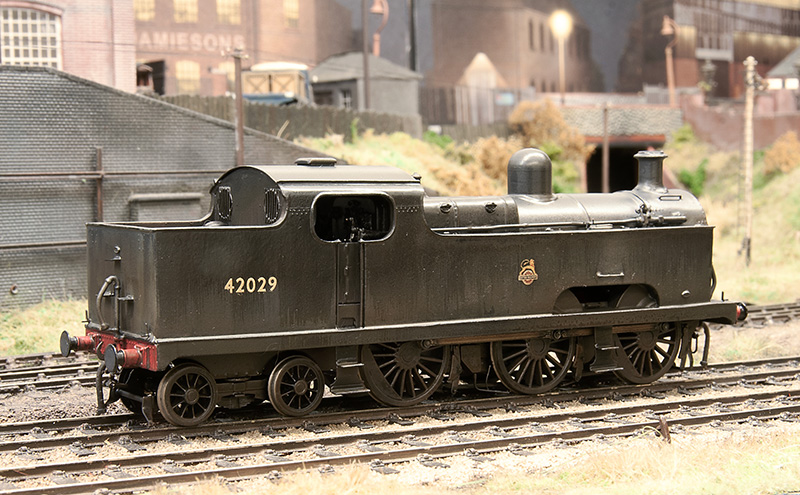
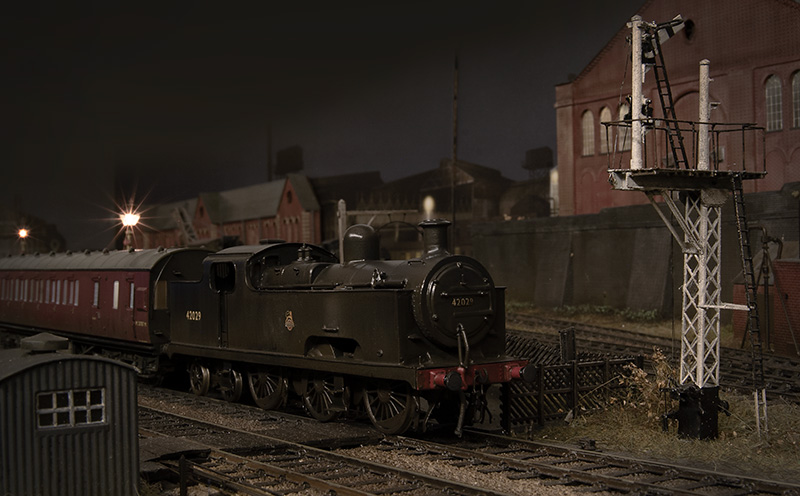
Below some pictures of the finished loco with my usual caveat of still needing coal and a crew. 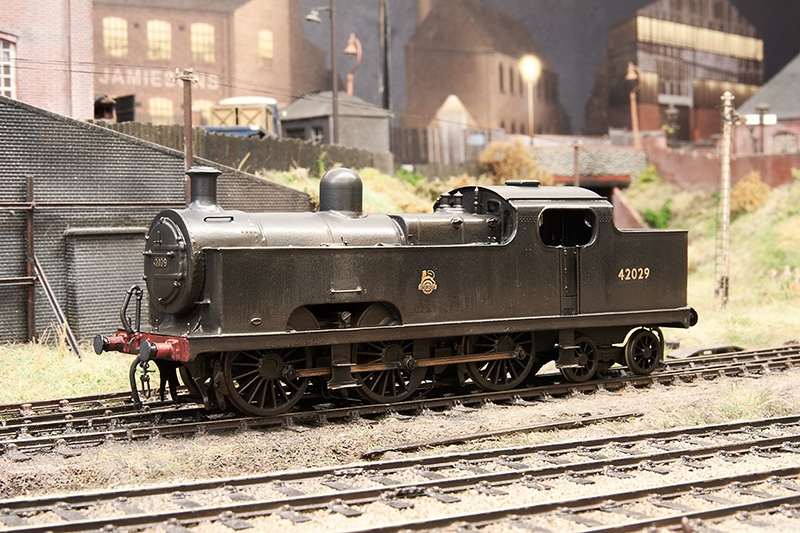
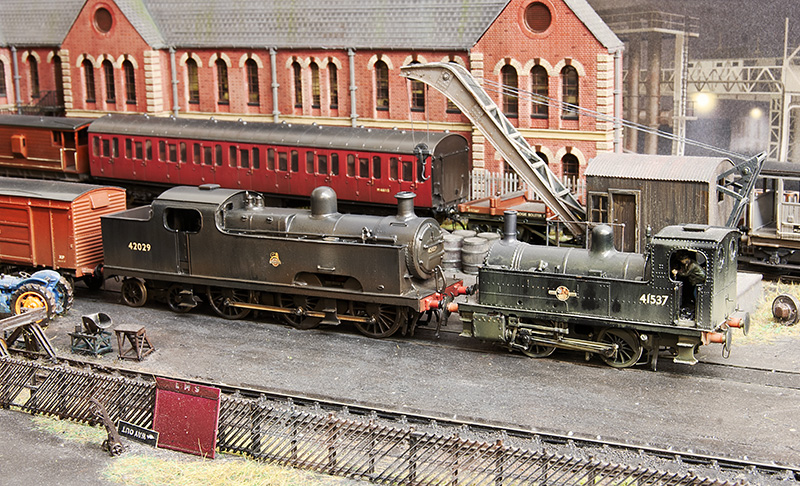 With her baby sister!
Flights of Fancy – Part 1

Long time readers may remember this illustration I did a fair few years ago. At the time I was toying with the idea of BR Flatiron for Brettell Road. People who know anything about these locos will know that they only made it as far as 1938 before the lastof them went for scrap but my theory was what if they didn’t and made it another 2o years or so? After all we are all happy to bend the historical truth when it comes to places but why not locos too?
A brief history
Samuel Johnson of the Midland Railway had identified a need for a large passenger tank engine in 1903 and while a 0-6-4 seemed a logical progression of their 0-4-4 tanks several ideas and arrangements were put forward both before and after the design by Deeley was settled on. These ranged from a 4-4-4, a 2-6-2 with odd split side tanks, through several variations of outside cylindered 2-6-4’s and a 4-6-4. All of the class of 40 were built in 1907. As it turned out this was not a wheel arrangement that would become at all common in the UK. The front axle was mounted into a Carzatti slide giving extra play and resulting in a somewhat backwards arrangement of coupling rod with the knuckle joint ahead of the middle axle and not behind it as was the norm.
In early LMS days the class were fitted wit new superheated Belpair boilers resulting in a different firebox and being longer, the boiler now sticking out from the front of the tanks. The cab spectacle plates were also changed at the same time.
In 1928 loco No.2015 derailed at speed near Newark and a passenger on its train was killed. 2 more derailments occurred in early 1935. The first instance was when N0.2023 derailed at Ashton under Hill in February, killing its driver. 3 weeks later number 2011 was observed by railway inspectors operating between Leicester and Burton upon Trent only to itself derail 5 days later at Moira. Fortunately this time no serious injuries occurred. But the reputation had set in, the class were well known as rough riders on anything other than perfect track and were noted to run smoother going backwards.
An idea not completely without precedent.
The case for these locos lasting longer than they did is not without precedent. Class leader N0.2000 underwent some modifications to see if the riding could be improved. These were the replacement of the front axle arrangement with traditional springs (giving a different look) and an improved bogie with side bolsters. No 2000 was tested against an unmodified classmate No.2012 which itself had recent general repairs and not yet clocked up 1000 miles since. Both locos were considered to be in first class running order.
On the first test No.2000 ran between 35 and 50 mph before selling back to 35 and it was reported that the engine rode very steadily with no side movement reported of the trailing bogie. Test 2 saw No.2000 run between 45 and 50mph settling back to 45 with the same results. Test 3 was run at 55 and occasionally 60mph and this test was satisfactory enough to try test 4 where she was run over 60mph, reaching a speed of 67 before selling back to 65. It was reported that a slight amount of side oscillation developed and a slight roll but was still considered satisfactory riding.
No.2012 ran 3 tests. Test 1, 35mph occasionally touching 40 and the riding was reported as good with a slight oscillation and roll being perceptible on the footplate. Test 2 saw 45mph with occasional 47 and the riding was considered fairly good but with more oscillation and tendency to roll. The final test saw running at 55mph with occasional 60 and the riding was reported as rough with the oscillation and roll said to be pronounced and the front end having a tendency to develop an up and down surging motion.
Although the results of the modifications to No.2000 were good Stanier decided that the rest of the class were not worth altering and between 1935 and 1938 they were all scrapped with many of the (standard) parts going on to other locos. It was reported that many of the boilers were used on 4f’s.
But what if Sanier thought the modification were worth doing to the entire class? They were only 30 years old and many midland locos lasted much longer than that. As the boilers went to other locos they were obviously good so it it such a leap to think that a modified flatiron could indeed make it into BR days with only a slight tweak of history is it?
The Model
Luckily for us South Eastern Finecast do a kit for these loco’s and I’ve had one in the stash pretty much since I did the drawing above.
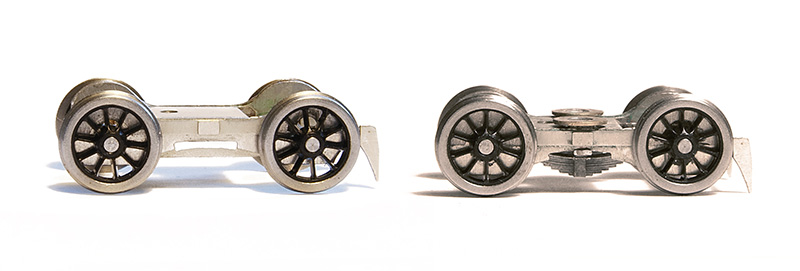
Starting with the bogie as supplied on the left and my modified version on the right. It’s been modified mechanically to provide basic springing on all 4 wheels and a basic form of sprung side control. As supplied the bogie is designed to be attached to a swinging arm much like the RTR guys tend to do. I didn’t really like that idea much if I’m honest.
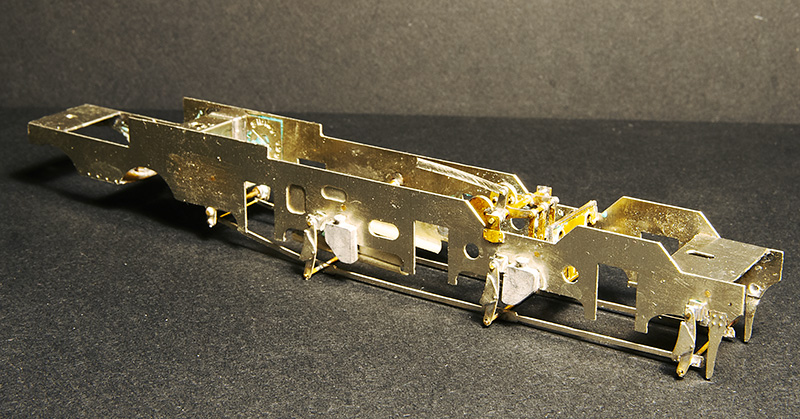 The main frames modified with some spare Brassmasters inside motion bits. I considered there was no way you would be able to see working inside motion so just modelled the bits I felt you might see if you looked hard enough!
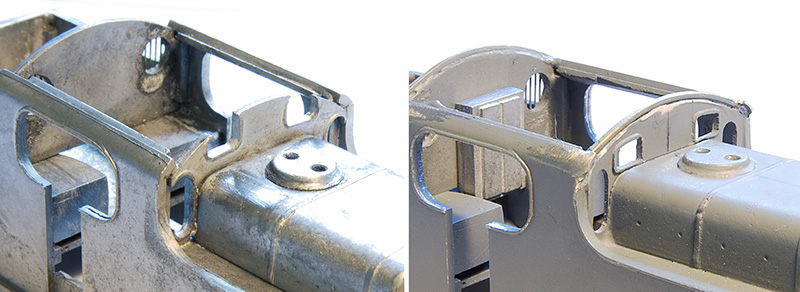
The cab Spectacle plate is a particularity weak point of the kit as it bears only a passing resemblance to the real thing, I made a new one from plasticard as can be seen on the right. If anyone wants the drawing for this (which I admit is a best guess on my part) it can be downloaded from here. The rebuilt cabs also seemed to have slightly longer roofs than the originals and little bits of Nickel strip were soldered to the corners to replicate this. 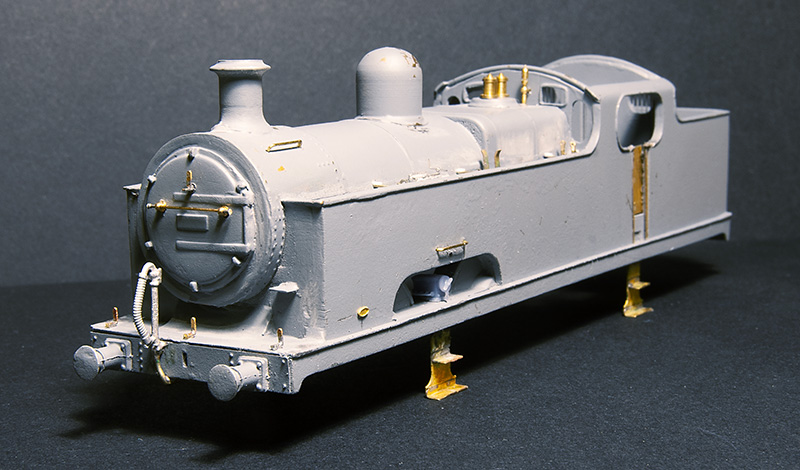 Front view. The kit relied on an upper half of the boiler/smokebox merging with the lower half which is cast as part of the tank front and this forming the front of the smokebox. The end result wasn’t all that round so I cut it back and used a 22mm copper ring in its place Buffers are from Lanarkshire Models and lamp irons from Stenson Models
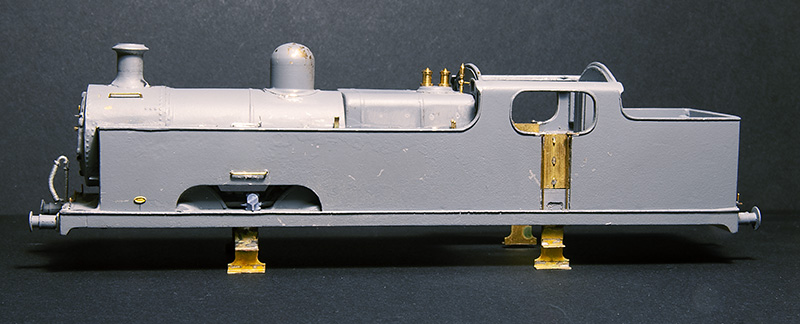
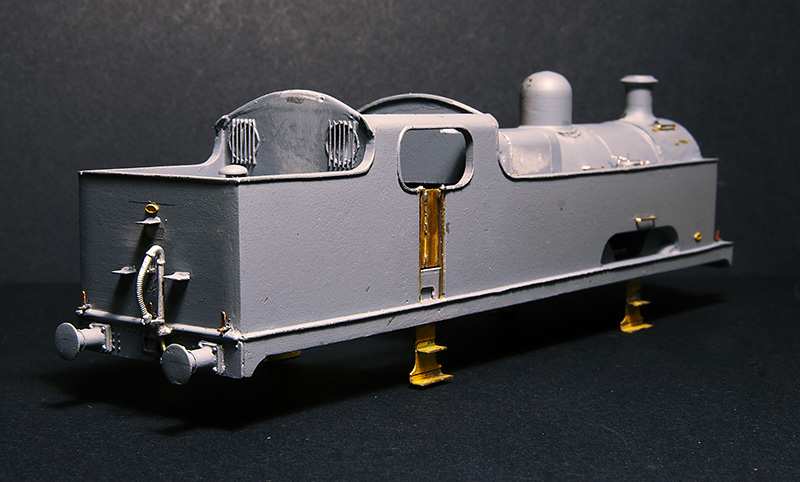 The rear view. The steps are cast into the rear of the bunker and where a little chunky. Also the top one was too low so these were replaced with some of my mk1 coach end steps. The window frames are from a Mainly Trains spectacle plate etch. Note the larger buffers on this end.
 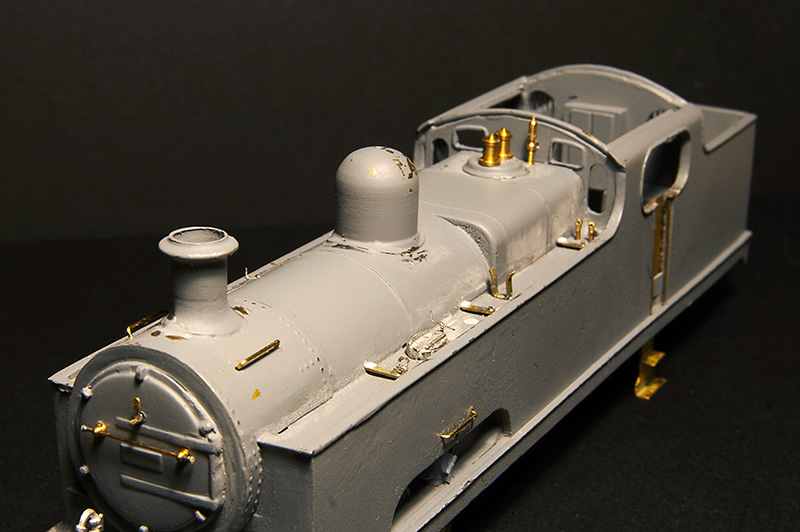 The top of the tanks are vague as supplied with just casting for the water filer caps and 2 air vents that were related to the water pick up gear. In reality only 2015 had this fitted so they should be left off all other models of the class. This is my educated guess of what should be there but i do think there should be more clutter than this. Photos of this area are rare and so far I’ve only found 2
Progress will now need to wait until after Scaleforum where i need some more bits.
Post Scalefour Crewe reflection
Scalefour Crewe was an excellent show in my opinion and feedback from my operators was that they all enjoyed themselves (thanks for your help guys). Thanks to the show organisers for inviting us. The layout seemed well received and many people were kind enough to say nice things about it. We seemed to be quite successful in holding people attention throughout the weekend.
As with any outing theres aways a period of reflection on how the show went. The layout seemed to fight us a little in the morning but settled down. The main issue being the cassettes were causing a few problems.
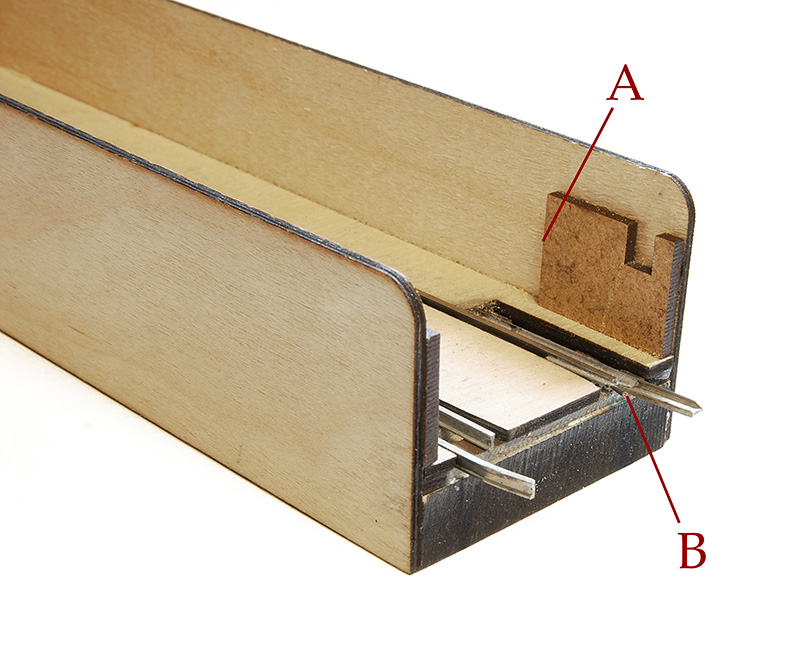 There were 2 areas with the cassettes that need addressing. Area A is that any stock that wasn’t on the rails would strike the edge of the end stop supports and bring the whole train to a halt. It’s unrealistic to think that everything on a cassette will always be on the track 100% of the time as the cassettes are moved around. Thats the point of them after all.
Area B is an easy fix. Theres a bit of wire that holds the connecting rail (which is loose at the end) in line with the rail on the cassette and agains the guide rail. These bits of wire were too straight meaning the joining rail could go the wrong side and all the stock would fall off. A little more of an angle to the wire will solve that.
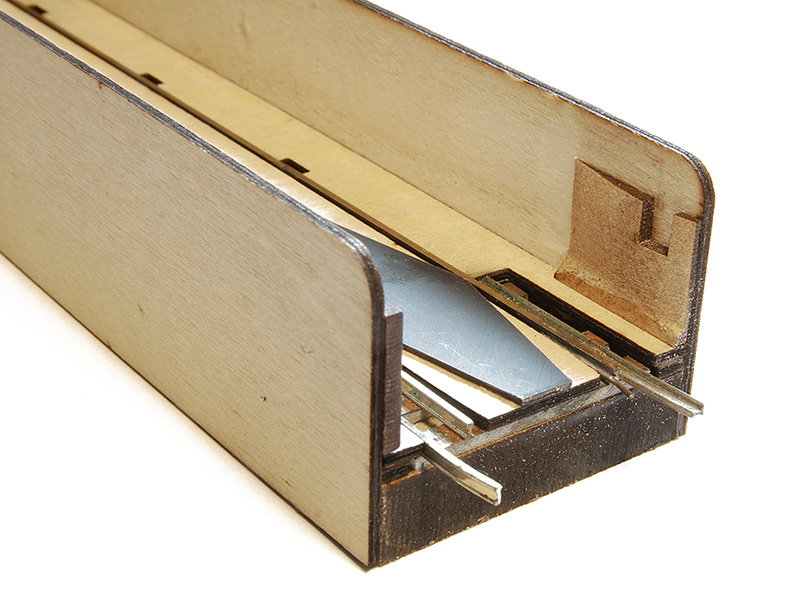 First approach to fix problem A was to shape the end supports so that stock doesn’t stop when it hits it. A few trials showed this to be effective but it merely gets the stock past the ends and it still stays off the track. Plan b was to make a re-railer from 30 thou plasticard so that any errant stock is pushed back on to the track. The advantage of this is that I don’t need to reshape the end supports at all as the stock is on the track as it runs off the cassette. This is just a rough proof of concept of course but if I fit one to the end of every cassette, as wagons will need to run of their own cassette and through the loco cassette that gives 3 opportunities to re-rail any rogue wagons and if they are still off after all that then they deserve to go back in the box for attention back home!
Above is a little test video. The brake van is running along the edge of the cassette before the join.
Aside from the usual small stock of wagons that need attention either through failures or just a general refusal on their part to play nicely we had a few issues taking stuff in and out of the yard. There were also a few clunks when running through the slip which is a dead giveaway that something is not quite right somewhere. So on returning home and when I had just 2 boards up, allowing me better access to the slip this has been investigated, tweaked and one of the check rails replaced.
A Bachmann brake van (straight wheel swap, no compensation) does the testing.
Artistic licence
This weekend I was helping Tim at Railex (helping in the loosest term – I was there anyway!) and had a very interesting chat with a chap about lighting on layouts. He explained that lighting is what he does and he was obviously somewhat of an authority on the subject.
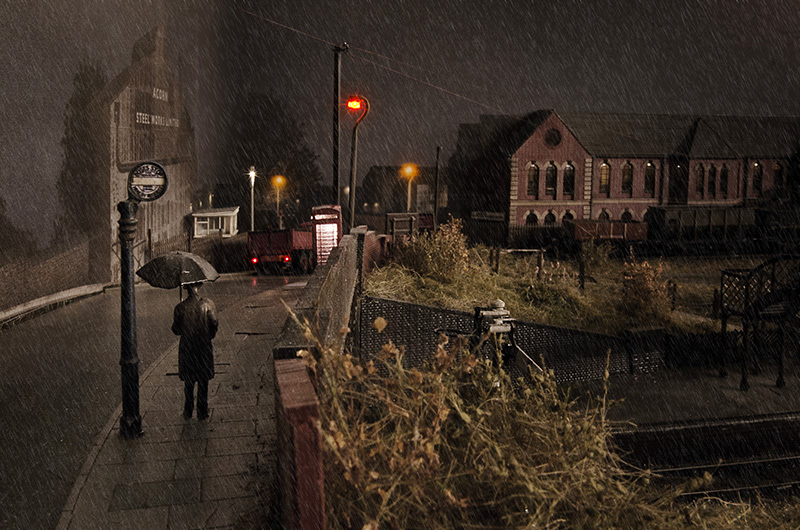 Anyway the subject of this image came up, Apologies for posting it again, I get people are probably sick of seeing it but I have added a bit of rain as some people asked for it. He explained that sodium lighting on a scale of colour gives a very high spike in the yellow range and doesn’t output any other colours. For this image to have the colours it does it would need a white light source, I cant say its the moon because its raining! It actually does have a white light source as I have a string of dim-able LEDs on the wall of the shed that I use to infill my night pictures. He very obviously knew exactly what he was on about! People may have noticed that at night we sometimes see in black and white. It was something I was already aware about on a very basic level. Cameras are much better at picking up colour in low light than the human eye as anyone who recently saw and photographed the northern lights probably noticed.
So I could say that the above image has a certain degree of artistic licence to it. Or at least I could if it was deliberate but the reality is it wasn’t. I hate it when people throw the term artistic licence around to justify missing something or some sort of mistake after its been pointed out. It’s OK to miss things, just don’t try and claim it was deliberate after the event.
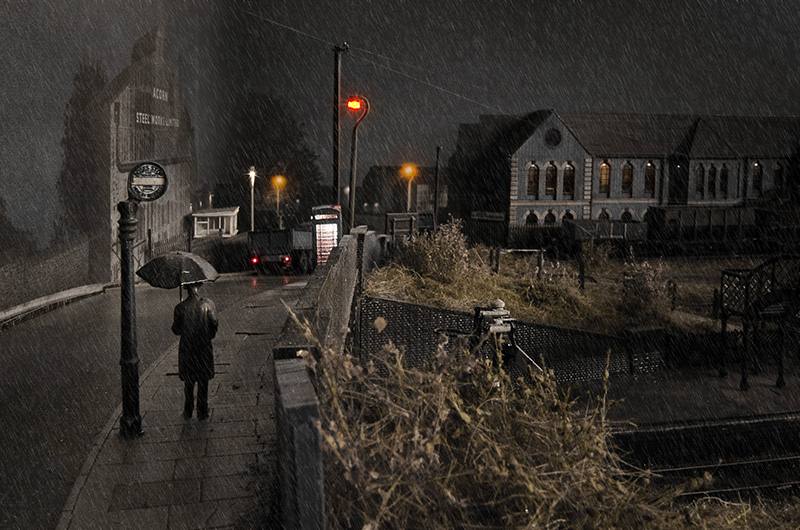 So by taking all of the colour out except yellow (and putting some back in for the lorry lights and inside the phone box) we have an image that more accurately depicts what you would see if you were really standing on a rain sodden bridge in the Black Country at the end of the 1950’s. Two questions now though, The first is which of the two is actually the more pleasing, or nicer image? and the second is anyone actually bothered?
simply back
Today, 21st June 2023 marks a small but significant date in the life of Brettell Road, in that it’s exactly 2 years since Tim and I first cut wood for the 2 new baseboards. I think it fair to say that a reasonable amount of modelling water has flowed under that particular bridge since that day and I’m now drawing in to the layouts final destination somewhat.
Drawing being the word as the big thing thats always been missing from any pictures of the new boards is the backscene. Long time readers may recall that this is an area of the layout that I have revisited on more than one occasion and, with every intention of this being the last time, I find myself deciding to get this particular subject closed off once and for all.
The method
The method I use is like modelling but in a 2 dimensional world rather than 3. Starting with drawing up the basic structure in much the same way as I do the modelled buildings.
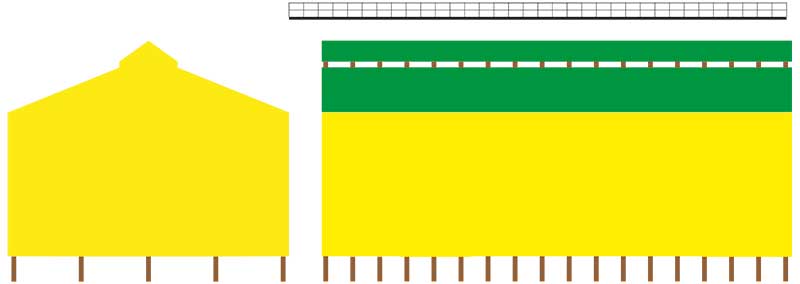 Above is the basic drawing of a typical industrial shed. Think of it like a kit of parts. This is done in Adobe Illustrator and the rather bright colours are simply so that they are easily selectable at the next stage.
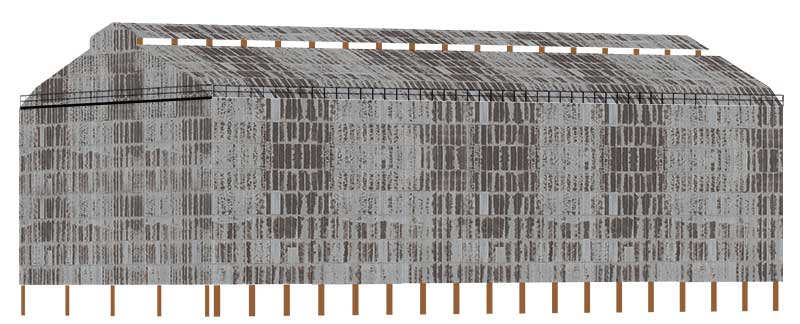 Which is to transfer the basic drawing to Photoshop where Scalescenes textures are overlaid and the bits ‘assembled’ into something resembling a basic 3d building. You will note theres no shading and no perspective yet.
 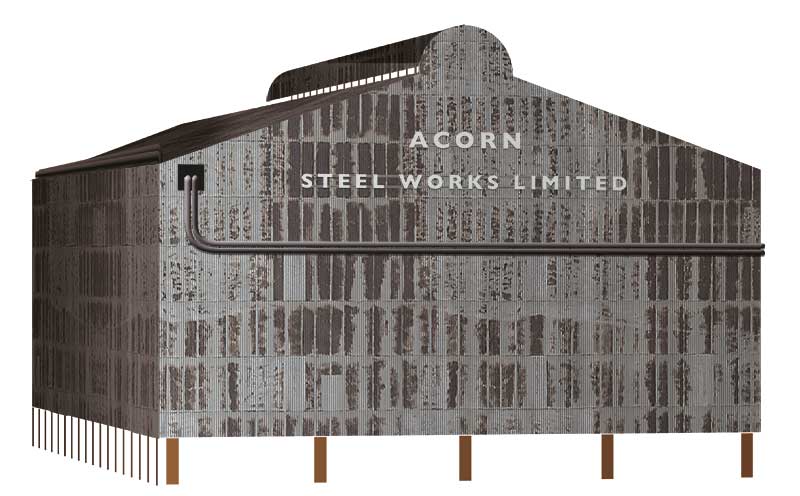 A different building showing some shading and some perspective. The image is still made up of separate parts in a folder so that I can fine tune it once applied to the finished backscene.
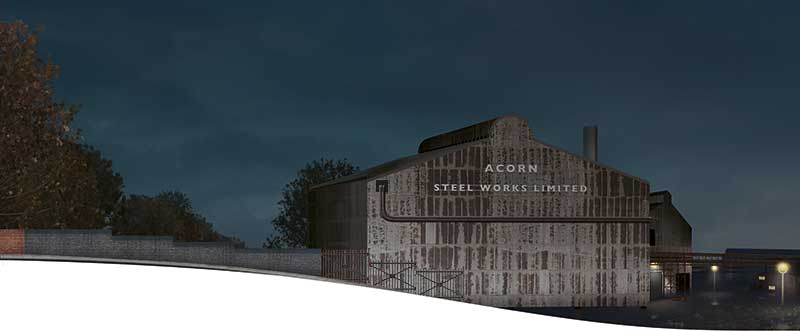 Of which this is the end board for the left of the layout. Some consideration, such as the metal fence, needs to be made for elements of the layout that will cross from the 3d world to the 2d one. The line the railway takes, under the bridge on the left is hinted at by the arrangement of the trees.
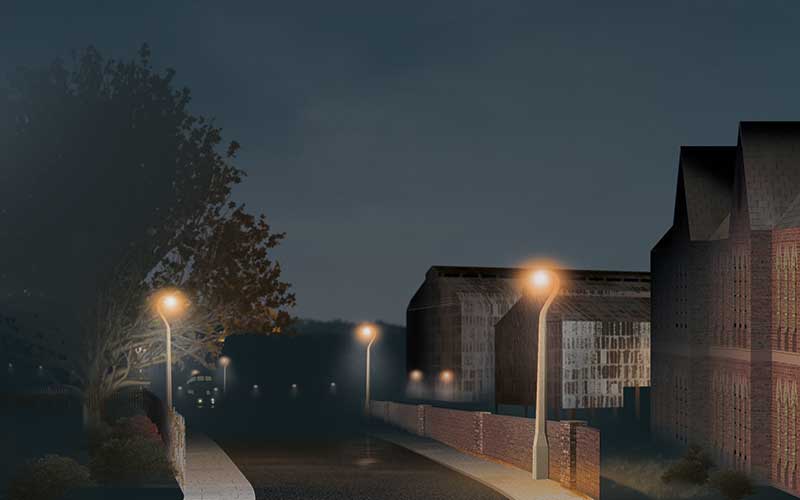 This is the view of the bottom of the hill on the left. Again the wall and the building on the right of the image are intended to match up with the 3d model.
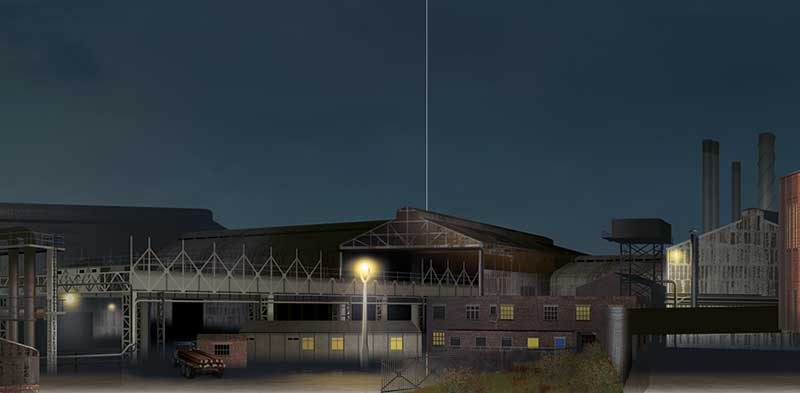 And finally the middle bit of the 2 new boards. Based on images of the real Round Oak. Of course the point of all this is that its there but not really all that noticeable at the same time.
Revised fiddleyard
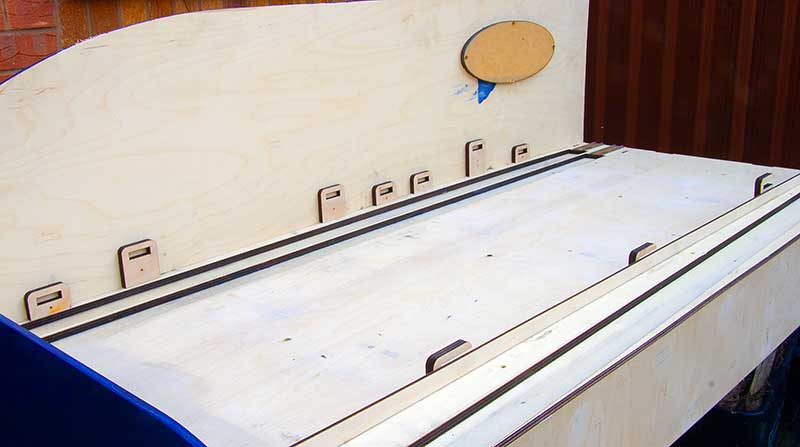 Ive mentioned before that enlarging Brettell Road would mean I need to build new fiddleyards. The reason for this is the way the cassette system worked was to have a recess in the board which given that the layout is now 2 tracks meant the old ones couldn’t really be made to fit. I also took the opportunity to make some improvements and the result can be seen above.
The boards are 6 inches longer and this time I’ve included a little barrier on the near side edge to stop anything falling off It never did but it was something that bothered me. 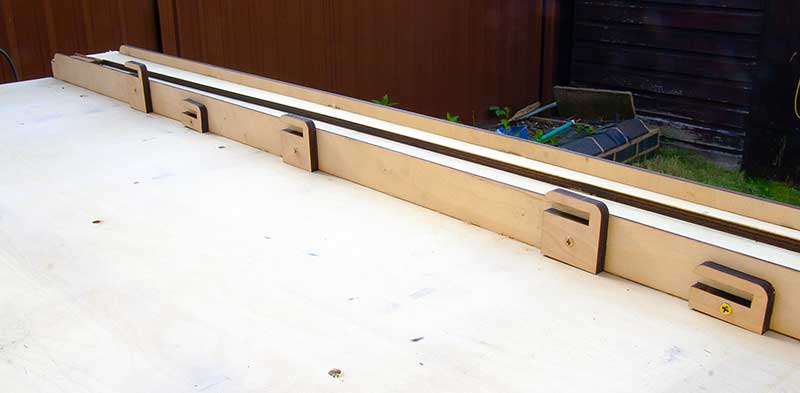 View from the front. I decided that the Round Oak industrials running on the mainline was a no-no, so now they will appear from the right of the layout behind the warehouse. As the mainline drops away this means that i needed a different level for this bit.
With the cassettes I have also made some improvements. The originals use 9mm ply which as it was unsupported did bend somewhat. I now have 3 sizes instead of the original 2. A short one for locos, A medium one for units and a long one for coaches/wagons. I have made the long and loco ones reversible but I only expect to reverse some of the locos.
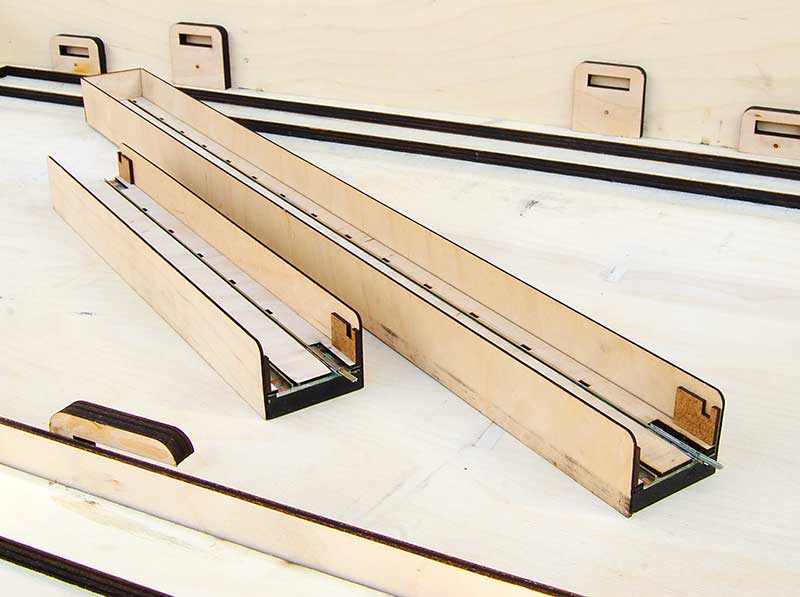 Pictured are the loco and unit versions. The base is 9mm MDF this time.
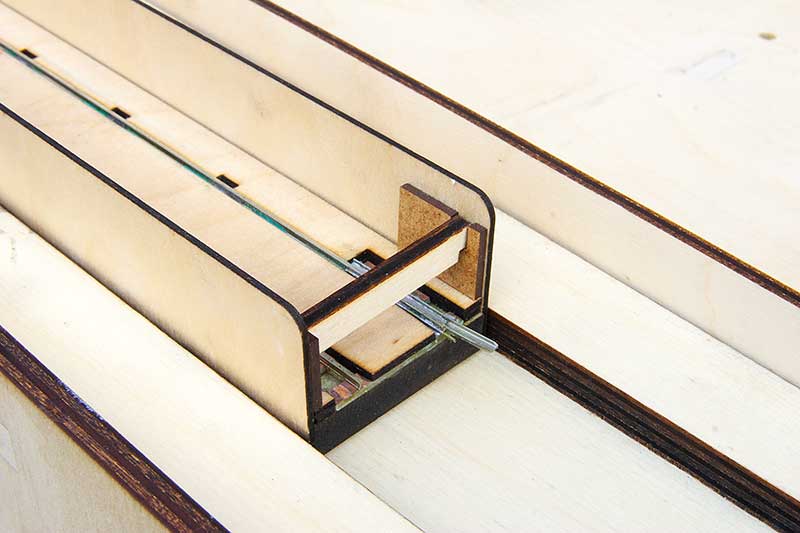 The little bits on the inner ends are for rudimentary buffer stops. This stops the trains running off the end but also adds a little security when lifting the cassettes so that nothing rolls off.
 The way they connect is a tweak on my original design of using a bit of flat bottom rail on its side – positioned in the web of the running rail for alignment and electrical connection. Originally these were both sides and the rails on the cassettes were angled outwards a little for a good fit. Making the loco cassettes reversible main this wouldn’t work and so a small bit of 0.6 straight wire is soldered to the inside of the web to help with alignment.

You may be wondering what the little blocks are for in the first 2 pictures.
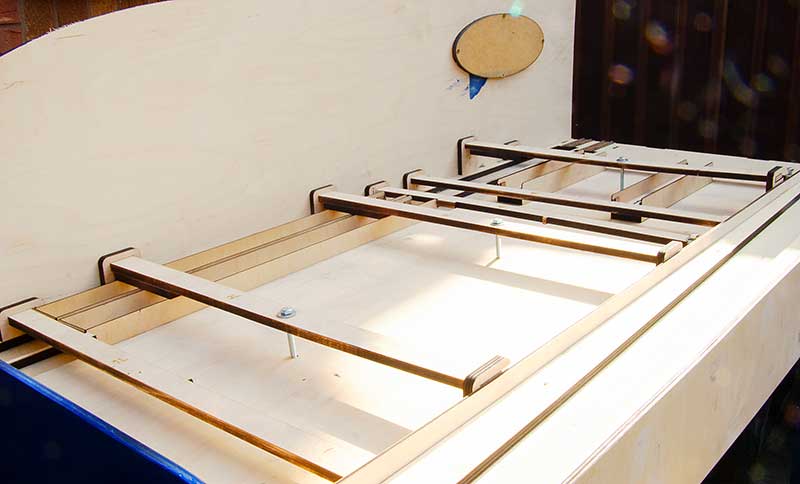 Taking a hint from Amlwch (a layout i used to help out with) I decided to make the storage of the cassettes integrated with the fiddleyards. This one will store the locos and units, the other one the long cassettes. Most of the braces slot in place meaning I can lock in place 8 unit cassettes with just 3 bolts and 16 loco cassettes with just 2. The less time spent faffing about at an exhibition the better!
Thanks as always to Tim for allowing me to hijack his laser cutters.
Stretching things out a bit.
One aspect of making Brettell Road longer is that the original fiddleyards will need to be replaced. As such the opportunity will be taken to increase their length from four feet to five which means I can increase the cassettes from three feet long to four and a half. Any bigger than that and cassettes start to become unpractical and a bit sketchy anyway.
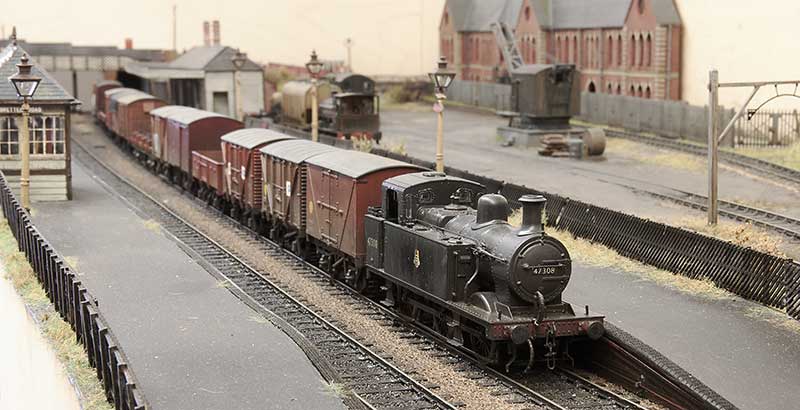 A four and a half feet long freight train on Brettell road.
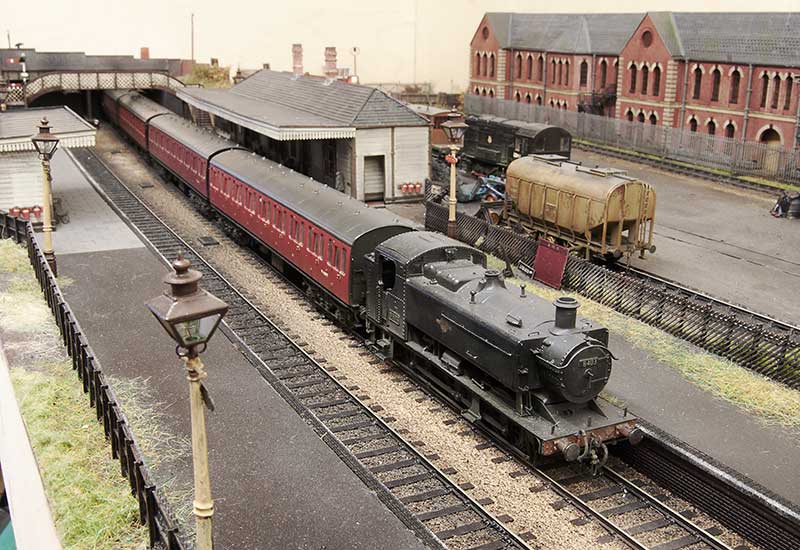 A four coach passenger train. When I built this originally one of the (then 3 coaches) wasn’t finished as I hadn’t detailed up the underframe yet and just swapped the bogies. This was due to Brettell Road’s first outing coming up (Scaleforum 2018) and it never got moved from the ’roundtuit’ list since.
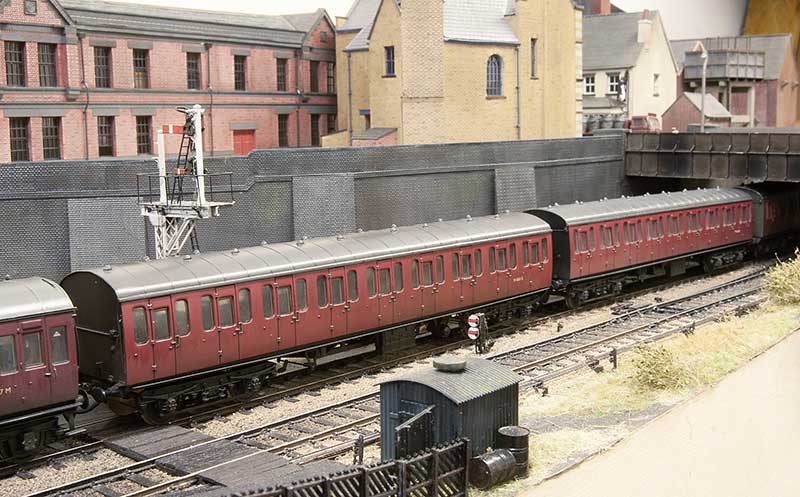 But when another cheap coach popped up I decided to get this little train ticked off so they were both detailed up together. Leaving just one thing outstanding…
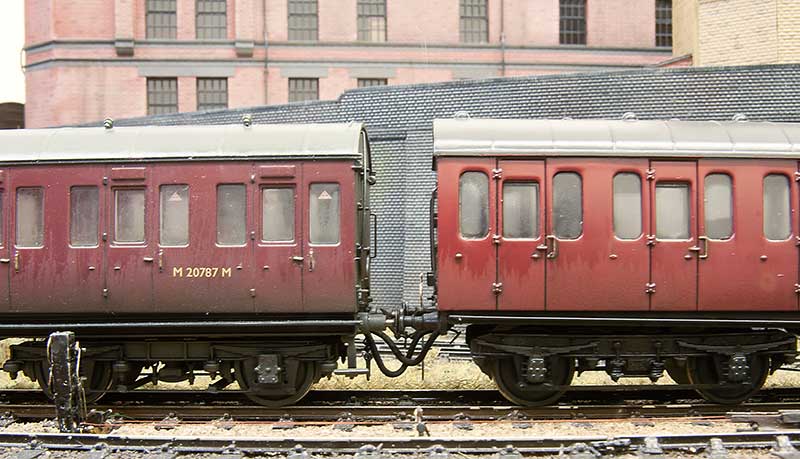 …the brake pipes. I admit to not using working ones on my wagons, as the layout is principally a shunting one, but as this is a fixed rake of coaches why not? I came up with the original idea for this back around 2005 and articles appeared in update and MRJ. The original update article can be downloaded from here. Where I have differed from my original article is to have one long pipe for the vac pipe and another long pipe for the steam heat pipe I figured 4 short pipes would just stick together in a clump! So theres a magnet on the end of the pipe that connects to a magnet in the bufferbeam. All simple stuff really but it does mean that the coaches and their pipes have to be couple up or the pipe will drag on the track and no doubt get stuck!
A dash of autumnal weather.
After much experimentation on Brettell Road part 1 and coming up with a working formula. Adding rain to part 2 was a much simpler process (although still a bugger to photograph mind you!)
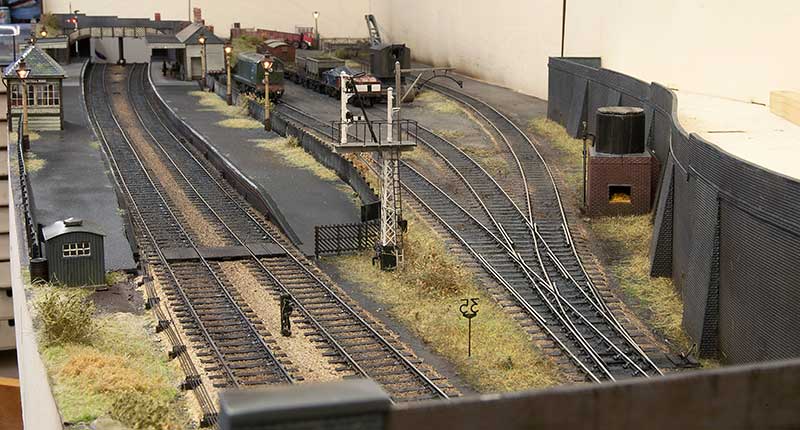 View from the middle looking towards Stourbridge. The method I have settled on is to spray everything that needs to be wet with a fine coat of Tamiya smoke. When dry a coat of AK interactive wet effect is added and thats really it. Simple enough now but it took an awful lot of faffing about to get here!
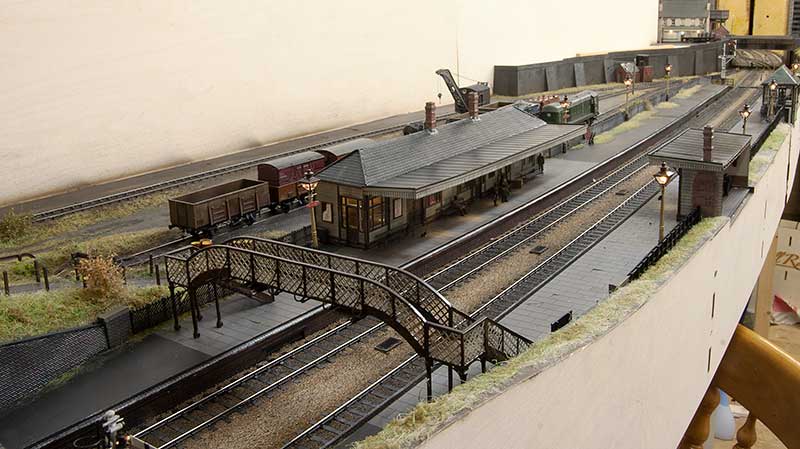 View towards Dudley
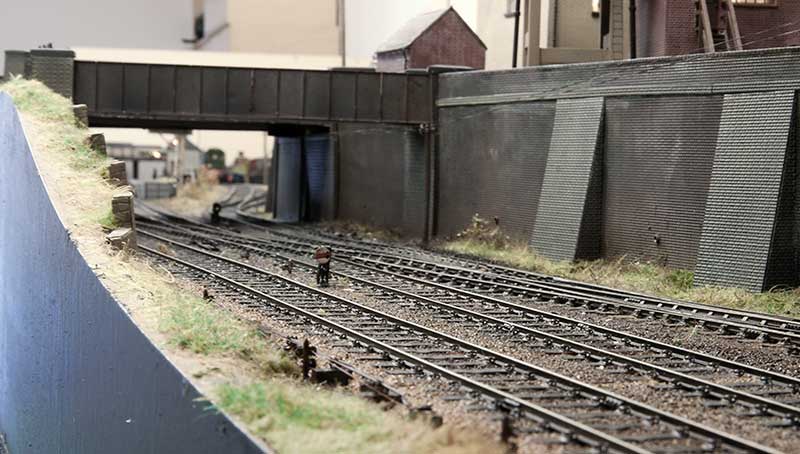 This is the view from the old layout to the new one . While its not something I intended to capture when I took the picture it does show the elevation changes quite well.
Below a few evening pictures
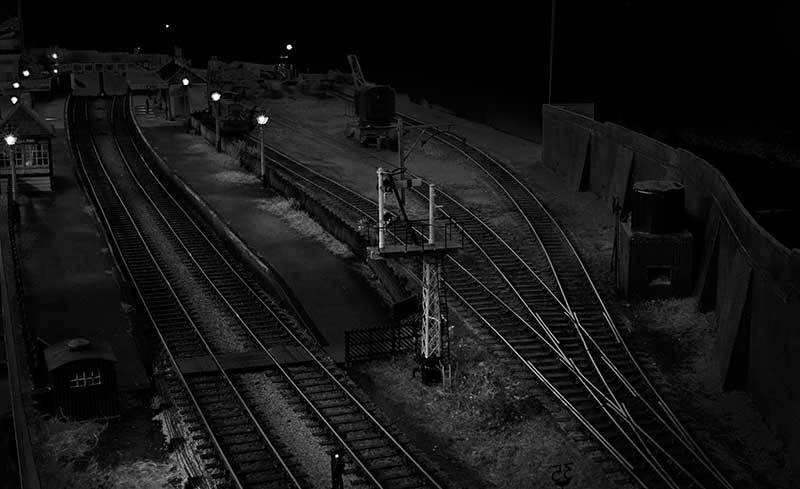
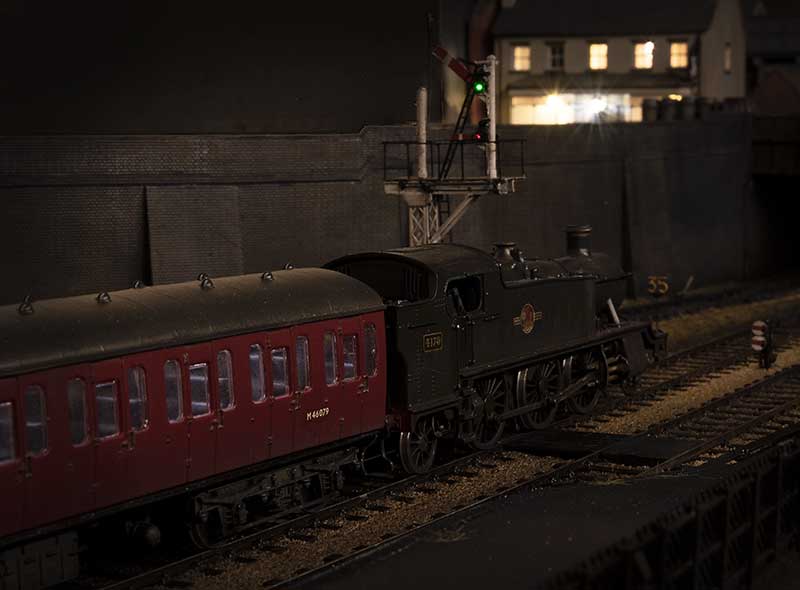
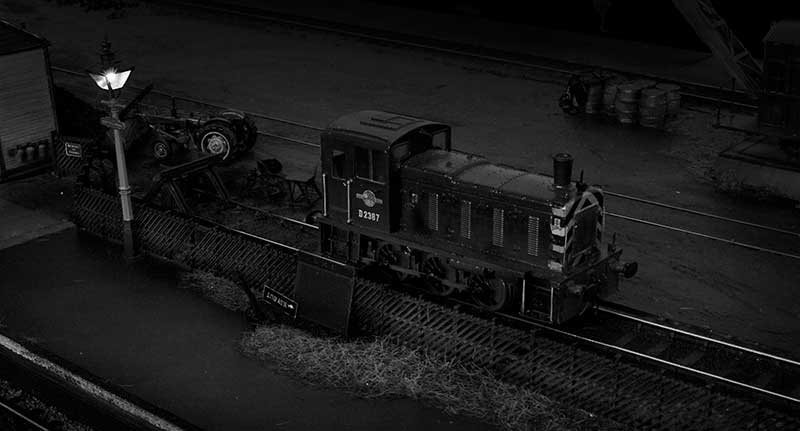
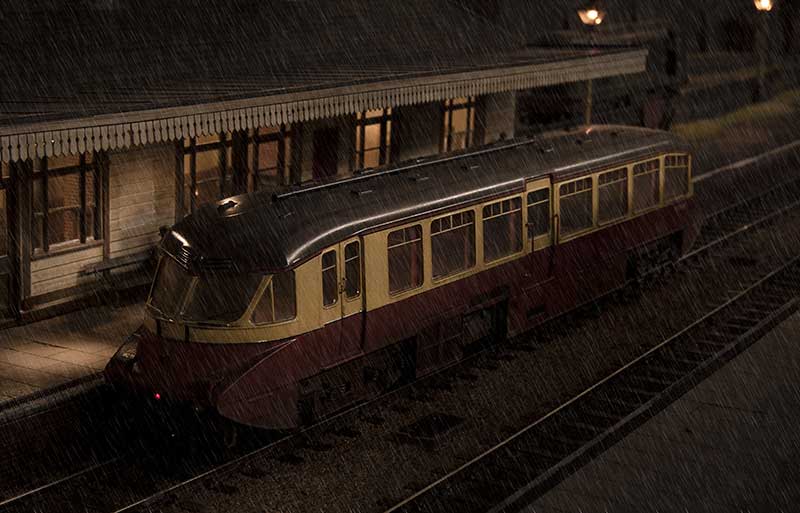
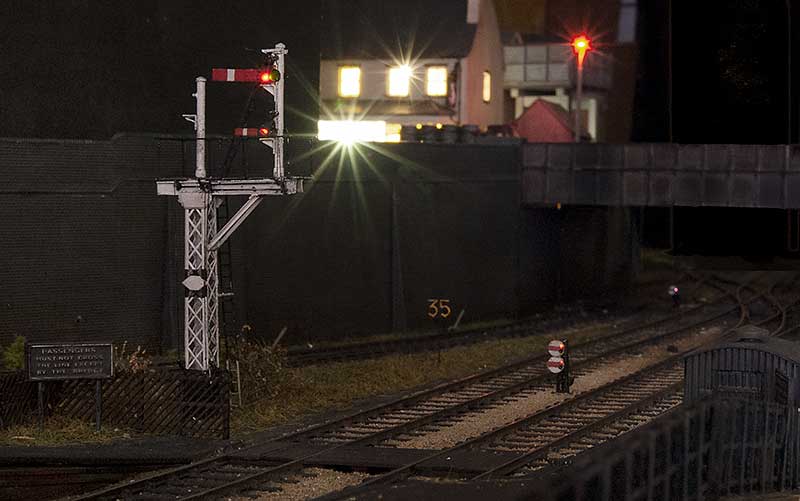
Tracks and tweaks.
Been busy doing the fiddly bits of track for Brettell Road part 2.
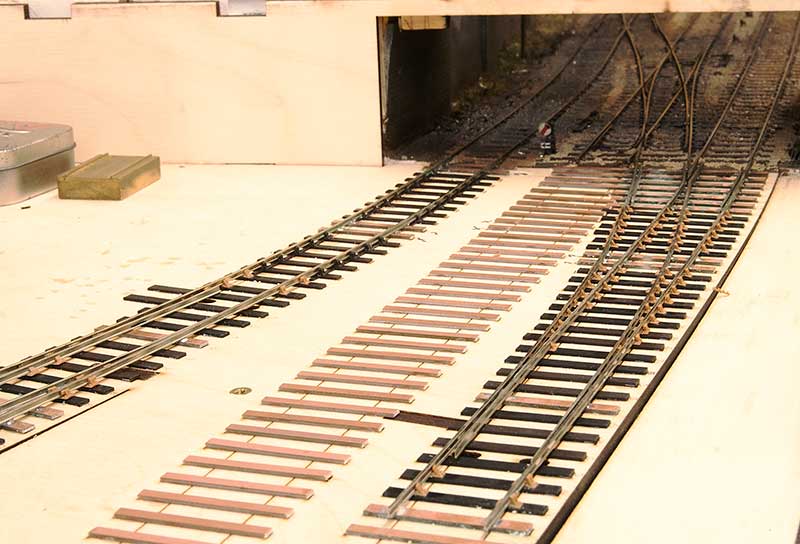 Ok, this is just a B9 on a slight curve, not exactly fiddly.
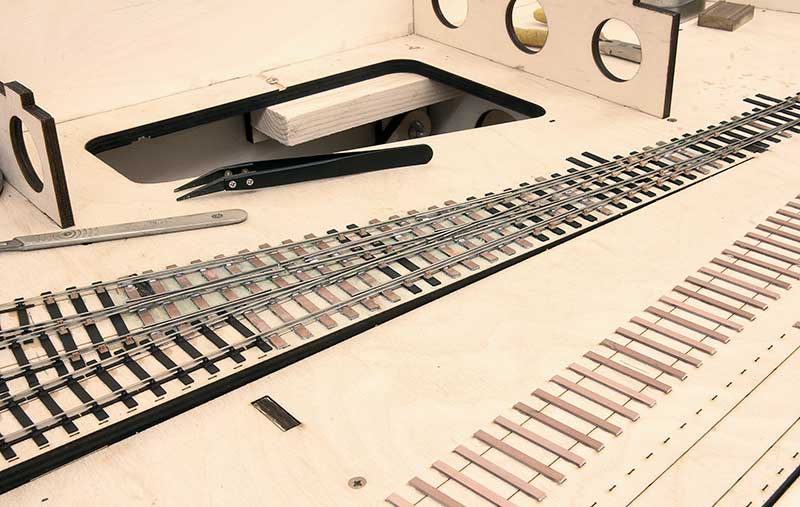 This is a bit more entertaining though. Ive tried a slightly different approach from my usual norm by using more copper clad and building more in situ than I usually do. I normally build the crossing assembly away from the layout but decided this time to only assemble the vees themselves remotely. I think its a bit quicker and allows a little more wiggle room doing it this way.
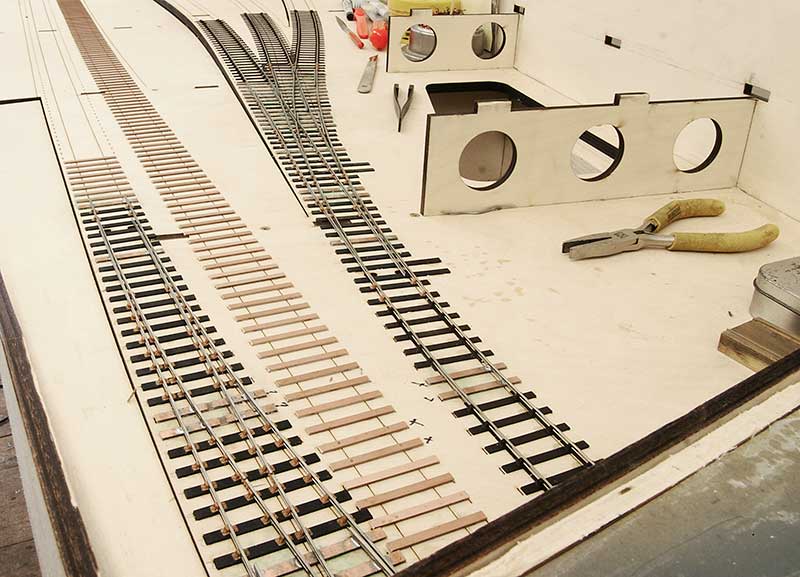 The view from the bridge.
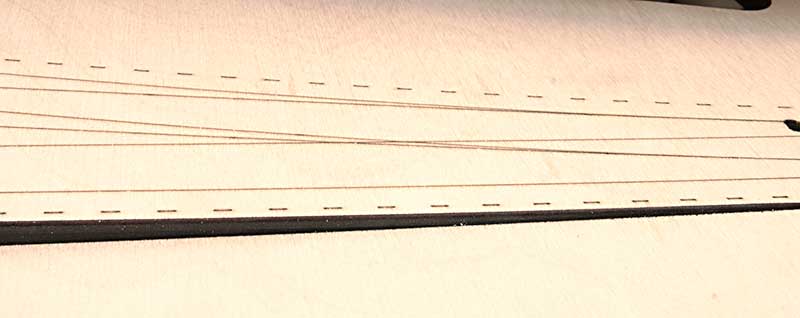 No matter how designed you think something is theres always some tweaks needed when you see the thing in the flesh. I never noticed how the 2 vees had ended up virtually on top of each other.
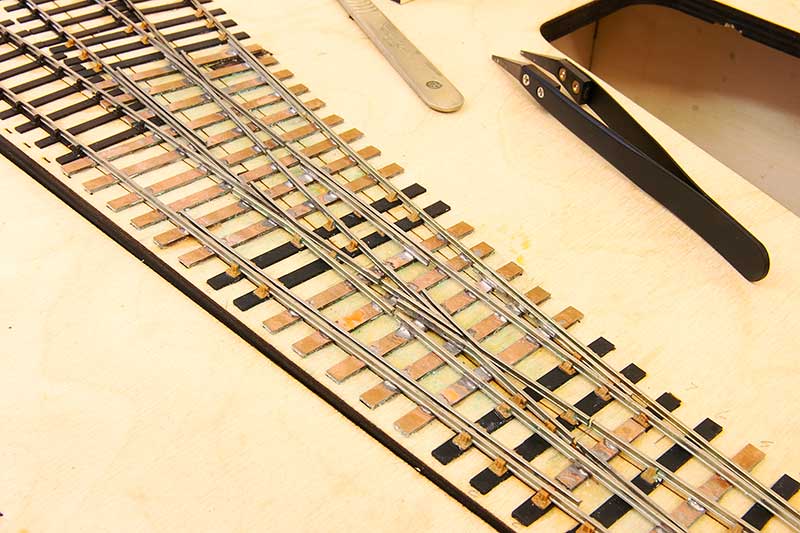 You can see here how the middle road has been realigned. The original alignment showing through under the sleepers.
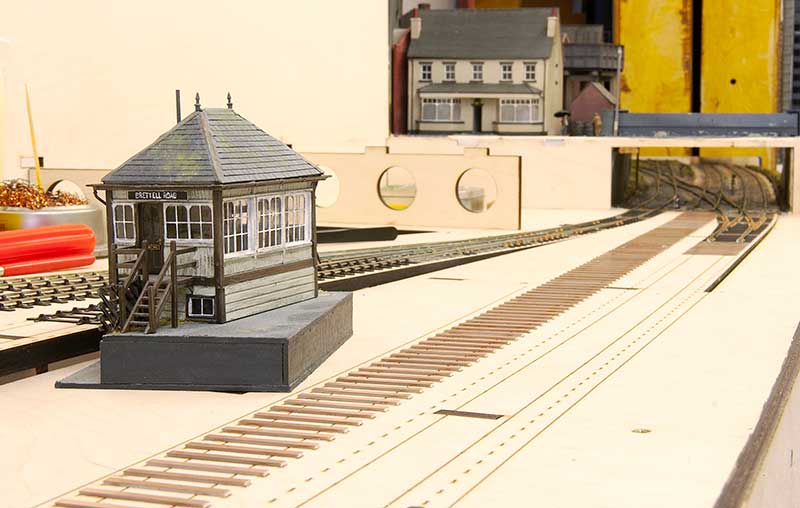 Another tweak is the position of the signal box. I don’t think I fully took into account the curve and the sighting lines are worse than I thought they would be where I put it originally.

By moving it to to the other platform and along to the left a bit the sighting lines are much better.

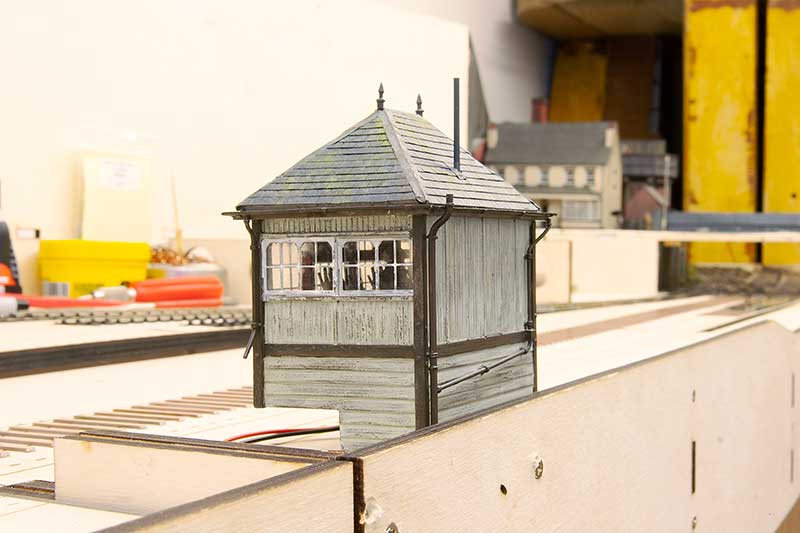
So the signal box will go here instead. I will need to move the steps to the near end and I plan to fit deeper windows so that it more like a type 3 box.
Wires and signals
Part of the process in upgrading Brettell Road and preparing it for part 2 was to redo the wiring. Those that have been following from the start will recall that it was initially only a plaything and not an exhibition layout and the wiring reflected that being just 4 wired between boards. 2 for the DCC and 2 for the AC supply. A concession was made after the first show to provide short protection for each board but its not really how things should be done so its been mostly stripped out and done again.
So now the DCC is split into 3 sections. One for the yard, one for the mainlines and one for the accessories. Theres little point having short protection if said short cuts off the ability to throw the points and resolve it. The AC is also split into 2 sections as well, the second being a DC supply for LEDs. You can use AC for LEDs anyway but the flicker can be noticeable sometimes. So now theres 10 wires between boards instead.
Signals
The new arrangement for entering the yard has required a few new signals as well.  Mainly a couple of ground signals from the MSE kits. I need a couple more for part 2 (one of which is a double) so I built them all together. these are powered by servos controlled by a Tam Valley control board.
  I guess this also comes under signals? A simple limit of shunt sign from a MSE lamp a bit of brass tube and some microstrip.
Below a couple of mood shots .


Midland brake van evolution – a visual guide.
One thing the Midland did well was use standardised bits and adapted them as they went along. This is quite noticeable in their signal boxes but also in their brake vans and, visually at least, the evolution is pretty obvious and logical. So from left to right…
 So starting with the early midland 10 ton van. This was very much of its time and featured 3ft 6in wheels with a veranda at one end only. The open platform thats so familiar to the idea of a brake van wasn’t something that the Midland really went with and only one lot (D2096) of 4 vehicles would feature this in the future. The rest of standard Midland brake vans would all feature a full length roof.
The later 20 ton van was built to diagram 1659 between 1924 and 1927 and featured a longer 12 ft wheelbase with 3ft wheels and a cabin that was 13ft 4in inside. This would become the standard size cabin for the rest of the midland vans that followed The similarities between the 2 type shown are pretty obvious with vertical planking and basically the same end panels.

Next came diagram 1657 (the diagram numbers don’t seem to follow in a chronological order) built between 1927 and 1931. The obvious change was the duckets on the side. The outer ends also evolved to feature a smaller opening and flush planking but still with the same offset central vertical spar.
 From diagram 1657 to diagram 1940 built in 1933/34. Virtually identical except for an increase in wheelbase of 14ft which resulted in a visually less nicely proportioned vehicle. It’s suggested that the increase was an attempt to improve stability at higher speeds.
 On to diagram 1890 also built in 1933/34. Still 20 tons but with another wheelbase increase to 16ft and an increase on overall length from 20ft to 24ft. The cabin size remained the same but there was a change from vertical to horizontal planking. Note the end central spar now really is central!
 Finally diagram 2036. Basically the same as before but with the door opening moved to the far end. The planking on the ends is now gone as is the central spar as well as the upper part of the opening following the roof line. There were a few slightly different variants of this design such as diagram 2068 (the last being built in 1950) which featured a deeper ballast box between the wheels. Some of this last batch were also fitted although many of the other types were through piped at times in their lives.
Building plastic kits – some thoughts
Thought I’d do a bit of a more detailed post about building and finishing plastic kits and the thoughts behind it as I go along. As always other methods are available and no one has to follow every step slavishly. Just take from this what you want if it helps at all. The intended victim in this case is a Parkside LMS (ex MR) 20 ton brake van, kit PC58. Im not sure how long this kit has been in the Parkside range but it has the look and feel of one of the later kits however the instructions do refer to the Woodhead transfer sheets as a source of lettering and they vanished a long time ago now. More importantly and the reason to devote a little more than my usual ‘heres a bunch of pictures, hope you like them’ approach is this is the last original Parkside kit in my stash so it’s also the last kit I will build that I brought from Richard Hollingworth himself.
So armed with the kit, the instructions, a selection of glues and other rudimentary tools plus the all important prototype references I set to work. Generally parkside kits are as close to model railway lego as you can get. They kind of fall together however don’t take this for granted and in this case I found that the floor was about 30thou too narrow. This was evened up with a couple of bits of microstrip either side. The importance of a dry run to check the fit of all of the parts parts cant be overstated.
Another thing not to assume is that the kit is right or accurate. Again generally speaking the vast majority or Parkside kits are but theres a couple that have a few clangers. The vac’ braked 16ton mineral wagon with a 10ft chassis not 9ft and the LMS fruit can with the wrong shaped ends are the better known examples. It’s strange how the right chassis is in the range for the mineral wagon and the common fix for the fruit van is to use the ratio LMS van ends and roof. As these are all under the Peco banner now you would think this would be an easy fix for them. Perhaps they don’t know? The glues I will be using. as theres no metal to metal joining required the soldering iron can stay turned off for this one. The main glue I will use is the Tamiya extra thin cement.
Building the body
 The body assembled, I drilled the holes for the handrails before putting it together, the instructions say to do this after but i find it easier this way. Although not really a decision as such with this kit as the handrails aren’t moulded on this is usually the first point where you will start to make your own decisions.
Handrails – do models look better with separately fitted ones? Yes provided you don’t mangle the body too much removing the moulded ones and the replacements are not all wobbly. I use 0.35mm nickel silver wire and flat nosed tweezers to shape them. You need to keep the bends crisp and the straight bits straight. If you mess up a bend don’t waste time trying to straighten the wire out as you wont. Just start again. Separately fitted handrails that are all out of shape against a gouged body will not look any better than the moulded ones you carved off. Whatever you do though if you do have messed up handrails and someone points it out don’t try to claim its because they were bashed about in real life as it’s obviously a bodge! I think this stems a lot from the late 90’s when people were fitting all manner of after market bits and dodgy etches to Lima diesels. The fact that a lot of these parts were worse than what people were carving off the original body seemed to pass people by as separate bits was what you did back then!
Decision 2 – the lamp irons. Will they look better separately fitted? Yep but theres another thing to consider, will I knock them off in layout use? When people are new to finescale models (I don’t like that term but it serves a purpose here) theres a tendency to fit every tiny bit of detail that you can. With experience of operating your stuff at exhibitions you will find that you tend to draw back from that to point where practicality takes over. Where that point ends up will naturally be different for each of us.
It helps a little to delve into how human beings work. When I was working as an illustrator we placed a lot of emphasis on learning to see. Although we have sight we are not really wired to properly look at things. We are designed to make quick judgements and move on, basically can I eat it or is it going to eat me? What we are good at though is spotting something wrong or out of place. So a moulded lamp iron in this case will go unnoticed by most people. But one thats been knocked off wont. This pre-determined fascination with the out of place can cloud our judgement of many things. We notice graffiti on a wall so we think it’s prevalent. We don’t notice the 100 other walls we walked past that didn’t have any. We notice the wagon in a train that looks like it should be in the scrap yard and ignore all those that don’t look like anything like that. This extends to our history too, especially our photographic history. Photographers like the rest of us will ignore the mundane as focus on the thing that catches their eye. If you look at pictures of New Street in 1987 you would believe pretty much every train had a class 50 on the front and there was one DMU a day, as for EMU’s you can forget those completely!
 This next stage will be dictated by how the kit in manufactured and can in the right circumstances save time later. If the kit is moulded in all the same colour (and its not black) you can skip this bit. However if the body is one colour and the underframe is black you can safe a lot of painting later if you paint and finish the body before you move on to the underframe which is what I have done here.
The Underframe
 A wagon of this size is border line for needing springing or compensation in my experience. On wagons that don’t need it one tip I’ve found that works is to slip a piece of thin paper between the axle and the bearing at one end only while putting it all together. The other end should have no slop but the width of the paper gives just enough movement of 1 axle to keep everything on the rails. A piece of glass to check that the wagon sits square on all 4 wheels at this stage is another must however. Another handy thing is the Brassmasters axle spacing jig that ensures the axles are parallel. It doesn’t matter how nicely your wagon sits on the glass if its constantly trying to steer itself off the track!
 This is the underframe with all the supplied bits in place (except the steps) Its up to you if you chose to stop here or not.
 I went for ‘not’ and added the break linkages and safety loops. If you are going to do this drill the holes you will need in the brake shoe moulding before you fit them to the model, it’s nigh on impossible to do after. The safety loops are glued in to bits of 80thou microstrip that have a hole drilled through them. This is my stop point as there’s more detail that you can add regarding the correct shaped linkages and operating gear behind each wheel. It’s not something i can see on the layout unless I make a really determined effort to look for it.
Hang on a minute, what was all that rubbish about bits of paper and not compensating stuff then? Well sometime you can kill 2 birds with just the single bit of garden aggrigate! Of all the options I am on record as believing that rocking compensation is not the first or even second best option of the 3 we have. However the internal ones do handily provide more rolling resistance than pinpoint bearings and on a brake van and a layout with gradients thats not a bad thing.
 Let’s talk about buffers. If your plastic kit has moulded plastic buffer heads, let’s not beat around the bush here, they will be crap! I have yet to see any that aren’t! Options for replacements come from Lanarkshire models, MJT, Wizard and Accurascale. As always check your prototype pictures as the ones on the wagon you are building might not be the ones the kit represents. This applies to axleboxes a lot of the time too.
In this case I opted to keep the moulded stocks and replace the heads with those from MJT, The housing was drilled out very carefully using a hand held pin chuck. Don’t be tempted to use a powered drill as the wall you are left with is very thin and even the slightest bit of heat from the drilling will melt it. A 0.5mm hole was drilled through the centre of the buffer and through the bufferbeam to account for the tail of the buffer head. You can chose to spring the buffer if you like. I don’t find it makes any real difference though.
 Weight – I try to aim for 50 grams for a 2 axle wagon. If you have the room inside then these self adhesive car wheel weights are ideal. This brake van needed an extra 30 grams adding.
 Next stage is the running trial. With any kind of van I do this before fitting the roof as once its on i don’t want to try and get back inside. The wagon is tested through all the pointwork and sidings and any derailments or unpleasant jolts or bumps are investigated and corrected. In this case I’m happy to report there were no problems.
 The finished build, even at this stage you still need to constantly check your work. note the bit of white near to the closest handrail? Something I’d not noticed until I looked at the photo. I used the Revell liquid polly shown earlier to fix the roof. The reason is that the Tamiya stuff evaporates too quickly. The Revell version is thicker, wont run and gives me a little longer to position the roof.
Weathering
Im very much of the opinion that a restricted pallet is best for all sorts of modelling applications, You don’t want to go too mad! As discussed earlier unless you are going for the scrap yard look you kind of need your weathering to be one of those things thats there but its not really noticed. An important point I feel is don’t expect one technique to give you all the effects you want and try to work with each technique rather than against it, Things are so much simpler if you do!
 So stage 1 washes – to represent washed on dirt you need to wash on the dirt! I make the wash from a mix of Revell 89 and no 9. If you are doing multiple wagons at once keep changing the mix and the paint to thinner ratio unless you want them all to look the same. Don’t be afraid to go in with neat paint as well to mix it all up a bit and work ‘wet in wet’. Ive done that here on a few planks and the roof. It doesn’t matter if it looks a mess at this stage as you will need to leave it for no longer than 24 hours and potentially clean it all off again with cotton buds and clean thinners. A big part of weathering is not about how you put stuff on but how you clean it off. Having said that I have found on many occasions, especially with planked vehicles, you can skip the cleaning stage and this was the case here.
 Next stage is airbrushing. For this I use AK interactive dark mud as it comes and a mix of black and Humbrol gummetal for greasy/ sooty deposits. Think about in the real world the direction that the atomised dirt hits the vehicle and try to emulate this. Track dirt from about 45 degrees below the model and roof dirt straight down. As aways refer to photos. What you don’t want is a rally car look as if the model has been flinging itself around a Welsh forest for a week!
 The last stage is best described as titivating (and its pretty hard to show the effect it has in pictures but i still think its worth doing). I use the burnt umber gouache for small deposits of rust. It doesn’t want to sit on enamels all that well so will naturally give a rust like effect. This can be fiddled with with water or paper towels/ cotton buds until you are happy. Its worth noting that if you are doing a vehicle with a lot of rust it’s best to do the gouache stage before the washes. Ak interactive also make sets of weathering pencils, including a set just for rust, which work well in combination with the gouache.
The lighter brown and gunmetal were used to dry brush areas of wear on the steps and the underframe respectively. The grease is a wash that contains particles and is used neat around axleboxes and bits of the underframe that are greased in real life.
 As I said its hard to see the difference this has in photos. The oval crop is before and the main picture after. While you have the gunmetal out you can pick up some of the thicker paint that always forms on the inside of the lid with a cotton bud and dab it on to the buffer faces to represent more grease.
 And there you have it. All that work for a mundane wagon that will hopefully just blend into the scene and go about is business in a most unremarkable, unnoticed way!
More thoughts on Brettell Road 2 but not kinda not at the same time
A while ago I shared my initial thoughts on extending Brettell Road. For those that missed it click here.
The initial plan required some modification to the Left hand end of the existing layout but otherwise it was pretty much an add on. Then the coronavirus happened and while plans were firmed up no wood was cut (lazered) and its not progressed to any kind of physical reality. In that time my thoughts have turned to correcting the first regret, that being that Brettell Road 1 wasn’t double track to begin with. This would also have the benefit of replacing the mainline track bed with ply as initially I used MDF. The layout was only supposed to be a play thing if you remember.
This would require some additional tweaks to Brettell Road 1 but actually not as drastic as one might think.
 Starting with the left hand end, where the new boards would attach to the existing layout in addition to the track. I was actually quite generous with the track spacing and the double track would fit with only a slight tweak to the wall shown by the arrow. There’s another advantage here as my first plan would involve splitting the single slip across the baseboard joint but the double track pulls everything further in to the layout meaning the entire slip falls on this board. No changes would be required to the bridges.
 At the right hand end there’s a benefit to slewing the track away from the front of the layout with space then for the second track in front of it. The plan is to extend the furthest siding a little while shortening the front one a smidge. This would allow me to start curving the front wall just after the canal bridge to generate the extra space. I will need to build a new bridge. None of these tweaks are particularly drastic.
Below is a mock up of how it would look.

The Bachmann Compound – part 1
I found a relatively cheap Bachmann Compound recently and thoughts have turned to what to do with it.
Lets start with a little disclaimer. Alan Gibson supplies a set of wheels to convert this loco to P4 and I would have every confidence that just swapping the wheels would get a p4 steam loco up and running pretty quickly. After all a 4-4-0 has got to be about the best case scenario you could really ask for. I didn’t try it myself but we’ve had a wheel swapped GWR Grange (I think) running on Moor Street for years now.
Being relative new to RTR steam locos, this is actually my first RTR tender loco I’ve had since i was a kid, there’s always 2 areas that stand out to me as looking a little weak on pretty much all RTR steam locos. No, not the wheels although big, in your face, wheels do perhaps yield the greatest benefit of swapping to p4 visually. The areas I am talking about are bogies and tenders. More specifically in the case of the latter, tender underframes. They just always seem so, for want of a better description, flat!
The bogie

So to the bogie. There was nothing about the supplied RTR one that i wanted to keep so its a straight swap with a Comet example. As supplied they can be built with central springing for side control but no springing on the axles. Setting some simple springs up however couldn’t be easier.
The loco chassis

To the loco. I decided I wanted to use some of the Comet chassis bits but not exactly as intended. So the first process was deciding what of the RTR offering I wanted to keep and what I wanted to replace.
I wanted to use the sideframes in a sort of Brassmasters easychas inspired way and keep the original Bachmann drive. Initially I thought the crosshead was just an RTR bodge but they do actually look like that. So that and the cylinders were keepers. I also liked the brake gear so that stayed.
The Comet chassis is not designed for this model and is too long. The wheelbase between the driving wheels and hence the coupling rods are also too long. Comet do specify this is the case on their website. The Bachmann frames are actually the right width at the front of the loco but narrow from the cylinders back to accommodate the 00 wheels. The cylinders look, from underneath that they might fit on little pegs coming down from the footplate. They don’t, they slot sideways into the chassis. Its best to pop them off and keep them safe.
I decided to split the chassis behind the forward step to loose some of its extra length. The front part being a relatively easy fit. The rear part needed some trial and error to cut away little sections to get it to fit. The Bachmann model is driven on the front driver ( it looks like the chassis was designed for gears but to both axles but it doesn’t have them), so the Comet chassis was carefully titivated so that the rear axles position matched. I wasn’t too worried about the front driver as I has decided to keep it rigid.
By leaving the RTR style bearings off the rear driving axle you get a little room for vertical movement. A Brassmasters sprung bearing was modified with a bit of tube (the Bachmann and hence Alan Gibson axles are an odd size). The frames were glued in place using 60 thou plasticard to space them out to something more prototypical. The springs are part of the RTR keeper plate so they are too to far back but I decided to leave them as is.
The brake gear needs a bit of modification to fit over the new frames and it was here that I hit a little unexpected snag. Bachmann use bigger wheels than scale. I wonder if this is because its a development of the national railway museum model which being an earlier example had bigger wheels? Anyway the effect of this is the brake gear sits too low and would likely hit the rails when crossing pointwork. The solution is to take a mm out of the top of the keeper plate so that everything moves up a little.
Valve gear
Lets be honest RTR valve gear is generally a bit weird. Its often both too big and to thin at the same time. The Bachmann coupling rods are about scale height (ignoring the bosses which are huge!!) but being only 1 piece of metal aren’t thick enough. So these were discarded and the Comet ones used in their place. Suitability shortened by 2mm.
The connecting rods as supplied are quite good though. Much more meaty and they feature the big square bosses that the Comet ones don’t, so hybrid valve gear it is then! The Bachmann crank pins are 2mm wide (really!) so a bit of tube was soldered in to make them fit the Gibson crank pins. While I was at it I made another 2 collars for the trailing driver a the coupling rods on a compound are outside of the connecting rods.
On to the tender
Body great but underframe – ugh!

Luckily Lanarkshire models do a replacement chassis kit for a Fowler tender. This was assembled as per the instructions. For the outer frames I was kindly supplied a spare etch by Brassmasters and mated this with some Comet springs and axleboxes. I decided to keep the Bachmann steps as they are moulded as part of the tender body.

As is often the case with this sort of stuff, the most pleasing view is the one you wont ever see!


Another ‘tweaks’ post
Bit of a random post this time but I have been revisiting a few things. Be warned though these are all really subtle and if I didn’t point them out I suspect no one would ever know.

Starting with the safety valves on my prairie. As supplied it was a pretty flat dish with 4 blobs to represent the valves. A bit of drilling and some wire gives something a little better.

I’ve also gone back (again) to my Dapol railcar for another little tweak.

As its not all that obvious I have fiddled with the bogies a little. Some 3x4mm triangles and some microstrip was used to change the sideframe shape to something more accurate. I also got a spare set of sideframes and cutting the springs and axle boxes of the new ones, filing down the old ones and sticking them over the top had given me more relief.
Sometimes its nice to look back at where we started to see how far we have come.


While i was in a railcar kinda mood this is my detailed Lima one. I haven’t done anything to it, it just tends to avoid the camera for some reason.

Austerity hides at the headshunt. Again no tweaks just a piccie.

Now this is properly subtle. I have revisited the layout with some Tamiya smoke and AK wet effects to see if I could increase the wet look a little. The smoke provides the darkening effect of the rain.

It a little easier to see on the light walls of the pub.

The thing is I know its darker because i knew what it was like before. In order to give fresh eyes something to compare it with I needed a few areas of contrast.

By the warehouse i can leave the area under the canopy dry to give the contrast I was looking for.

and at the other end the areas shaded from the rain by the bridges. Its important to make sure the rain falls in the same direction. So the buildings don’t have smoke applied to the sheltered walls. Its the area above where I feel the effect has come out best.
A little something I’ve been dipping into.
One little project I have been dipping in and out of now and then has been the station buildings for part 2 of Brettell Road.

This is the smaller building. The real buildings at Brettell Lane were wooden but of a GWR origin. As Brettell road is more midland I used the Ratio (previously Parkside) LNWR station panels. These or similar were used in the Birmingham area so that was near enough. The canopy valence and supports are from London road models and the poster boards from N brass. The chimney is from Unit models.

The side in the first picture faces away from the public so rather than have a blank wall I decided to give the viewers a sense of being inside the building. (it is supposed to be raining remember, who wants to stand outside?)

The main building is the same but bigger. The above image gives a rough feel of the look im after. I actually shot it like this because I haven’t done the roof yet!

I have mentioned in a previous post the idea of letting the layout have little bit of a life of its own. Originally i was going to use the name Brettell Grove not Brettell Road so why not an old station nameboard with the original name?
Back to the canal.

Back in the early days of Brettell Road I represented rain falling on the canal as seen above.

Over the years however the effect of this became lost so I have revisited this area of the layout to get the effect back. Also to make the canal look a little more downtrodden. I have used a thin layer of clear resin and the same baking soda in wet varnish trick as I used originally. Results are below.


Last tweak to the presentation.
With Brettell Roads new roof design the last thing to do was remove the original pelmet.

I have to admit I wasn’t expecting that removing it would open up the layout quite as much as it has.

This is the view from my eye height. Obviously this higher angle wasn’t available to me before now.

A simple little project


Return to the roof
A while ago I showed a picture of the framework for Brettell Roads new roof. I was going to have this done for Scalefour North but given the Covid-19 crisis the show was canceled and the urgency to get it done went with it. However I have turned my attention back to this with thoughts on the material.

The first material I brought was just too heavy so i didn’t even try to use it. The weight wasn’t something i had really considered. This is the second material, much lighter but it let too much light through. On top of that my efforts were too scruffy and would have bugged me if I left it.

So this is material 3 – Much happier now and with the help of my wife much neater as well. The image shows it before I finished the front off and the supports will obviously need to be darkened.

The above image shows the lighting on the layout pretty much as the eye sees it. Not as dark as before but still obviously night time.
Brettell Road 2
As the song goes, regrets, I’ve had a few but unlike the song I am going to mention them. With Brettell road pretty much finished off thoughts have turned to what to do next. Before anyone asks, New Street isn’t calling me back at the moment.
Brettell road was only supposed to be a play thing for home, but much in the way of New Street which started with the idea that you could model the western end station throat in 8ft, Brettell Road went a little bit wrong.
It was designed like an exhibition layout but not as an exhibition layout if that makes sense. In the urge to get something done and 1950’s midland railway practice being alien to me at the time there was one major aspect of the track plan that I have always regretted. You see, for those like me who didn’t know, the Midland had a thing about facing points, especially coming from passenger lines onto goods loops and yards. What they preferred was a single slip and the train would pass the slip. Back up through the slip onto the wrong line before proceeding into the yard. Had I known this at the time (or more accurately been bothered to find out!) I would have done the Brettell Road main line as double track and used this arrangement. For the operational interest as well as its not really something you see done on models.
The other regret is about proportion. You see for an exhibition layout that’s 16ft overall but only 50% or 8ft scenic I feel the proportions are off. If it was 24ft with 16 ft scenic then a viewing ratio of 66% sits much better.

And so, presenting Brettell Road part 2. An extension to the original incorporating a station and yard based very loosely on the real Brettell Lane. Doubling up the track on the existing 2 board is still a none starter but with minor adaptation to the track work at the left hand end of the original I can get the single slip in and get in the operational interest I missed the first time. The yard will rise slightly to be level with the platforms which is something I’ve borrowed from the features of the yard that was at Kings Heath. I plan to do the station in the very last week of service to keep with the run down feel (hey no one really expected this to be pretty did they?)
Why we still need books.

Although they have apparently been around for a while now I’ve only recently come across the Locomotive Portfolios series of books from Pen and Sword.
Presented in an almost square format and hard backed at 250 or more pages they seem well detailed and have a very large number of pictures (some in colour). From what I’ve seen so far I will be keeping an eye on this series.

While on the subject of books one of this things that had drawn me onto Brettell Road and away from New Street for the last few years is research. Its a side of the hobby that I really enjoy and I feel that New Street was becoming less about learning stuff and more about producing stuff. That’s not to say I knew all there was to know, far from it but I would go as far to say I had a pretty good idea where to find stuff.
With Brettell road it was all familiar but at the same time so different and its this that has drawn me in. Its a railway I knew but clearly didn’t know at all and it definatley ticked my learning stuff box.
One thing that really surprised me is the reliance on books. Its easy, now we are well into the 21st century to think we can get all we need online but the truth is that is far, far from the case. Yes the internet is great but when you are a somewhat detail obsessed railway modeller looking for a specific thing its next to useless. The information just isn’t out there in the digital world and i wonder if it will ever be? We will always need books.
Old ‘uns and a possible change to how the layout is presented

So to draw a line under the last post. The Lima CCT is finished off and ready for service.

So is the crane. It rides very high as supplied so I ground the bearing slots down and removed a bit of material from under the axleboxes (its still a smidge to high). Seems strange that Hornby raised the ride height on all their models to accommodate their tension lock coupling. Why not just make that smaller instead?
The end shackles are from Roxey and the cables are the heavier e-z line. Transfers are from Cambridge Custom Transfers. The single plank wagon is just standing in at the moment.

One of the issues with Brettell road is the height it sits at. The subject of layout height is a thorny one but I take the view that operator comfort trumps everything else. After all we will be working on the layout for a couple of days . Currently its a bit low which I’ve got round by asking show organisers to provide chairs. From a sitting position its just about the right height.
However I’ve been thinking of doing a more traditional style, separate roof and here it is mocked up. Its designed so that it all slots together and no screws or bolts will be required. It will still have a material roof to shield the ambient light but it should make the layout itself a little lighter too. The plan is for the original pelmet to be removed.

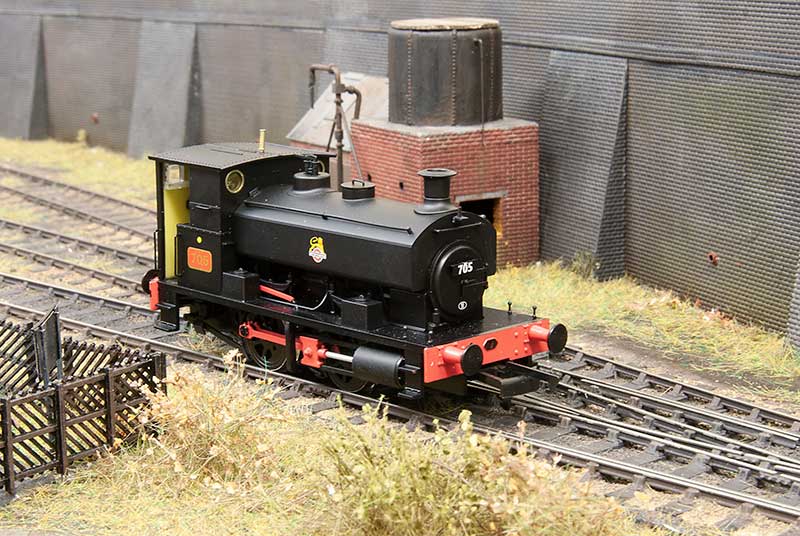 I never really intended to go for the little Hatton’s Barclay tank despite the Earl of Dudley’s railway having quite a few of them. But one popped up for a reasonable sum on ebay with a best offer option. As it would be a nice to have I put in a cheeky offer and the seller accepted it!
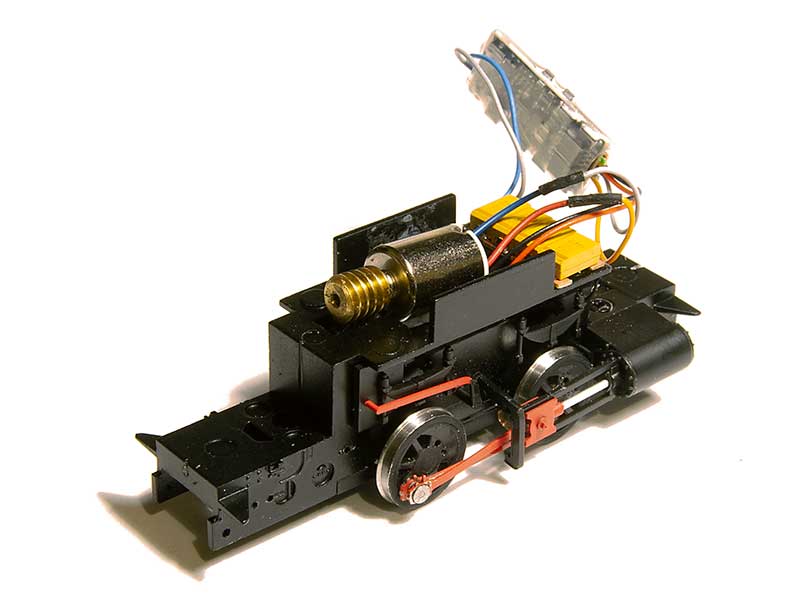
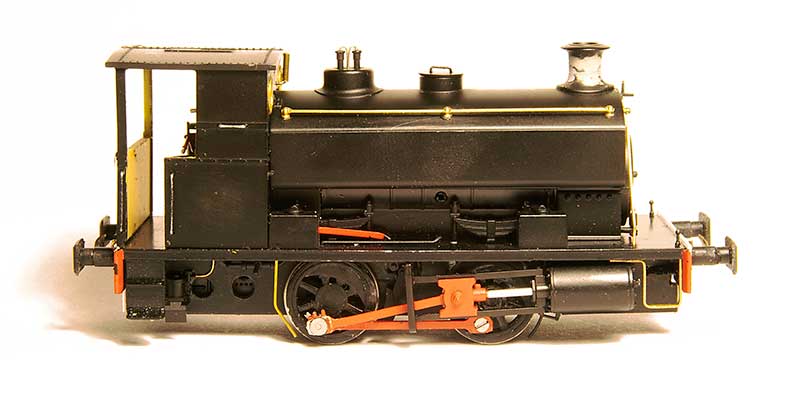 As can be seen in the previous picture there’s quite a noticeable gap between the chassis and the wheels. Of the limited detail on the chassis a lot of it pugs in as separate bits so its a relatively easy job to make some new overlays from 60thou plasticard and plug the bits back in.
 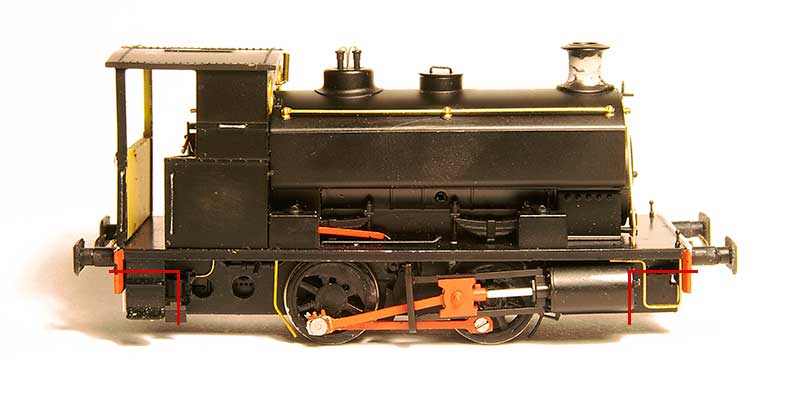 One thing I would advise though is to cut away the original chassis at the points shown (where the NEM coupling pocket is) as you will end up with very chunky and visible frames at the ends of the loco. Might be better to do 20 thou overlays and space them out so they are nice and thin. The arrangement of the brake shoes on the EoD locos seems the opposite way round to the way Hattons had modelled them with the shoes in front of the wheels not behind them and the linkages not visible at all. so these were rearranged. You can see the front crank pin screw in this picture. I also changed the front step to match prototype photos.
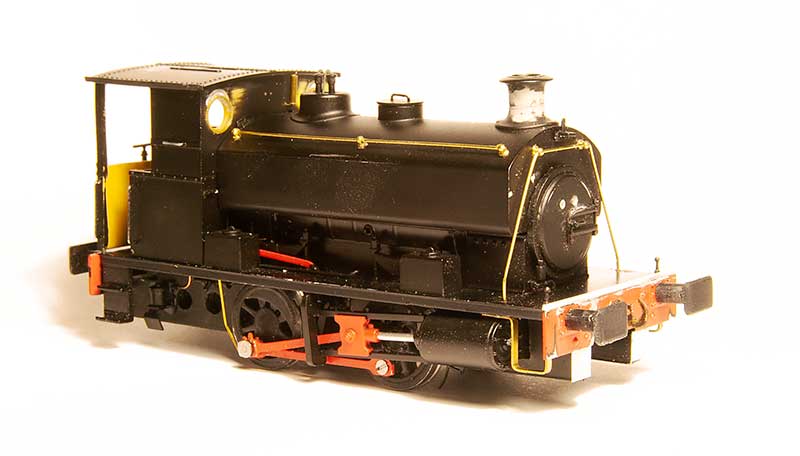
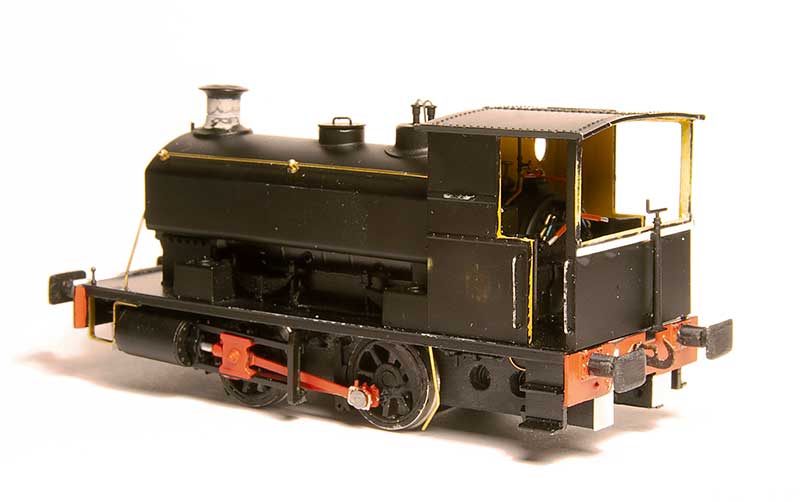 The rear of the cab. EoD locos had 2 types of cab, an enclosed one with 3 windows and this open version. The enclosed one is available from Planet industrials as a detailing kit. Given the layout is set in the rain my mini driver and fireman must be cussing me for not going for that one! My first thought was to scratchbuild a new rear cab from brass for strength but I decided to cut away the RTR one first to see if that would work instead, as can be seen it did. The handbrake is the supplied RTR one