One topic that seems to come up fairly regularly on forums and Facebook groups is weathering track. I thought I’d do a mini article on my thoughts and how I approach this subject. As always other methods apply.
The prototype
As with any modelling activity you need to look at the real thing if you want to copy it. You don’t necessarily need to understand it and the advice model what you see, not what you think you know applies. If you are modelling a real place then the jobs pretty much done for you but it pays to look at references as close as you can to the timescale you are modelling.  Even when track is brand new it actually isn’t. this was taken a few days after they relayed the eastern end of new street. Note the use of wooden sleepers, not all brand new track uses concrete or steel sleepers. The rails are very rusty and there’s already evidence of the trains using it. The visible colours of he pandrol clips wont last long.
  Some plain flat bottomed track that to any modeller would be considered clean. things to note are the welds where it was joined, the rail colour has spread to the sleepers in places and some of the ballast is on top of the sleepers. I’ve found when it come to track being really neat isn’t always he best thing. Its subtle but look at how the 2 rails are not the same colour. The inside face seems dustier than the outside.
  The weather changes things – the rails look very dark because they are wet. The wetness seems to mask some of the subtleties seen in the previous picture.
  Around points things have to move and as such they are greased. Note how the grease from the rod passing under the rail has manages to creep onto the web of the rail above it? The rail dust is visible around the baseplates and the third rail is a completely different colour to the running rails.
 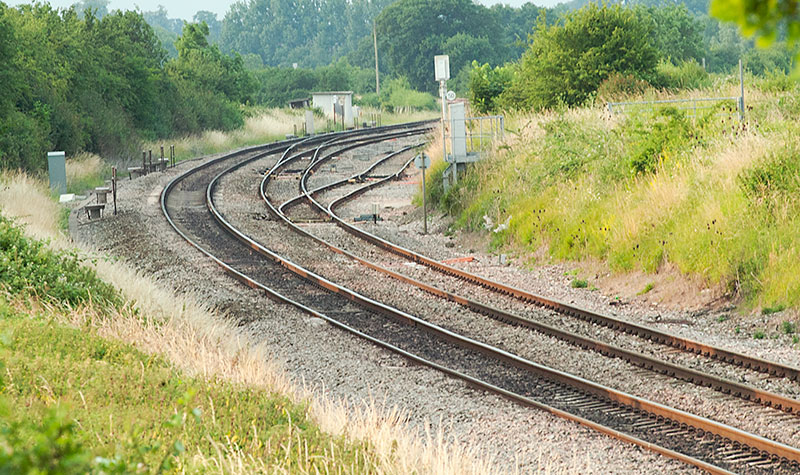 I include this picture because it illustrates an important point. 2 tracks can be side by side and look different. There are many reasons for this. The tracks might be different ages. The trains might be doing something different depending on the direction they are going. If they are braking then there will be more brake dust. The trains themselves might be different too, loaded freight trains that carry loose material do tend to drop things and push dust along with them. If your line had a heavy use of a particular type of train then the material itself can affect the look of the track and distort its colouring. Also track weathering is directional. As the trains move along they tend to push any dust or debris along with them. As we run on the left in the UK the left hand line will tend to look the dirtier of the two when looking away from you. You can see this effect here and it pays to weather your track in the direction the trains are moving for best effect.
Modelling it.
If I am using wooden sleepers then I tend to lay the track first then give it a base coat of a mucky brown colour. I use JLTRT track colour but I’m not sure if you can still get it. Halfords do a decent matt brown in their range of camouflage spray paints which is good as well. You don’t need to be too precious as it is just the base colour. I then paint the rail sides with either Humbrol matt leather (look for tins with the union flagon the side, the others are weird and too green) or Revell 84 before ballasting. You can get a little tool for paining rails that consists of a little roller fed from a reservoir. To be honest I tried it ans didn’t get on with it. A nice flat brush seems much easier. Do all this before the ballasting.  Flat bottom track on New Street. It was pretty new in 1987 and the rails had a distinctly different colour to the bullhead stuff. As its bi directional i sprayed the track from both directions. Firstly with a light coat of Revell 84 and then a mix of gun-metal and black. Note the grease around the fishplates done with the same colour and a simple card mask to prevent overspray.
  Sidings outside New Street signal box, It pays to have all the scenery immediately next to the track in place before the weathering. Overspray onto these elements is something that would happen in real life. Note much more gunmetal/black colour where the loco’s stand.
 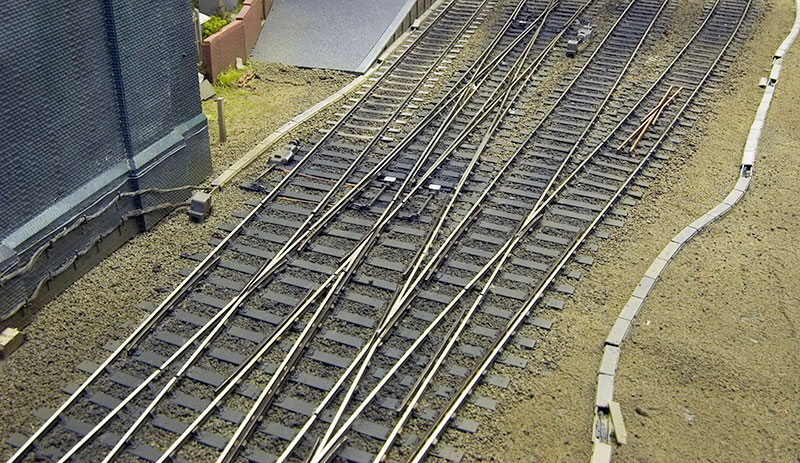 Make sure that you repaint the checkrails once you’ve cleaned the rail tops A black sharpie is good for keeping them dirty or you can chemically blacken them as well.
  Close up of the end of a double slip.
 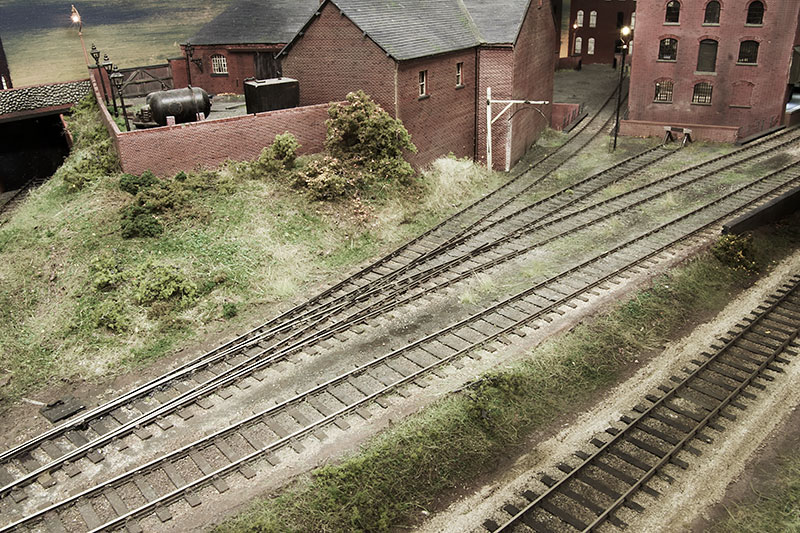 Older sidings on Brettell road. I used my finger to ‘smudge in some powder paint to the ballast to give the less cared for look. Some static grass gives an impression that the yard is losing the battle with nature. While in some cases weeds can creep into sleepers or even force their way through them it pays not to have your greenery on top of them.
Its all pretty simple stuff really but as I said at the start, observation is the key.
Great article Jim, the effects you have captured look very effective. Your choice of paints is not mainstream but your choice is justified in the outcome.
Brilliant observations and execution Jim. I love the randomly strewn cable trough covers!
As always I take-my-hat-off to you. Thank you for a masterclass in observation with clear examples from the prototype. Please post any other nuggets that have come to mind on the subject.