Don’t worry, I’ve not ditched model trains and took up gardening. As far as I am concerned a garden is just somewhere where a model railway shed should live!
With the track and wiring done on Brettell Road part 2 thoughts have turned to the landscaping of the yard. 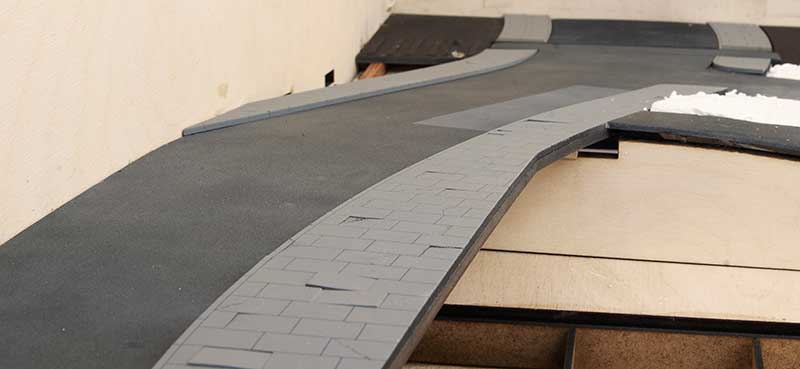 Before I could start on the yard I needed to get the road in as this will need to be blended into the yard. The parts for this were cut out at Tim’s but I did add a layer of 1mm balsa to the road and sanded a camber into it. The thing with laser cutters is they are so neat. By using 2mm mdf for the pavements i could carve away some of the slabs to make it all look a bit more scruffy. I also cut a few of the slabs out completely on the laser so that I could add plasticard instead and do a couple of raised slabs. Brettell Road is set well before the ‘where theres blame theres a claim’ culture. I guess people back then just looked where they were going or called themselves an idiot if they ended up on their backsides!
This is my nod to Brierley Hill’s level street. Which if you’ve ever been there, is anything but level! At the bottom is a now abandoned level crossing (the real Level street had 2 that were part of the Round Oak system). The line it was on now forms the back siding. The road will need more work yet and weathering but this was far enough to let me move to the yard.
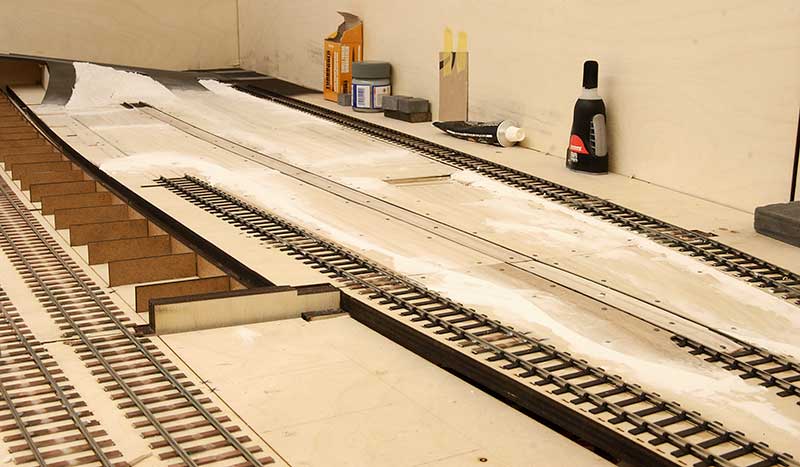 I’ve never done inlaid track before and, added to the bright idea to have different levels, I figured the easiest way would be to infill the gaps with layers of balsa The top layer is 1mm thick and is glued to various different shapes underneath as I didn’t want it to be all that flat. The infill in the track is 1.5mm balsa as I figured a half mill difference between the surface and the rail would aid track cleaning and wouldn’t be noticeable. I used track pins to hold it all together as well as PVA. Incidentally, I think this was the first time I’ve ever brought track pins!
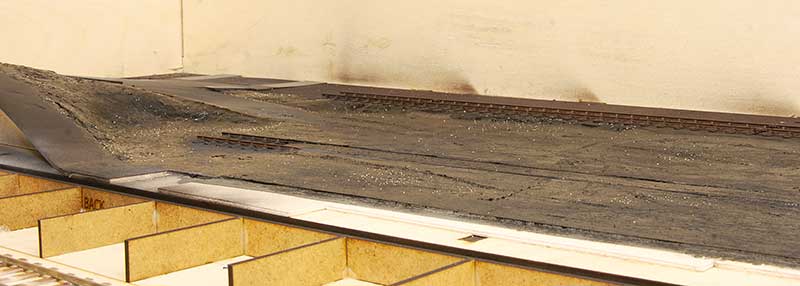
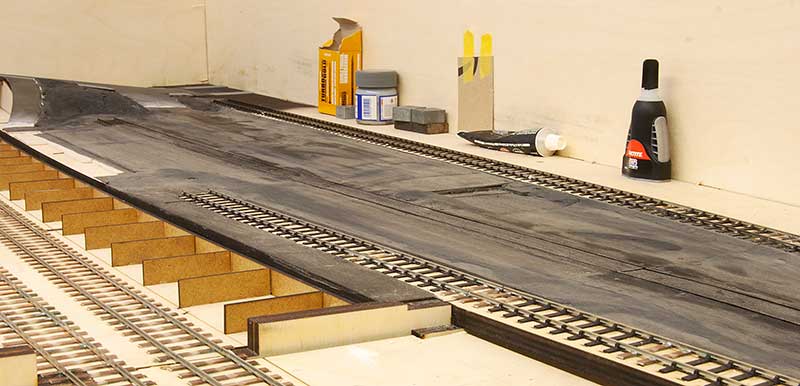 Despite my half mil’ gap idea i was still a little concerned that track cleaning would result in patches of nice fresh wood showing through. So rather than paint I decided to stain the wood black.
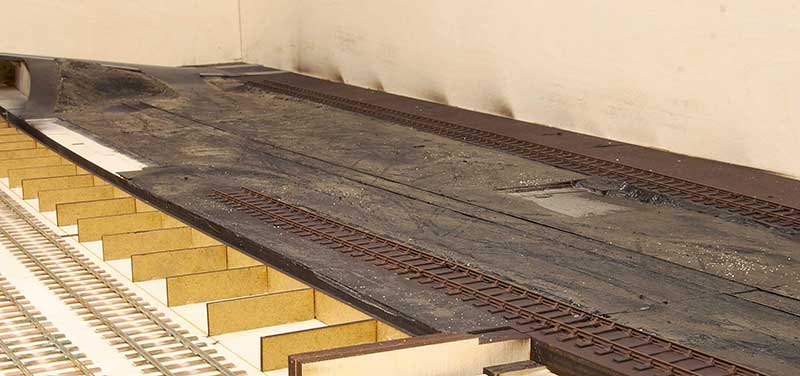
Time for another new (to me) product. I’ve used 2 colours of ‘mud’ from WWS Scenics. Peat and dark brown. These are like a very smooth liquidly filer. I used the peat first with the dark brown over the top. Applied with a plastic spatular and then stippled with a large brush. Ive also added some tire marks and a light sprinkle of chinchilla dust while it was still wet. More to do to it yet but I’m pleased with how it’s coming along so far. Lets just say the yard at Brettell Road was somewhat agricultural! For WWS muds click here.
Hi Jim,
I always enjoy your posts. One question, is there a way you could make it so that the images can be clicked on to enlarge them? My eyesight isn’t as good as it could be, and it would be great to appreciate what you are doing all the more clearly.
You might be interested in Mikkel’s Farthing Layouts blog where he is currently dealing with yards, weathering and the like.
All best,
Matt
Thanks Matt. Depending on what device your using you should be able to right click and see slightly larger images. I do restrict the image sizes to 800px or 940px depending on which part of the sight they appear on.
There’s a link to Mikkel’s site on the links page 😉
Love the old yard gate Jim,along with everything else,superb!
Hi, its looking great. Cant wait to see it progess! Thanks for sharing.