This is an older article that you may have seen on some forums before however its something I am asked about quite often so i thought I’d reproduce it here.
First up the basic structure. I thought long and hard about the camber of the roads but in the end decided to do them flat. The reason is partly ease but also looking at large vehicles they sit level on their suspension and to me a model leaning over doesn’t look right.
The kerbstones are cut individually from 80thou square microstrip, the paving slabs are scribed onto plastic sheet. Don’t forget things like dropped kerbs.
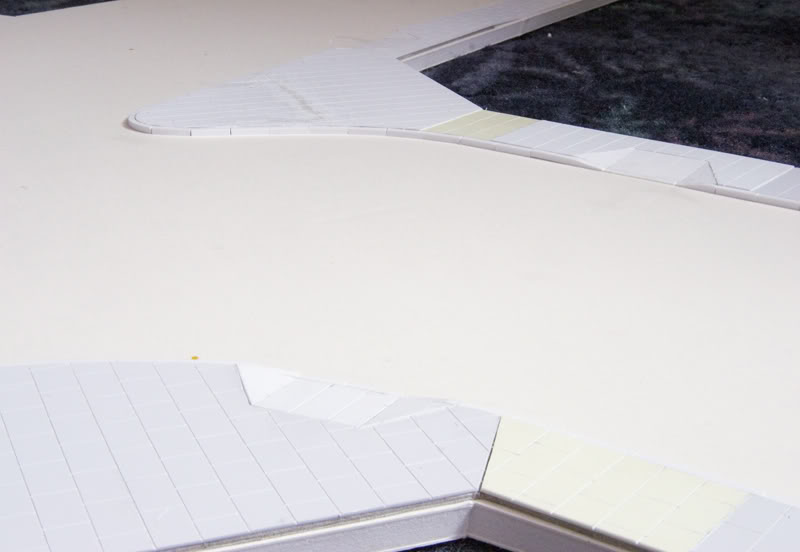
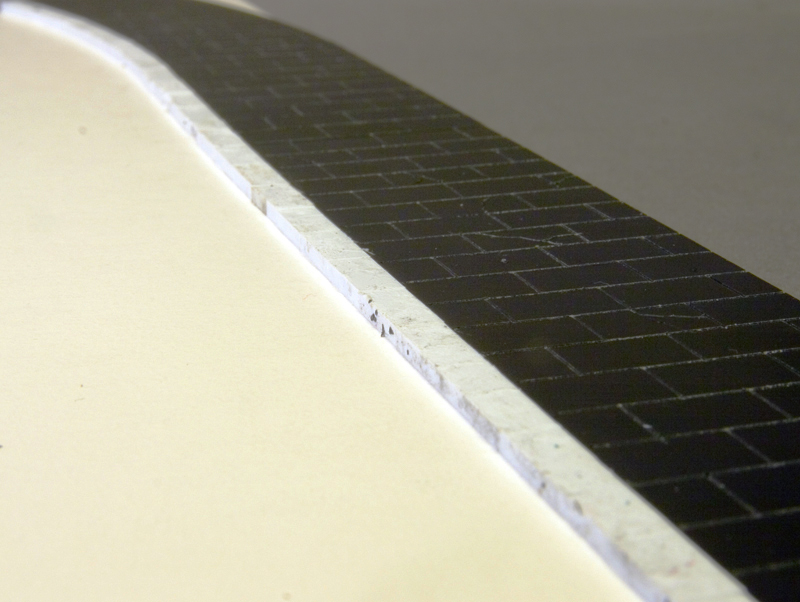 Birmingham had a lot of large kerbstones that were cut from stone, a lot have gone now to be reused in posh buildings. To model them I softened Evergreen strip with liquid poly before attacking it with sandpaper and a hammer. Once I have a suitably distressed strip this was cut into lengths and laid individually.
When ready spray everything with plasticote suede paint. This gives a texture to the surface. When dry spray everything black and then a light dusting of grey primer – you are aiming for a tarmac look to the paint – don’t worry about the pavements for the moment.

Using thinned enamels block in the pavements – you can see how some of the pavement is tarmac.

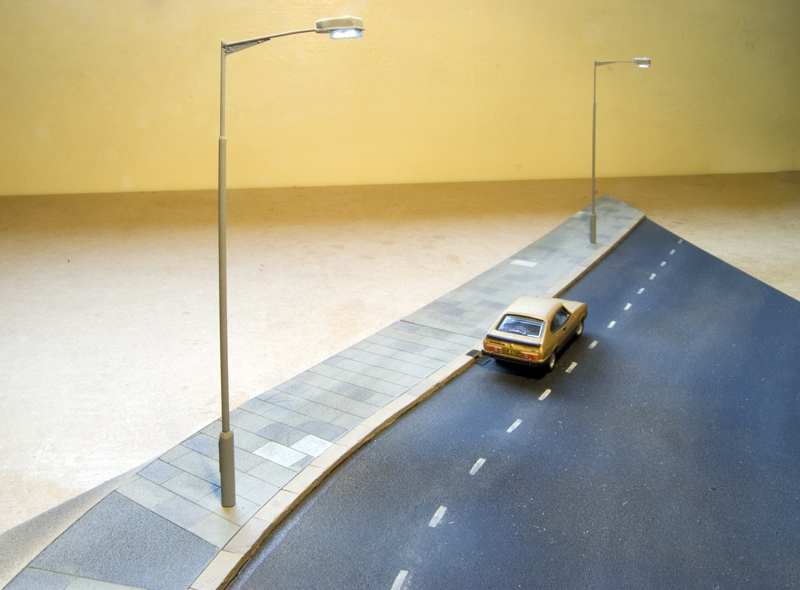
When dry paint the road with neat thinners and then paint ‘wear’ onto the road. I use browns and blacks for the area where wheels go or not. Pay attention to how dust collects where vehicles don’t go such as arround the pavements, the gravel you get can be represented with pepper at the end. Use the paint neat and using a large flat brush blend it into the wet thinners. You will see I have picked out some paving slabs with a lighter grey – For darker slabs the fastest way is to use grey markers.
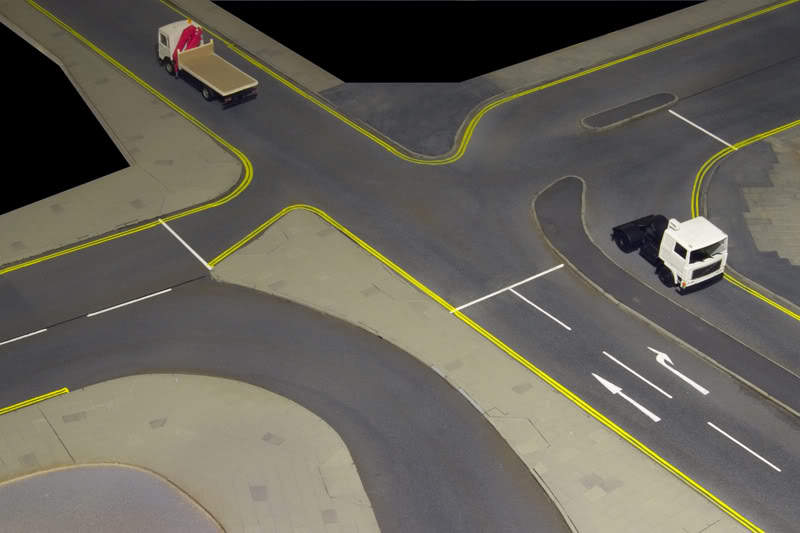
Road markings are added using paint markers – I cut templates to help me keep them neat.
These will need a little more weathering to tone them down a little. Once dry spray everything with matt varnish
Its worth considering when your road is set as the time of the year affects the colouring – for example in the winter the roads look much whiter due to salt being spread on the road. In the autumn there are leaves in the guttering etc etc
Due to health and safety people are not asked to lift as large slabs as they were, modern paving slabs are much smaller than they were 20 years ago.
Not all roads are tarmac though, this is how I did concrete
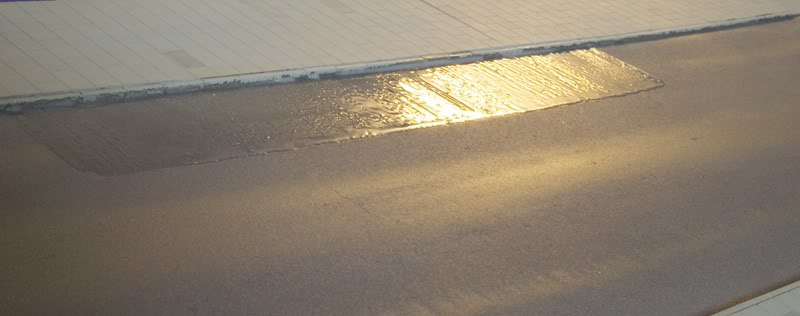
First up paint the area to be concrete with PVA glue – allow it to dry for a bit. When it is dry enough to hold a shape use a nit comb (I had to buy one specially – honest!) to draw lines through the surface.
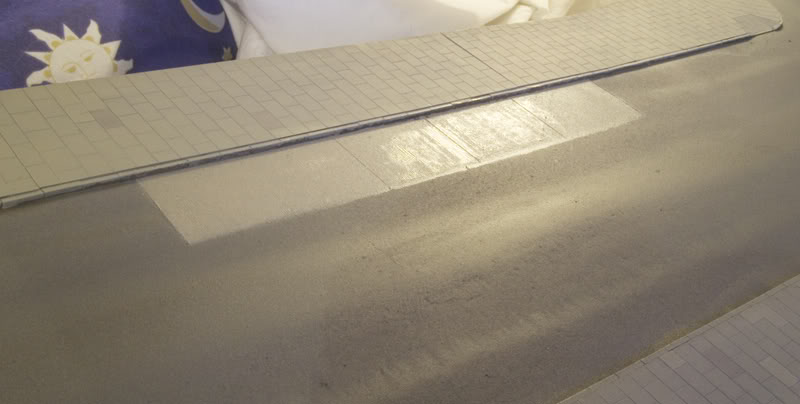
When set use the plasticote suede paint to give the texture – I needed my concrete browny grey but if you need it grey-grey overspray with primer. Once dry cut in panels with a scalpel and then weather as before. The black tar was added with a fineliner.
 Since I wrote this an excellent book, Modelling Grassland and Landscape Detailing by Gordon Gravett has appeared which also deals with roads and especially older worn tarmac. Well worth getting a copy (ISBN 978 1 908763 06 8)
Very useful article with great tips, many thanks for posting this Jim.
Funny – I had just seen a copy of Gordon’s book the other day and have now ordered all three! Should see them in early January so I can push forward with my attempts at actually finishing a layout.
I really like your attention to detail and historical accuracy. It sets your layout apart from so many that are just representations of a time and place (like mine).