Here comes the rain
Regular readers will be aware that I plan to model Brettell Road in the rain. While falling rain is not doable and if it was to scale wouldn’t be visible anyway I believe it’s worth trying to show the effects of rainfall. Of course it will be frozen in time but I don’t think there’s a lot I can do about that and I’d like to credit those who view the layout in the flesh with a degree of imagination.
Aside from things looking wet the other thing I wanted to try was raindrops in puddles and the canal.
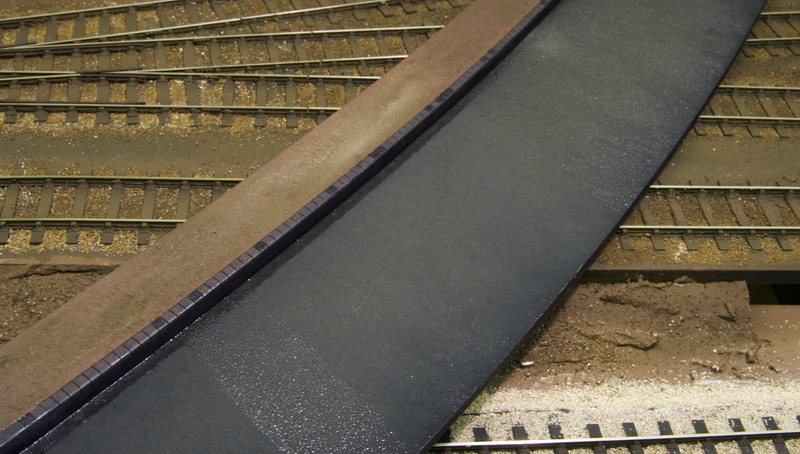
The canal itself was done with multiple layers of varnish as per Gordon Gravetts book then the area where the bridges were masked and more varnish added (Humbrol clear) with baking soda sprinkled on while wet. I did try cold and warm varnish to see if it made any difference but found it didn’t.
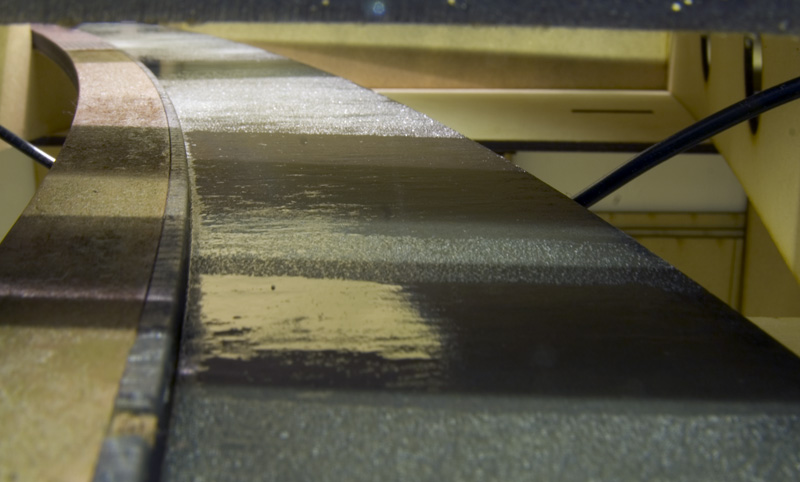
The above image shows the canal in position (again you will have to imagine the walls) and below in something approaching the light I plan the final project to have.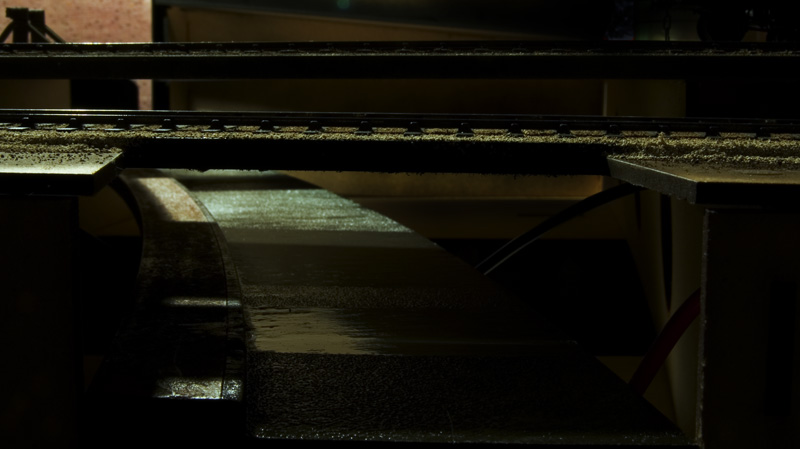
Just a few more wagons
Been building a few more wagons for Brettell Road.

Starting with some RTR offering, from left to right, Dia 2078 van from the Bachmann van. I’ve converted it to a fitted van and repainted it. Next an eastern region van of some descriptions again from Bachmann. My local model shop had these in their bargain bin so I picked 3 up thinking it would be a quick win. In reality it was a bit more involved as due to the chassis design p4 wheels don’t fit. The backs of the W-irons were slimmed down and the brakes removed and replaced along with some extra details. Then we have a Hornby Dublo banana van mounted on a red panda chassis kit. Not much more to say about this really other than to direct you to Ian Flemming’s blog (click here). Likewise the last van, an Airfix body on a Parkside chassis.

More vans starting with the Slaters 8 ton van kit. In reality it’s too old for the layout but I liked its antiquated look and have assumed that it’s an internal user for the steel works. Next along a 12 ton van from the Cambrian kit followed by a shock an and LMS brake van both from Parkside kits.
Finally a Cambrian single plank wagon (left) and an older Parkside open. The load is based on a picture I found in a book or magazine somewhere. I wanted a tarpaulin covered load as being an older kit there was no interior detail at all. Quite why the end of the wooden beams weren’t covered over is a mystery. Next to that is another Parkside kit for a wooden open and the famous Airfix 16 ton mineral. Surprising to think I’ve been into model railways for my whole life and never actually built one before. Finally a Ratio 5 plank open which I’ve depicted as sold off to the steel works due to its age.
New Street, new board
Back in the latter half of last year when Tim and I did the boards for Brettell Road we also cut the next 2 boards for New Street. While the boards for Brettell Road were experimental both in design and materials we didn’t want to jump that far with New Street so sticking with what we know we opted for ply.

This is the first of the two. A simple rectangle but the awkward part was that the surface isn’t flat as the trackbed drops down as you leave the station. This board will be entirely under the tunnel but I plan to leave a letterbox in the front so you can peek in. The jigsaw shape in the top surface is due to Tim’s cutter not being long enough (he now has one that can do boards this size with ease).
One thing I did forget was although we etched the track plan and cut holes for the point droppers into the top sheet I forgot to include the holes on the bottom one! (note for next time). I also mistakenly glued the back boards the bring way round (hence no jigsaw as Tim kindly re cut it for me on the bigger cutter).
The next board will be similar and will recreate the area I originally did for the plank.
A little engineers train
I’ve always liked engineers trains (what do you mean, we know?) so a short one for Brettell Road was always going to be on the cards. I’ve shown you my build of a gannet before but now it’s painted.
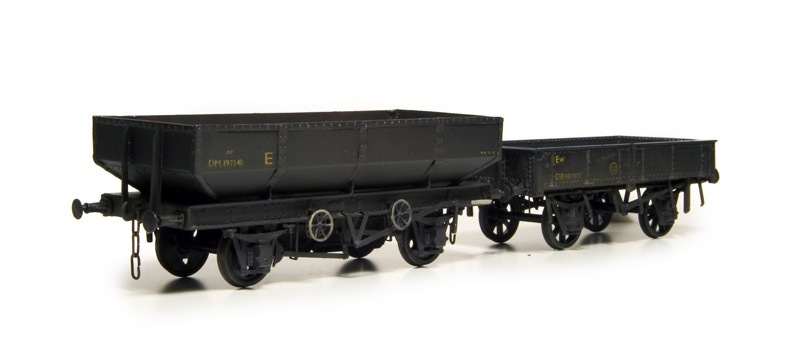
Shown here with a Cambrian starfish ballast open.
From one of thier old kits to one of thier newest, the recently released herring ballast hopper. There were 2 very different designs of ballast hopper given the herring title. One of them was closely related to the mackerel and of the catfish ilk (walkway one end, single hand wheel).
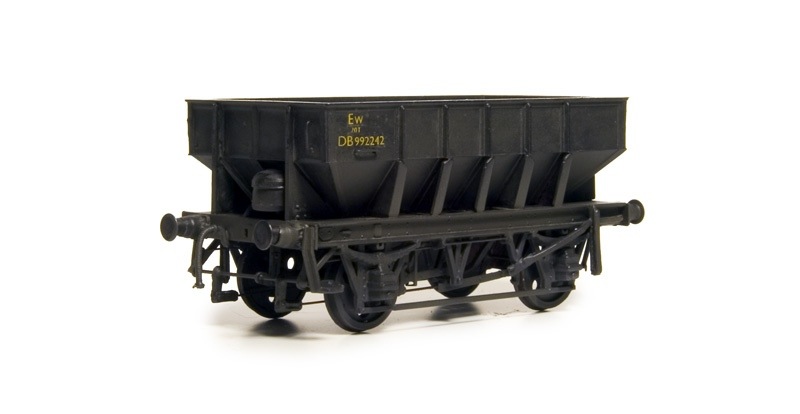
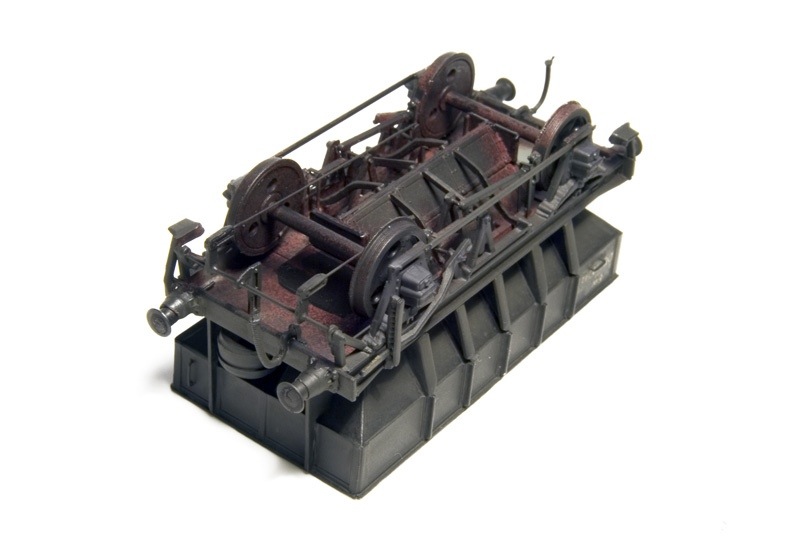
The Cambrian kit is for the GWR design and it suffers from the same problem the gannet had, that being to discharge the ballast a track worker had to stand by the side of the wagon, right next to where the falling ballast is going to be. It’s a diminutive little wagon and features a one piece hopper and a one piece chassis, the latter being a big improvement on the catfish and dogfish kits. For such a small wagon there’s a lot of details to be added and the underside shows a nicely pleasing complicated look. Of course most people probably won’t notice so if you wanted a rake you could probably miss a lot of this stuff off but having said there nothing that’s really tricky if you take your time.
I swapped the buffer heads for MJT ones and drilling the shanks for these proved a bit tricky with the sides ending up really thin. I didn’t spring them (never do) but think the metal heads are a worthwhile improvement.
Some of the smaller parts had quite a bit of flash on them which was a bit of a surprise as most Cambrian kits I have built recently didn’t have any. That’s the only negative of what is a nice little kit.
I have a couple of Tunnys still to do and I might throw in a catfish too but that’s for another day.
The origin of species.
Whilst Charles Darwin might have thought he was on to something BR had a slightly different idea on the subject. For those new to all this engineers wagons are generally named after things that live in the sea and some of those names are quite inspired! Whale for the largest of all the ballast hoppers and shark for a ballast plough which does kind of look like one, or at least the ploughs do. This is where BR and Mr Darwin deviate a somewhat as to BR the shark was an evolution of the…erm…Oyster! It’s obvious now I’ve said it isnt it? (what do you mean no?)
Sharks and oysters look very similar and the main difference is that sharks are vac fitted and oysters are unfitted (although some were later vac piped). Wanting something a bit different for Brettell Road and given that the oyster was an LMS design anyway I tracked down a cheap Cambrian shark kit and set to work.
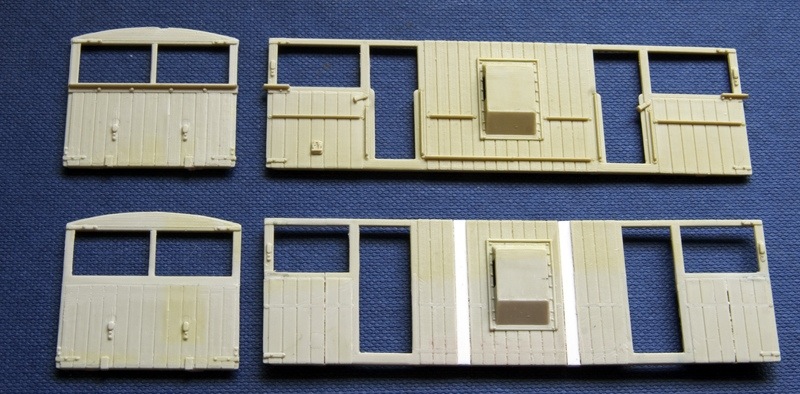
Starting with the body the verandas are 1 plank shorter each end and the van body is 2 planks longer per side. So the side was cut into 5 parts with a scalpel (don’t use a razor saw as you will loose the width from the planks), a plank removed from each end and 2 pieces of 80×60 thou evergreen added in. The handrails were removed as was the extra detail around the doors and the brackets from the ends under the opening. (Use a masking tape mask to protect the planks you need to keep.)
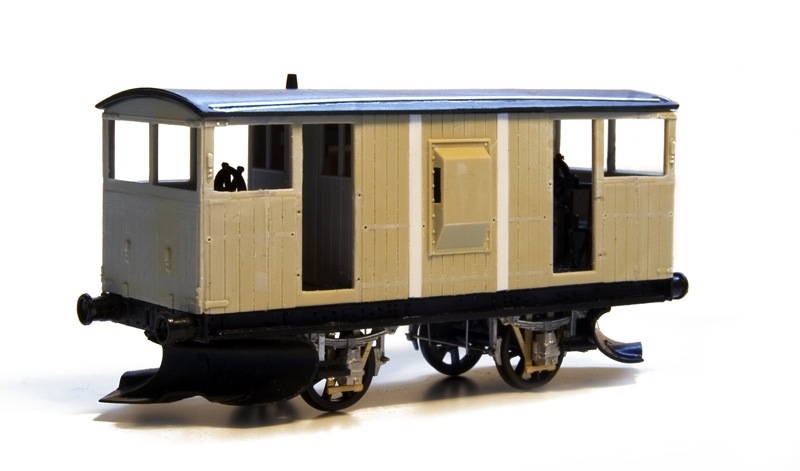
Turning to the chassis the oysters had different w-irons and no full length lower step. I used some MJT w-irons I had lying around and given the short wheelbase (only 9ft) I just used them rigid. The springs and axle boxes are also from MJT. The plough’s edges were thinned down as supplied they look quite thick. The rest of the van was built up pretty much as per the instructions with the usual extra brake gear gubbins.
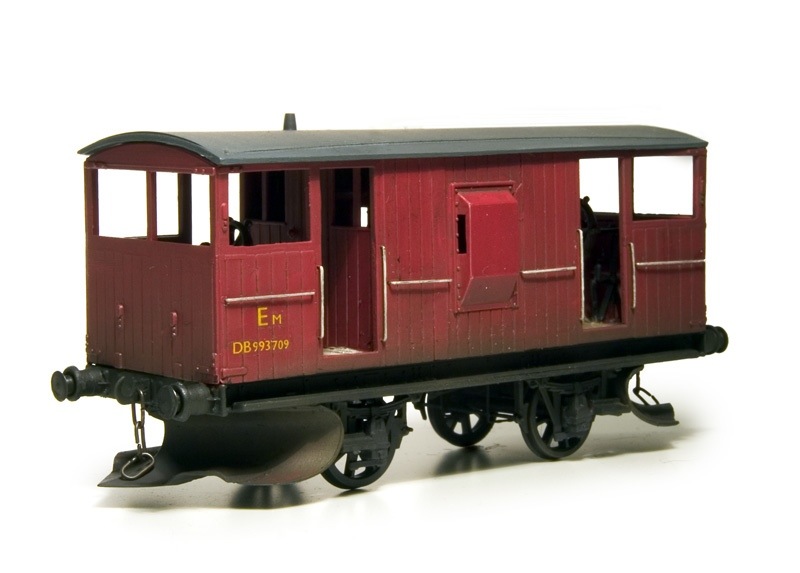
After paint and still not with the roof finally fitted. My last stage of Brettell Road weathering is still to be added, that being to make the model look wet. Below compared with a ‘normal’ shark

The oysters lasted quite late and some were rebodied with shark style bodies. The only real difference visually would be the w-irons and brake gear if you fancied an easier version.
Riveting stuff
The title does not refer to the quality of this post, don’t expect anything like the screenplay for Inception but there might be a very minor cliffhanger ending! The title refers to what I have been doing, riveting the cabs of my 2 panniers.
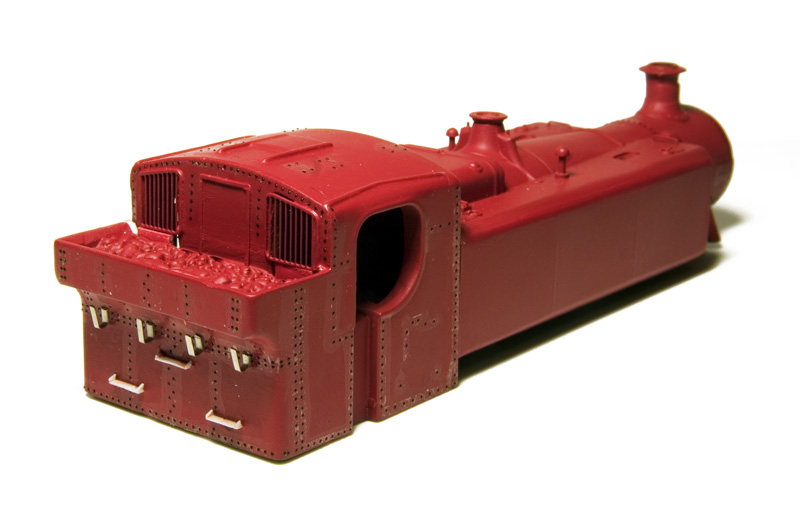
The Hornby cab I used for my 15xx had no detail really so the rear window framing was added from the Mainly Trains etch. The rivets are the water slide ones from Archers which have been around for a while now. They make the whole task quite enjoyable but they are a bit tricky to use. The main problem is they come off very easily. You can overcome this by working in small areas and sealing them with Klear (or Humbrol Clear) to protect them while you work on the next bit. The other tip is don’t be too adventurous. It’s very tempting to try to add a nice long line of rivets in one hit but the transfer tends to break so I find it best to work with strips of about a dozen or so (you can even count them if you like! You might be the first person to actually do this in the history of ever mind you!).
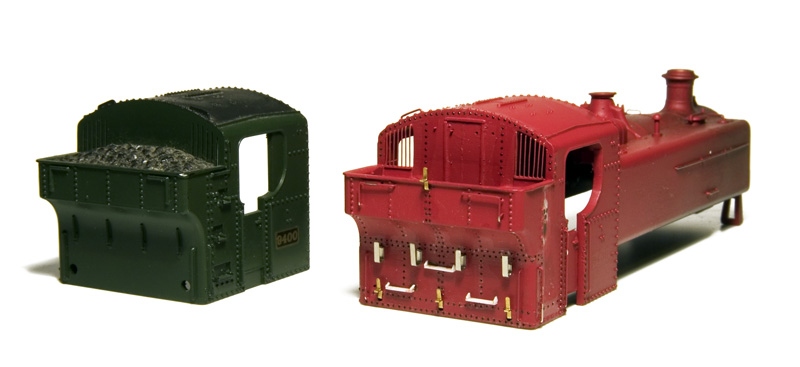
The detail on the Lima 94xx cab is much better but oddly when it comes to the rear it doesn’t match the rest of the model at all. It’s almost like an early EP sample and when the final model was completed, the guy charged with doing this area pulled a sickie! As with the 15xx, archers rivets, Mainly Trains rear windows and bits of strip metal and plastic were used.
While work will continue on the 15xx (Handrails next) contrary to my last post the 94xx will now take a back seat while a third party looks into doing a chassis for it. (That’s the minor cliffhanger bit you see?)
revisited class 86 – the body

Having stripped off most of the old detail I have now got effectively back to where I started! I have replaced the headcode box sandbox filler covers and TDM sockets with my own etches. The headlight was removed and re-attached straight (Yeah I know) and the jumpers are from a Hornby 50. One thing I didn’t pick up on last time was that class 86/4 had a single body mounted lamp iron like a class 87 and not twin buffer mounted ones like a class 86/2. Not sure why I never noticed this before.
A pair of panniers
I must have had a Lima 94xx tank for over 30 years and its languished in the loft for a large part of that time. I was never a huge fan as with its protruding smoke box it never really looked like a proper Pannier tank to me. Its horrible chassis didn’t help it but as time marches on things change and today its kind of gawky look appeals to my sense of wanting to portray the less pretty railways of the UK. Its extreme cousin was the 15xx tank, which is a particularly ugly monster of an 0-6-0 tank engine, appeals even more.
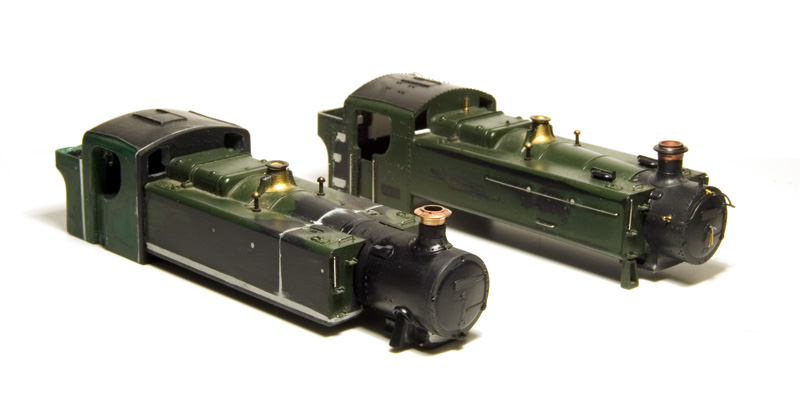
These pair are a little bit chalk and cheese in a way. The 94xx (at the back) is hoped to be a quickie while the 15xx (at the front) will be a very slow burner indeed.
The 94xx
The Lima body isn’t bad at all, the tanks and boiler are a mm too long but over all its pretty accurate. To my eye the chimney and safety valve were too tall so I have reduced them a bit and the cab doors seemed a bit to flush to the cab side so they were cut out and remounted further back. Lima moulded bunker steps on both sides (which is wrong) so they were filled in on the side you can see. The handrails and smokebox dart have been replaced with wire. I plan to mount the body on a Collett chassis from High Level Kits.
The 15xx
I said slow burner earlier because I don’t even know what i’m going to do about a chassis yet, but I’ll worry about that later. The body is a combination of a Hornby cab lengthened by splicing in a 1mm section in front of the bunker and grafting another 1mm section to the front to which the windows were cut out using the originals a guide. The tanks (from another Lima 94xx) have been shortened and made deeper by adding another 1mm section of plasticard to the bottom before filling and shaping. The smokebox and first section of the boiler come from an old Airfix Prairie tank kit with the front of the lima smokebox grafted back on.
Next project – revisit an old class 86

One of my early electric loco projects was this class 86/4 built using the Craftsman conversion kit. There are several areas that I need to look at but I am hoping I can avoid a complete repaint on this.
First up the chassis, It will need converting to a Bachmann warship drive as per the rest of my class 86 fleet. I’ve covered this in other places but never on my own site so I will give a few tips on how this is done. The blanking plates for the bodyside clips are visible so they will need looking at and the sandbox fillers are the early type. The headcode box will need replacing as will the TDM cables and MU boxes (Spare Hornby class 50 ones at the ready). Also the handrails are too chunky and the bufferbeam detail will need redoing. Finally I will need to knock up another reworked Sommerfeldt pantograph which is something I have been meaning to cover too.
First stock for Brettell Road, finished
I’ve been busy finishing off some stock for Brettell Road. Starting with some wooden opens.
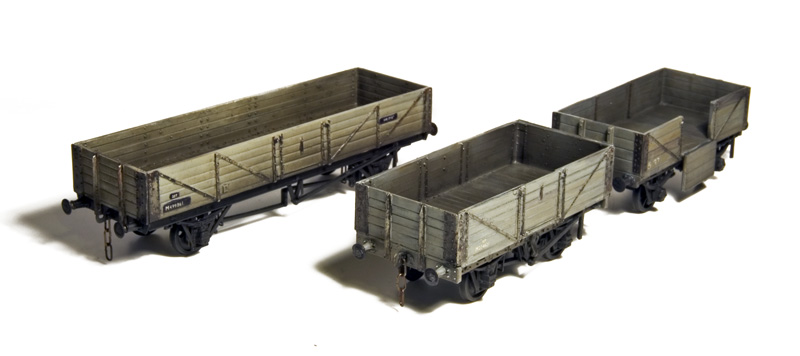
The Tube is an old Colin Ashby kit and is sprung with Bill Bedford springing units. I think you can get a kit for these wagons from Chivers now. These wagons have been weathered to look wet but you cant see it in the picture.
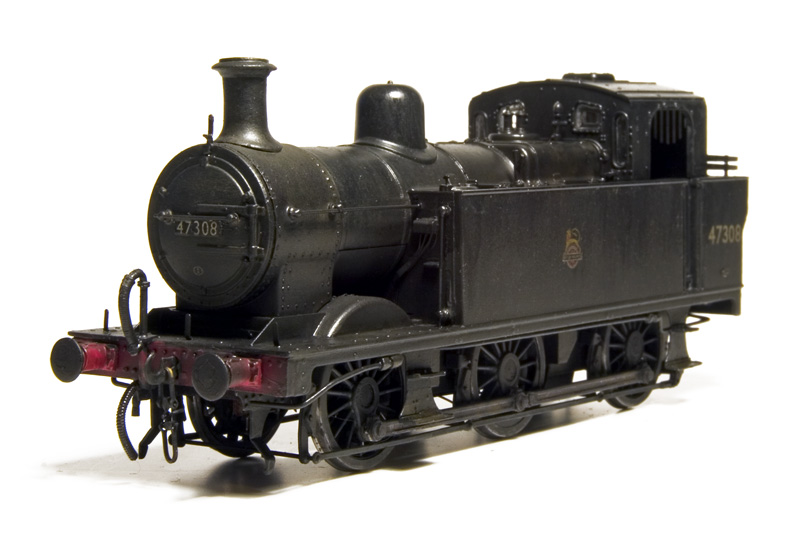
Back to the loco that started the whole project my GBL Jinty. I’ll let the pictures speak for themselves.
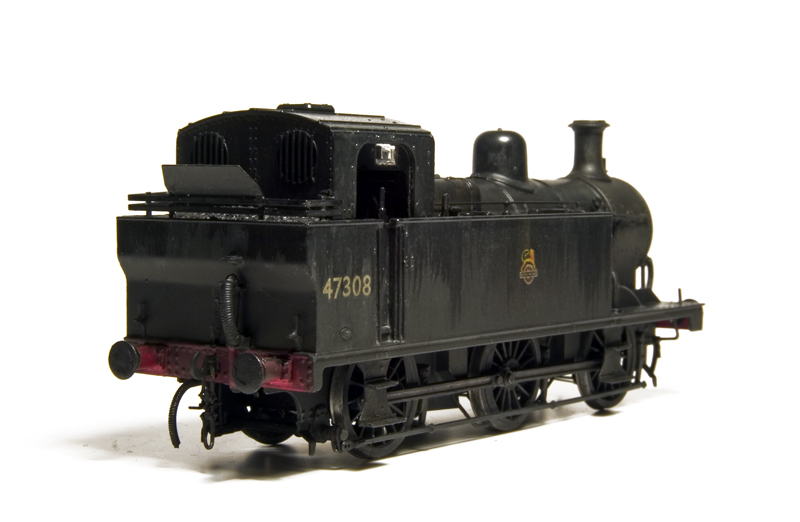
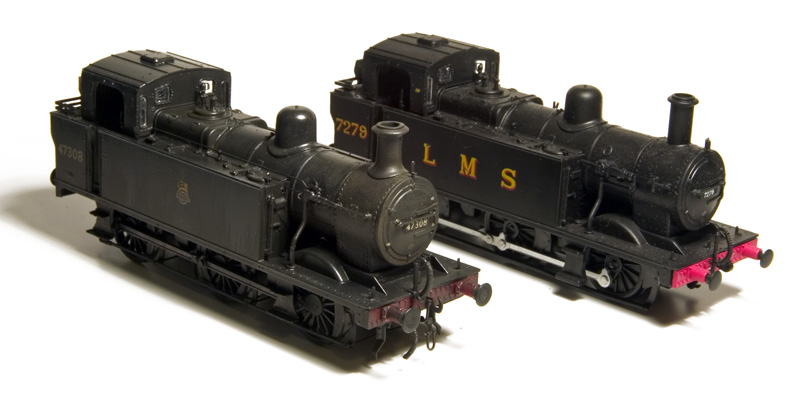

A brief return to the 101
You may remember the discussion on improving the Lima 101 turned to the windscreen problem as this is the only area (at least in the body) where the Bachmann model scores over the Lima one. Well a kind-hearted soul sent me some window frames to fix the Lima model and the results are presented below.

I was never that put out by the Lima windscreens but side by side it’s quite a difference.
Look mum, no glue!
Dear Customer (the letter reads). We are aware then many Falcon Brassworks kits have a reputation for being difficult to build or simply ‘aids to scratchbuilding’…
…If you feel this kit is not what you had expected or you are not confident about completing it please return it to us in its original condition and we will be happy to offer a full refund.
You cant say fairer than that really and given my liking of ballast wagons and the way I get a lot of enjoyment out of making things that are difficult I have been building the Falcon Brassworks Kit for the LMS 25T Ballast hopper or Gannet as they became under BR.
108 of these wagons were built to Diagram 1804 in 1932 by Metropolitan Cammell, and further wagons of the same design (with slight detail differences) were built by BR to lot 1/518 in 1949. Usually branded as Gannet under BR some were also branded Trout and they lasted till at least 1976. Apparently they were unpopular with workers as you basically had to stand next to the falling ballast to operate the handwheels.
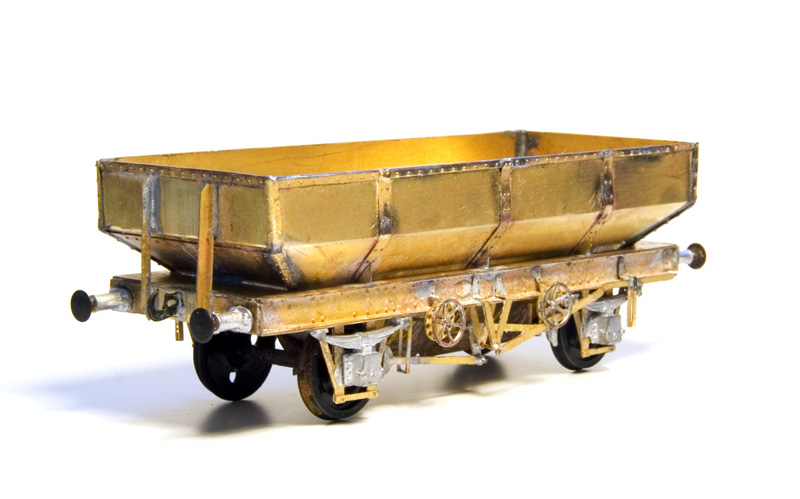
The kit wasn’t too bad, some of the parts were not etched cleanly and there were no tabs to help with assembly but it all went together reasonably well. The W irons were replaced with Bill Bedford sprung ones and other parts such as handwheels, brake hangers and lever guides were replaced with better parts from other suppliers. The Brakes themselves had no detail on at all so these were given a bit of a work over with bits of brass.
Other than that quite an enjoyable little project. I don’t know if id want to do a rake of them and its worth pointing out that the clearances between the hopper doors and the wheels is very very small. Some modification would have to be done for EM and i’m not all that convinced it could actually be built in 00!
RJ Essery’s book on LMS wagons shows one in 1965 with a caption saying that it is in BR Livery. As the image is black and white i am guessing that means black but if anyone knows for sure I would be grateful to hear from you.
For some pictures of BR ones see http://paulbartlett.zenfolio.com/brgannet/h58ef291#h15e03d3e
A spot of reading

Been doing a spot of reading, one book not very Birmingham and one not very railway! The first, Life on the Lickey 1943-1986 by Pat Wallace appealed because i’ve always had a bit of a fascination with the place, particularly Blackwell, My great aunt lived there (still does) and many an hour was spent with my dad and brother on the old platform watching all manner of things cresting the top of the incline. Peaks and 50’s were always the favorite and Peaks in particular seemed little troubled by the long climb from Bromsgrove. Funnily I don’t recall seeing any banking as a kid but in later years we were treated to such delights as 3 class 60s on a steel train. The book covers Pat’s time working the Lickey from engine cleaner to driver including accounts on working the unique Big Bertha as well as in later days such shenanigans as starting a failed HST when the guard wasn’t quite ready and dumping the poor chap into the ballast. I was lucky enough to meet Pat last year at the launch of the book where he kindly signed me 2 copies (one for my great aunt). Sadly he passed away a short time after but thankfully his experiences live on in this fascinating insight to working this well known piece of railway
ISBN 978-1-85858-523-9 www.brewinbooks.com
The second book is Birmingham in the 70’s and 80’s by Alton Douglas and while there is some railway interest such as the derelict Snow Hill A Deltic at Bromford Bridge and a picture of 210002 working the Cross City Line, this book is very much about the city. The Street scenes are just pure nostalgia and these are intersected with newspaper adverts from the time. Ive written before that New Street has become less about the trains and more about the place as time goes on and this book fits in with that view perfectly
ISBN 978-1-85858-511-6 www.altondouglas.co.uk
5th January 2015
It’s a bit late I know but happy new year to visitors to my site.
For those who like to read my writings I have an article in the current issue of Finescale Railway Modelling Review. A relatively recent magazine from Bob Barlow and Tim Skackleton. Sort of pitching itself at the MRJ end o the market it’s a nice looking and feeling (I always like a decent paper to be used in magazines) publication.
My article covers the building of New Street’s lamp building along with some thoughts on what I would do differently if I were to build it now. I hope you enjoy it
Why do those with the least to say make the most noise?
One of the side effects of being reasonably well-known is that you attract the attention of the good old Internet troll or two. I’ve had 3 in my time and the all follow a similar pattern. That being a minor disagreement that most normal people just move on from (and I often have to search to try to track down myself as it was so insignificant at the time) sets them off on their self-imposed moral crusade. They then follow you round the Internet trying to have a pop at everything you do. They also nominate themselves as a voice of the people and take great delight in telling you what everyone thinks (of course this is usually accompanied by a host of messages from ‘the people’ telling you that they don’t think that at all!
My first pet troll told me he “had marked my cards early on as one of those finescale types” that ‘his’ forum didn’t need. And to be fair to him he did a good job of getting me banned from that forum for a single comment deliberately quoted out of context. I must say I had never had any negative feedback from the moderating team at that point and no effort was made to contact me or discuss anything by them. I did contact them and eventually I got some sort of half arsed reason for their decision which they couldn’t really justify!
Troll 2 and 3 decided to work together. Troll 2 made a big fuss about sorting me out but sadly any private correspondence to have an adult discussion were ignored and he continued his attacks on the forum. Troll 2 was quite an unusual one as the supportive feedback I had been mostly from people who had met him an found him to be a bit of a plank in real life too! Troll 2 seemed to delight in trying to get troll 3 to do his work for him and tried to encourage him to post my private messages on the forum for all to see. More of that later
Troll 3 has, I am told via quite a lot of unsolicited messages, a bit of a reputation for his own brand of abusive private messages and seemed to spend a great deal of time on Facebook complaining how everyone in his little village basically hated him!
So since troll 2 thinks it so important that the world sees just what I’m like regarding my private messages il, do him a little favour and post them here for people to make up their own minds. The only edits are to remove names and clues to their identity.
It all started with this post on one of the forums
It depends what you mean by “mega star layouts”? Don’t you feel that by saying this that many of the people who have already exhibited at past exhibitions will feel rather insulted by this remark, as you give the impression that you don’t rate past/current efforts compared to your own unfinished layout?
To which someone with a normal degree of common sense replied
I don’t think this is Jim’s point at all. I think the question he poses is rather, among the general modelling public, which layouts are talked about in ‘must see’ terms? I think he’s claiming to be to close to the problem to see the general public’s view.
The reply came back
I’ll refrain from supporting others here then and posting in general in that case. Jim is known for his dismissive posts about others efforts; the Edited layout thread is a classic example. I’ll also retract my offer to make a free professional promotional film edited as well.
All the best
Troll 3
Not wanting to get into a discussion on the forum I sent the below via private message
Excuse me? What have I done to deserve this?
His response is below
Jim,
You know full well why. I’ve never read a single comment of yours, either here, facebook or anywhere else that doesn’t attempt to put something or someone down. Your recent spat with Troll 2 on the name removed thread is just one such example. You were always attacking my non railway stuff on facebook; (i cant recall this ever happening by the way bu this might be one of those insignificant comments that normal people just move on from as mentioned before) I was always waiting to read one positive thing from you. Your comment today edited was patronising and insensitive and how name removed (or whatever his name is) could decipher a hidden code in your message that us lesser mortals were oblivious to is completely beyond me. Again, you start posting a cynical view about my track on my layout thread; all of this just because of that catenary incident years ago! It’s rather sad don’t you think and babyish? I’ve often posted nice and genuine comments about your layout, but apparently these count for nowt where you’re concerned. Why can’t you show a little more modesty and spiritual generosity towards others? Why does this concept hurt you so much? I find it very weird and abnormal personally.
My reply
Name removed
You admit you have constantly read me wrong then? It is you that bring bring up the catenary thing consistently so it is clear that it’s you that can’t drop it. Yes I’ve had a few disagreements with people but I’m not even close to the amount of people you have routinely pissed off. I suggest you look closer to home before you point the finger and drop this pathetic point scoring agenda.
Jim
His response below
Jim,
OK name all the people I have constantly pissed off and why; the catenary shit was you mentioning it the other day. Other than that I only mentioned it once on RMweb – so twice (the second time because you brought it up). You’ve always had a problem with me; fuck knows why (although I have several ideas) but my advice to you is, do one. Find somebody else like you; sad; desperate for attention; egocentric with a very lonely pathetic life in a grotty basement in the Midlands, to unleash your miserable troll existence on. We don’t all give a shit about your huge sprawling self important layout like you think we should, and we don’t all spend our every waking moment building railways and trying to prove to an uninterested world how great we are(n’t).
Tight lines
My reply
I’m very happily married thank you and I don’t have a basement. You presume to know a lot and consistently get things completely wrong.
As for attention seeking egotists, remind me how many times you repost the exact same pictures you’ve been posting for the last 3 years again. I have said positive things about your layout but not every time you repost the same bloody thing.
Like I said, best not point the finger and prove my point
And that’s it. Not sure what I’ve done to deserve his ranting other than not tell him how great he is often enough! I am very aware that its poor form to post private messages online but since troll 2 is a fan of it and one of his mates did exactly the same to me on a forum I had no access too (even going as far as unlocking a thread just to score points – that’s a fine example of moderation for you!)
I hope I’ve removed enough identifying comments from the above and I must point out that any comments that do identify these people will also be edited. Perhaps trolls stand out because they are so rare and I might even be in a minority of only having 3!
Soldering on
I’ve had an enjoyable few days soldering stuff. Not random bits of brass to make bits of overhead but proper kits, designed by someone else!
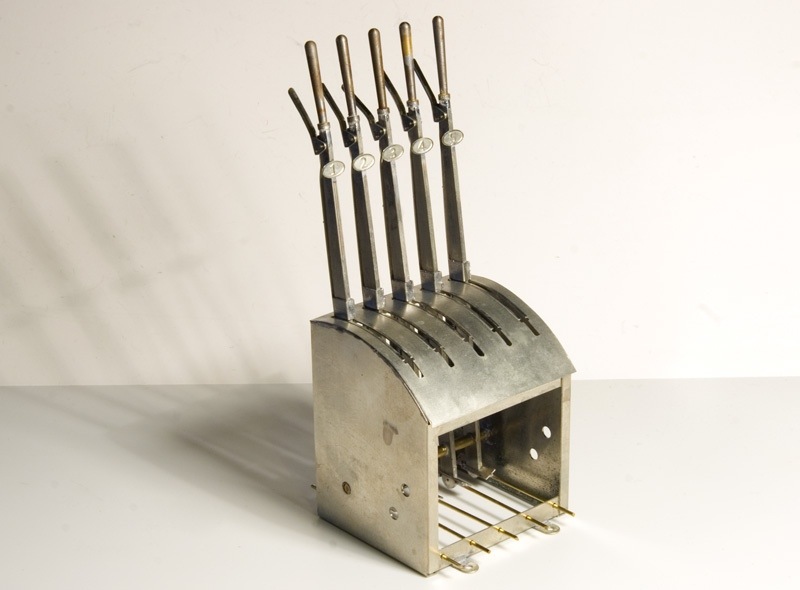
Starting with this rather nifty lever frame from the Scalefour Society. One of these can often be found on their stand at shows and it’s pretty hard to resist having a play with it. At one point I thought of getting one just because it’s nice! Now with Brettell Road I have an excuse!
It’s build as per the instructions. The kit allows for additional micro switches to operate point motors but in this case I’m planning a purely mechanical system.
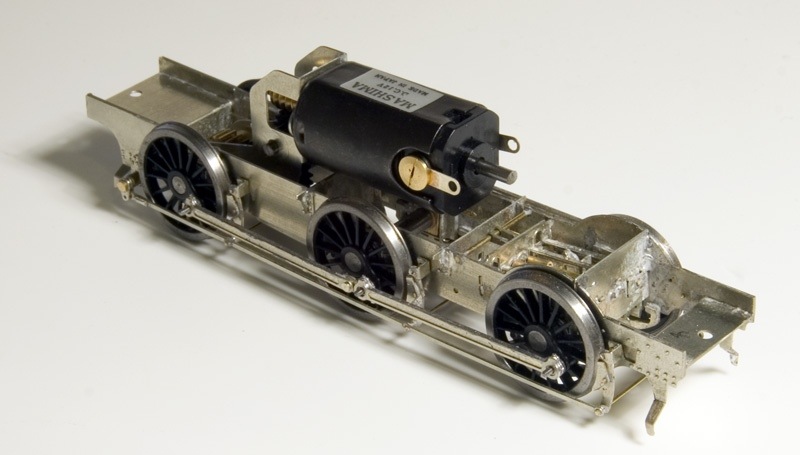
Next up the High Level chassis kit for my Jinty. As supplied the kit is designed for traditional compensation but I wanted mine sprung. The current fad for continuous springy beams seems like a lot of faffing about (I admit I’ve never tried it) and doesn’t really replicate what I see on real locos. The idea of equalised beams seems a whole lot more simple, uses less bits and is what the real thing does, (ok not a Jinty but think of a class 47 bogie).
Other than that I followed the instructions and for my first ever etched chassis I was surprised that it only took 2 afternoons to get it all together, I’m not sure why I thought it should take any longer to be honest. Obviously there’s a bit more to do yet, balance weights and pick ups.
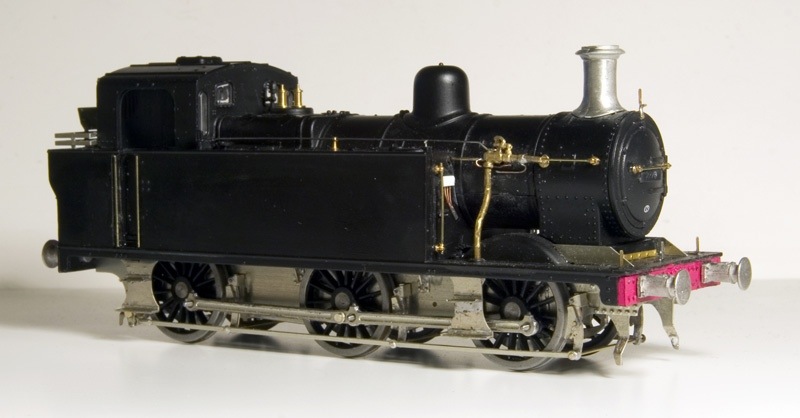
Above a quick mock up of how it all looks. The steps don’t come with the kit and are from the Brassmasters detailing kit I used earlier. It’s something a bit different for me and it’s really nice that someone has done the thinking about it stage for you. Makes a change from assembling a load of unrelated bits and having to figure out what to do with them!
Display shelves

Above is a couple of test shelves I did for a demo at DEMU earlier in the year. A variation on these shelves is now available from Tim Horn. If you missed the demo I will be doing a similar one (also on multiple units at next years Scalefour North. I’ll post details nearer the time.
Point rodding and hints of the past.
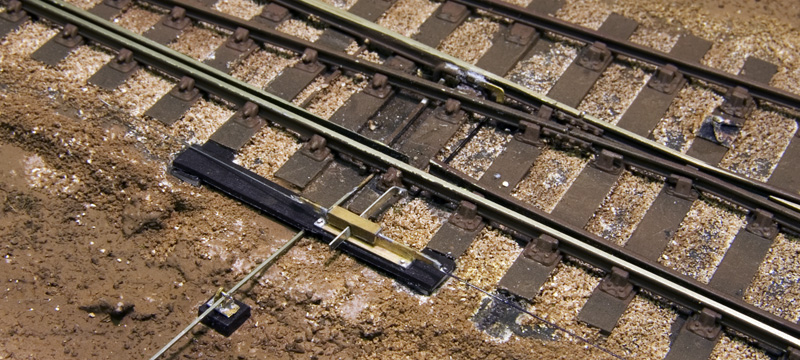
What you see above is a representation of a detector for the ground signal on Brettell Road. It was knocked up from scraps of brass using photos and Steve Hall’s articles in MRJ 113 and 115. I always enjoy fiddly details like this even though I know it will go unnoticed to most people.
There’s only going to be 1 point on Brettell Road that’s operated by the off scene signal box, the rest being operated by hand levers. However I wanted to include remnants of what was there before meaning the double slip would have been operated either end with facing point locks. Also given the distance a couple of compensators will be needed so while it’s not exactly complicated stuff it is worth doing.
My chosen route is the Brassmasters etched bits with rodding from MSE. I have also included the odd rodding stool where the rodding has been removed to help with the idea that it’s not so much added to the layout as taken away.
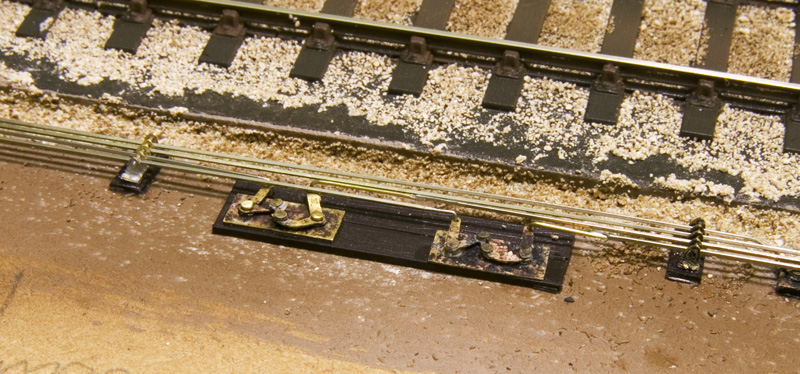
Most of this stuff is quite basic if a bit fiddly. Above are a couple of compensators. The ones supplied are cosmetic and don’t move and that’s fine for the disused rods as per the one on the right however with only 1 run that does anything it would be rude not to make it work. Ok it’s driven from the point rather than driving the point itself but let’s not worry too much about that. 2 Brassmasters compensators were used to make the one on the left with the centre arm from one and a few brass pins meaning it will move when the point it thrown.
All in a fun little project.
http://www.youtube.com/watch?v=5QrJsLczids&w=600
Signals
I’ve always liked mechanical signals, the ones on Moor Street are great fun to play with but for New Street I wont get the chance to have any. However for Brettell Road there are 2 (one of which is abandoned) so I have got to have a go at making some from MSE kits.
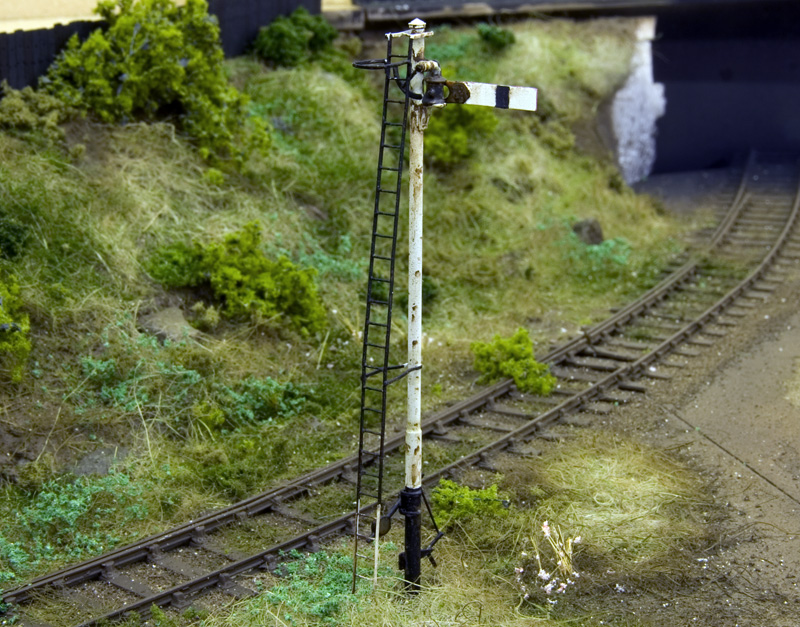
First up the disused one, based on a photo I found. This one would actually be a repeater for the main signal the other side of the bridge due to sighting problems. Weathering is done with gouache. I replaced the supplied ladder with one of Colin Craig’s.
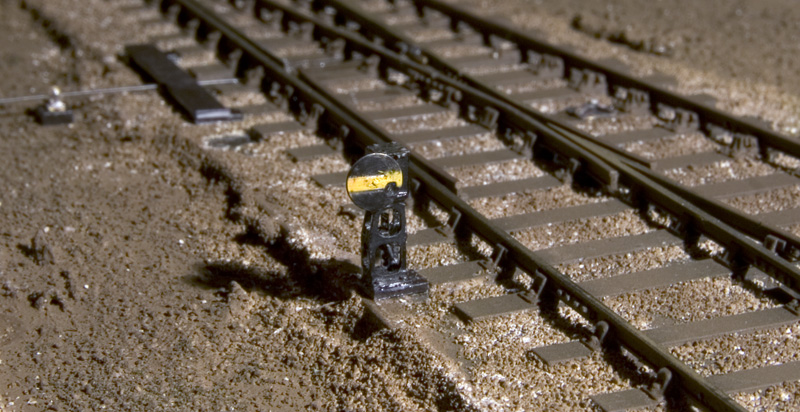
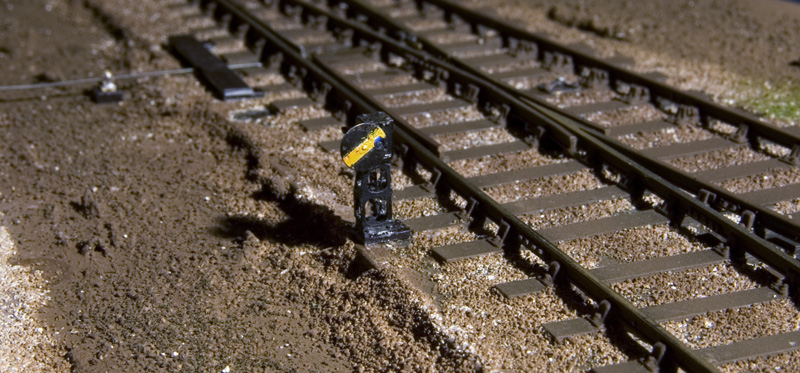
The other signal is this little ground signal (yellow so that the headshunt can be used when its set to danger) I deviated from the MSE instructions by making the counterweight arm work too. Theres a fibre optic in the lamp but its a bugger to photograph – you can just make it out in the second picture. It looks a bit blue but I was using a white light source – changing it to a yellow one should correct this.
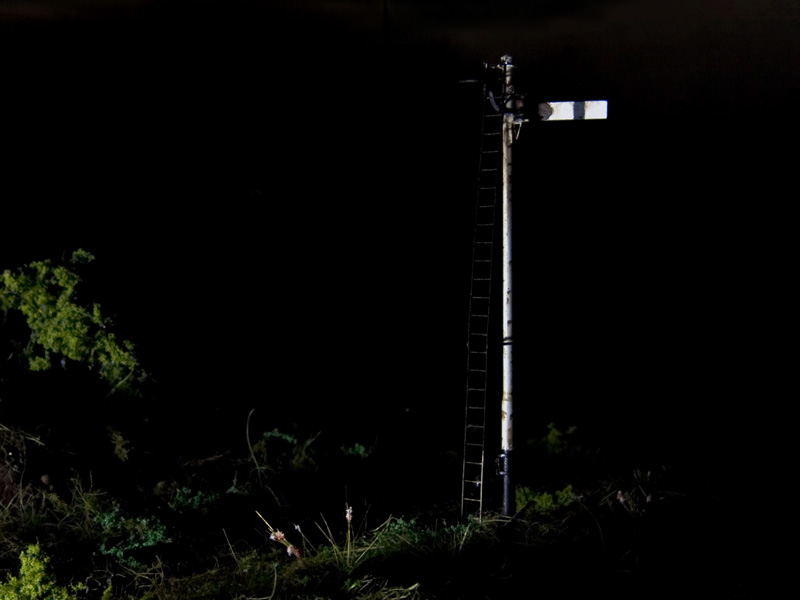
Finally as I was tidying up I left a pack of LED’s lying on the layout and purely by chance it illuminated the signal. Thinking it looked quite nice I took the image below – I’d like to claim it was carefully planned but nope – this was just lucky!
Click here for Model Signal Engineering’s website
Peak performance
Those who have been following my efforts for a while now will know I really like class 45’s. However the model ones seem a bit lacking in performance especially when it comes to road-holding. The problem is usually down to the pony trucks which are really just along for the ride in a flopping about kind of way. I wonder if RTR steam loco’s have the same problem? The problem is to my mind two-fold. 1 – staying on the track, they are just too light and while there’s some rudimentary springing its more of a token effort than a real attempt at a solution. 2 – no side control, a pony truck should lead the bogie into curves and without some sort of side control thats just not going to happen.

The solution? These rather natty sprung pony trucks from Rumney Models. They also provide side control and a handy ballast box to get some much-needed weight in there. For more details see www.rumneymodels.co.uk

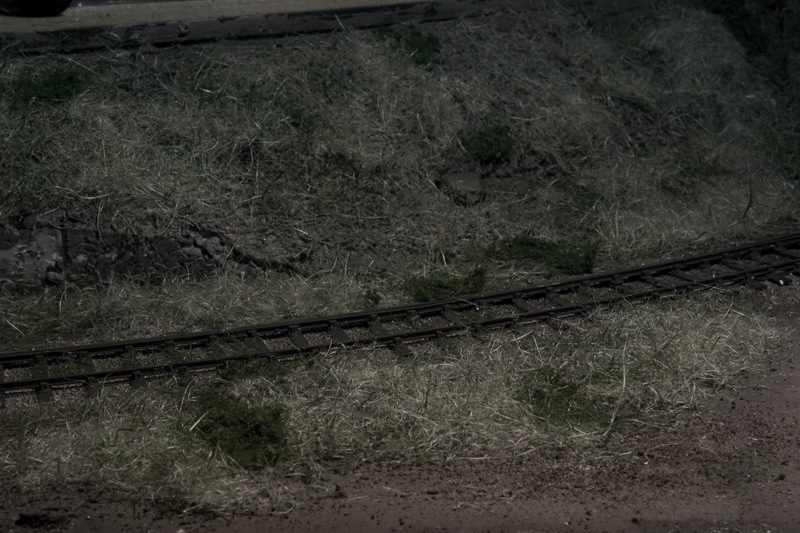
The image above shows progress on the embankment section. I can’t claim any expertise in modelling nature as it’s not something I’ve come across much before however a while spent looking at local plant life for the “what” and Gordon Gravetts book on the subject for the “how” has produced something I’m quite happy with although I am undecided if the nettles are a bit bright. I drew a quick fencemade from sleepers and Tim kindly laser cut it for me for the top of the bank. I guess it does mean that Brettell road will be set in early October mind you. If you haven’t got Gordon’s book yet then its well worth finding a copy.


I’ve made a start on some wagons. From the left are a Cambrian 5 plank open for which I found you need to remove a bit of material from the base of the w-irons for P4 wheels. Then there’s a Ratio Van and open (I’ve never built Ratio kits before) The open is really too old but I have a plan for an off scene steelworks (sort of Round Oaks ish ) so I will use this as an internal user. Followed next is a Parkside 7 plank open, simplicity itself and a Bachmann RTR van- this was supposed to be a quick win picked up from the bargain bin at Modellers Mecca but conversion to p4 was a bit more than just sticking wheels in with material needing to be removed and new brakes added from MJT. Right at the end is a Peco wonderful wagon tank. Quite advanced for their time with working buffers and springing. In reality the springing is a bit too hard to be of any real effect so I will fit some Bill Bedford sprung W-irons.

Finally back to where it all started , the GBL Jinty. The body has been detailed with bits from the Brassmasters kit, some parts from Markits (and London Road Models as well as some home brew parts such as lamp irons from brass strip. I haven’t done any work under the footplate yet as I need to look at the High Level chassis next.
New(ish) technology or modelling witchcraft?
New technology, there are those who embrace it or those who reject it or seeing it as cheating in some way. It’s not a new phenomena or even restricted to railway modelling, I remember such discussions when digital illustration started to appear. With a hobby of course it’s up to you how you pursue it. Do you want the end result to be the best it can be or do you enjoy the route to the end result more? No one is ‘right’ in such circumstances but if someone choses to embrace new technology is it fair to accuse them of cheating in some way?
The finescale end of the hobby has always had a reputation for valuing the journey over the destination and for a long time detailed or converted RTR was frowned on as not proper modelling by those who scratchbuild stuff when in many cases the RTR looked much more like it was supposed to than the scratchbuilt stuff anyway. In reality though the finescalers have usually been the ones to embrace new technology and ideas first and the current crop of high quality RTR is largely down to people wanting something better. You hear it all the time, we’ve never had it so good and it’s probably true but things don’t get better if people just accept what they are given – they have to ‘want’ better too. It’s probably worth at this point mentioning that we never had it so good 20 years ago and we will probably still be saying it 20 years from now. Does anyone really believe that the current crop of RTR is the best we are ever to see?
So to the point – Laser cut buildings. Already people are saying that its cheating, that you just push a button and a building pops out of a machine but in reality it’s just a very very clever scalpel and while I believe the end result is better is it any easier or quicker?

What you see above is a simple canal bridge drawing for Brettell Road. Its drawn in illustrator and while I have used some time-saving tricks like custom brushes for the arch and a custom fill for the brick pattern it seemed to take a lot longer than just getting a sheet of brick plasticard and cutting it out. The thing is though I could convert the pattern to lines (expand appearance for those interested) and then tweak it. For example I could easily recreate the half width header near the corners in an English Bond wall while doing so with plasticard would have been a massive faff. In fact I wonder if anyone has even bothered, I know I didn’t think it worth the effort!

Above is the actual wall loosely positioned on its canal bed and towpath. The top row are routed and cut by Tim.

However laser cut can be a bit clinical. For the towpath I wanted a cobbled section but also a dirt section to – the finished cut was attacked with files and sandpaper to roughen it up. Going back to the point of New technology and illustration, I always thought, if Michelangelo or Leonardo Da Vinci had Photoshop would they have used it? Id bet that they would!
Tanks and Trucks
Not the sort with tracks and a large gun sticking out of the front but storage tanks
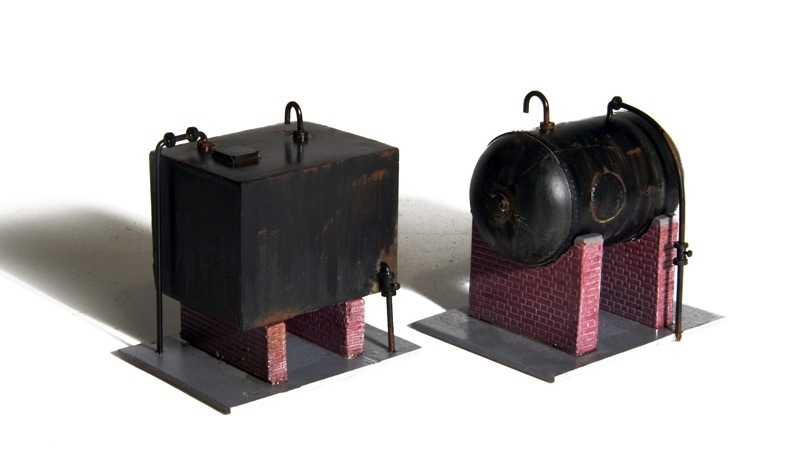
These are resin kits from Unit models with a bit of extra detail added. If you are not familiar with Unit models they are a little company with an extremely useful range of bits and bobs for scratch-builders – well worth checking out their site.
A pet peeve I have is really nicely modelled layouts with ever so shiny road vehicles that are clearly tipped from the box. These are usually done by quite skilled modellers who wouldn’t accept such a thing if it was a rail vehicle but are happy too for cars, trucks and vans. Odd then that I’ve just done a lorry for Brettell Road that is deliberately shiny!

You may have thought that the tanks look shiny too and you would be right. Part of the plan to model Brettell Road is to model it in the rain. I’ve seen layouts that depict snow but never rain which is a tad odd when you consider that in the UK on average it rains for 1 in every 3 days! This lorry is effectively a freebie, using left over bits from lorries done for New Street.
I realised that the picture of the double slip that isn’t in an earlier post is a bit confusing. However once a spot of paint is added it becomes much more obvious which bits are used and which bits are not.
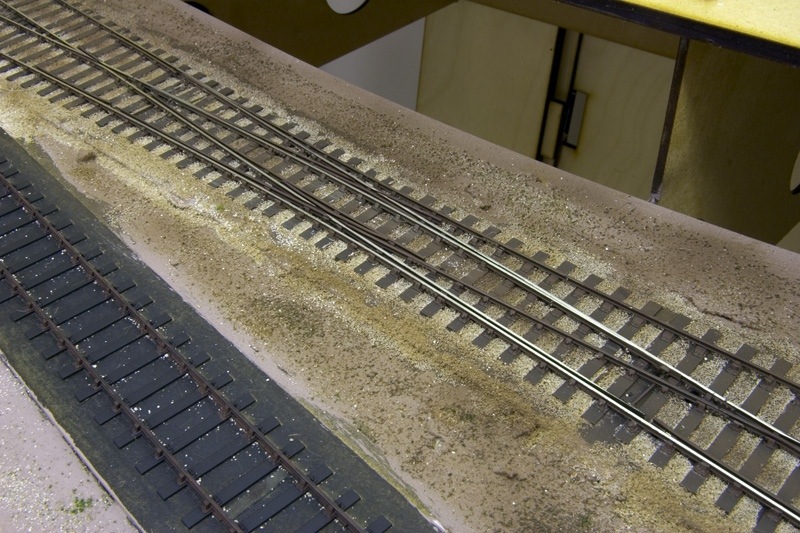
Finally a start has been made on the scenic side of things. Its early stages at the moment but the below picture gives a good idea of the effect I have in mind for the layout.
Transit, nearly there
 Well thats another transit van nearly done. Just need to add a tax disk and wing mirrors.

